Should I use Jira Cloud or Atlassian Cloud?
Atlassian Admin is the main way to manage users for Jira as well as other Atlassian products.
If you are just interested in user data, we recommend connecting the 1Password SaaS Manager Atlassian Cloud integration which uses Atlassian Admin APIs and returns data for multiple Atlassian products.
The Jira Cloud integration does show Jira user data, but the primary purpose is to provide Jira specific functionality such as:
- creating Jira Service Management requests from workflows
- updating any kind of Jira issue
- reassigning Jira issues
- a pre-requisite for the SaaS Manager Access Requests Atlassian Marketplace plugin.
You can connect both. A small caveat is that currently if you deprovision a user through the SaaS Manager Jira integration, then the user list in SaaS Manager for Atlassian Cloud won't reflect this change until the daily resynch with Atlassian Admin.
Connecting Jira Cloud
Selecting features
SaaS Manager uses OAuth to connect to Jira. The specific Jira permission scopes requested vary depending on the features you select when you connect.
By default the integration will return users, roles, groups and licences.
Other features you may wish to enable:
- Include Atlassian Admin data — if you don't connect the separate SaaS Manager Atlassian Cloud integration then you can enable this and you will see last login data and have the ability to deactivate Jira users. Requires a separate Atlassian Admin API key, and an Atlassian site with managed Atlassian accounts.
- Manage Jira Issues — select this to perform workflow actions on existing Jira Issues (e.g. adding comments to existing issues, transitioning issues to different states, reassigning issues, reassigning projects and project roles).
- Create Jira Service Management Requests — required if you want to create Jira Service Management requests from SaaS Manager. This will create a webhook in Jira to notify SaaS Manager when requests created by SaaS Manager are closed.
If you don't subscribe to Atlassian Guard, you will have no Atlassian Cloud API functionality for provisioning users or managing user groups. This can be done to some extent directly via the Jira APIs (changes are automatically synched back to Atlassian Admin), so the Jira integration also provides optional user management automation beyond what is possible using the SaaS Manager Atlassian Cloud integration for non Guard customers:
- Remove from groups — groups let you manage the access a user has in Jira.
- Add to groups — groups let you manage the access a user has in Jira.
- Invite users to Jira — sends an invitation email to a new user granting them access to nominated Jira modules. This requires you to create a Jira personal access token.
Consent screen
When you click Connect Atlassian will ask you to consent to granting SaaS Manager the scopes for the features you have requested.
Click Accept and you will be redirected back to SaaS Manager.
Atlassian does not directly communicate to SaaS Manager the Cloud site you selected on the previous step so you may have to re-select this in SaaS Manager (if your browser has an existing Atlassian token which grants you access to multiple sites). You must choose the same site as you chose on the Atlassian consent screen.
Click Import and Atlassian will connect.
Making SaaS Manager access requests from Jira Service Management
If your current workflow encourages users to make access requests via Jira Service Management you can deploy the SaaS Manager Access Requests plugin for Jira.
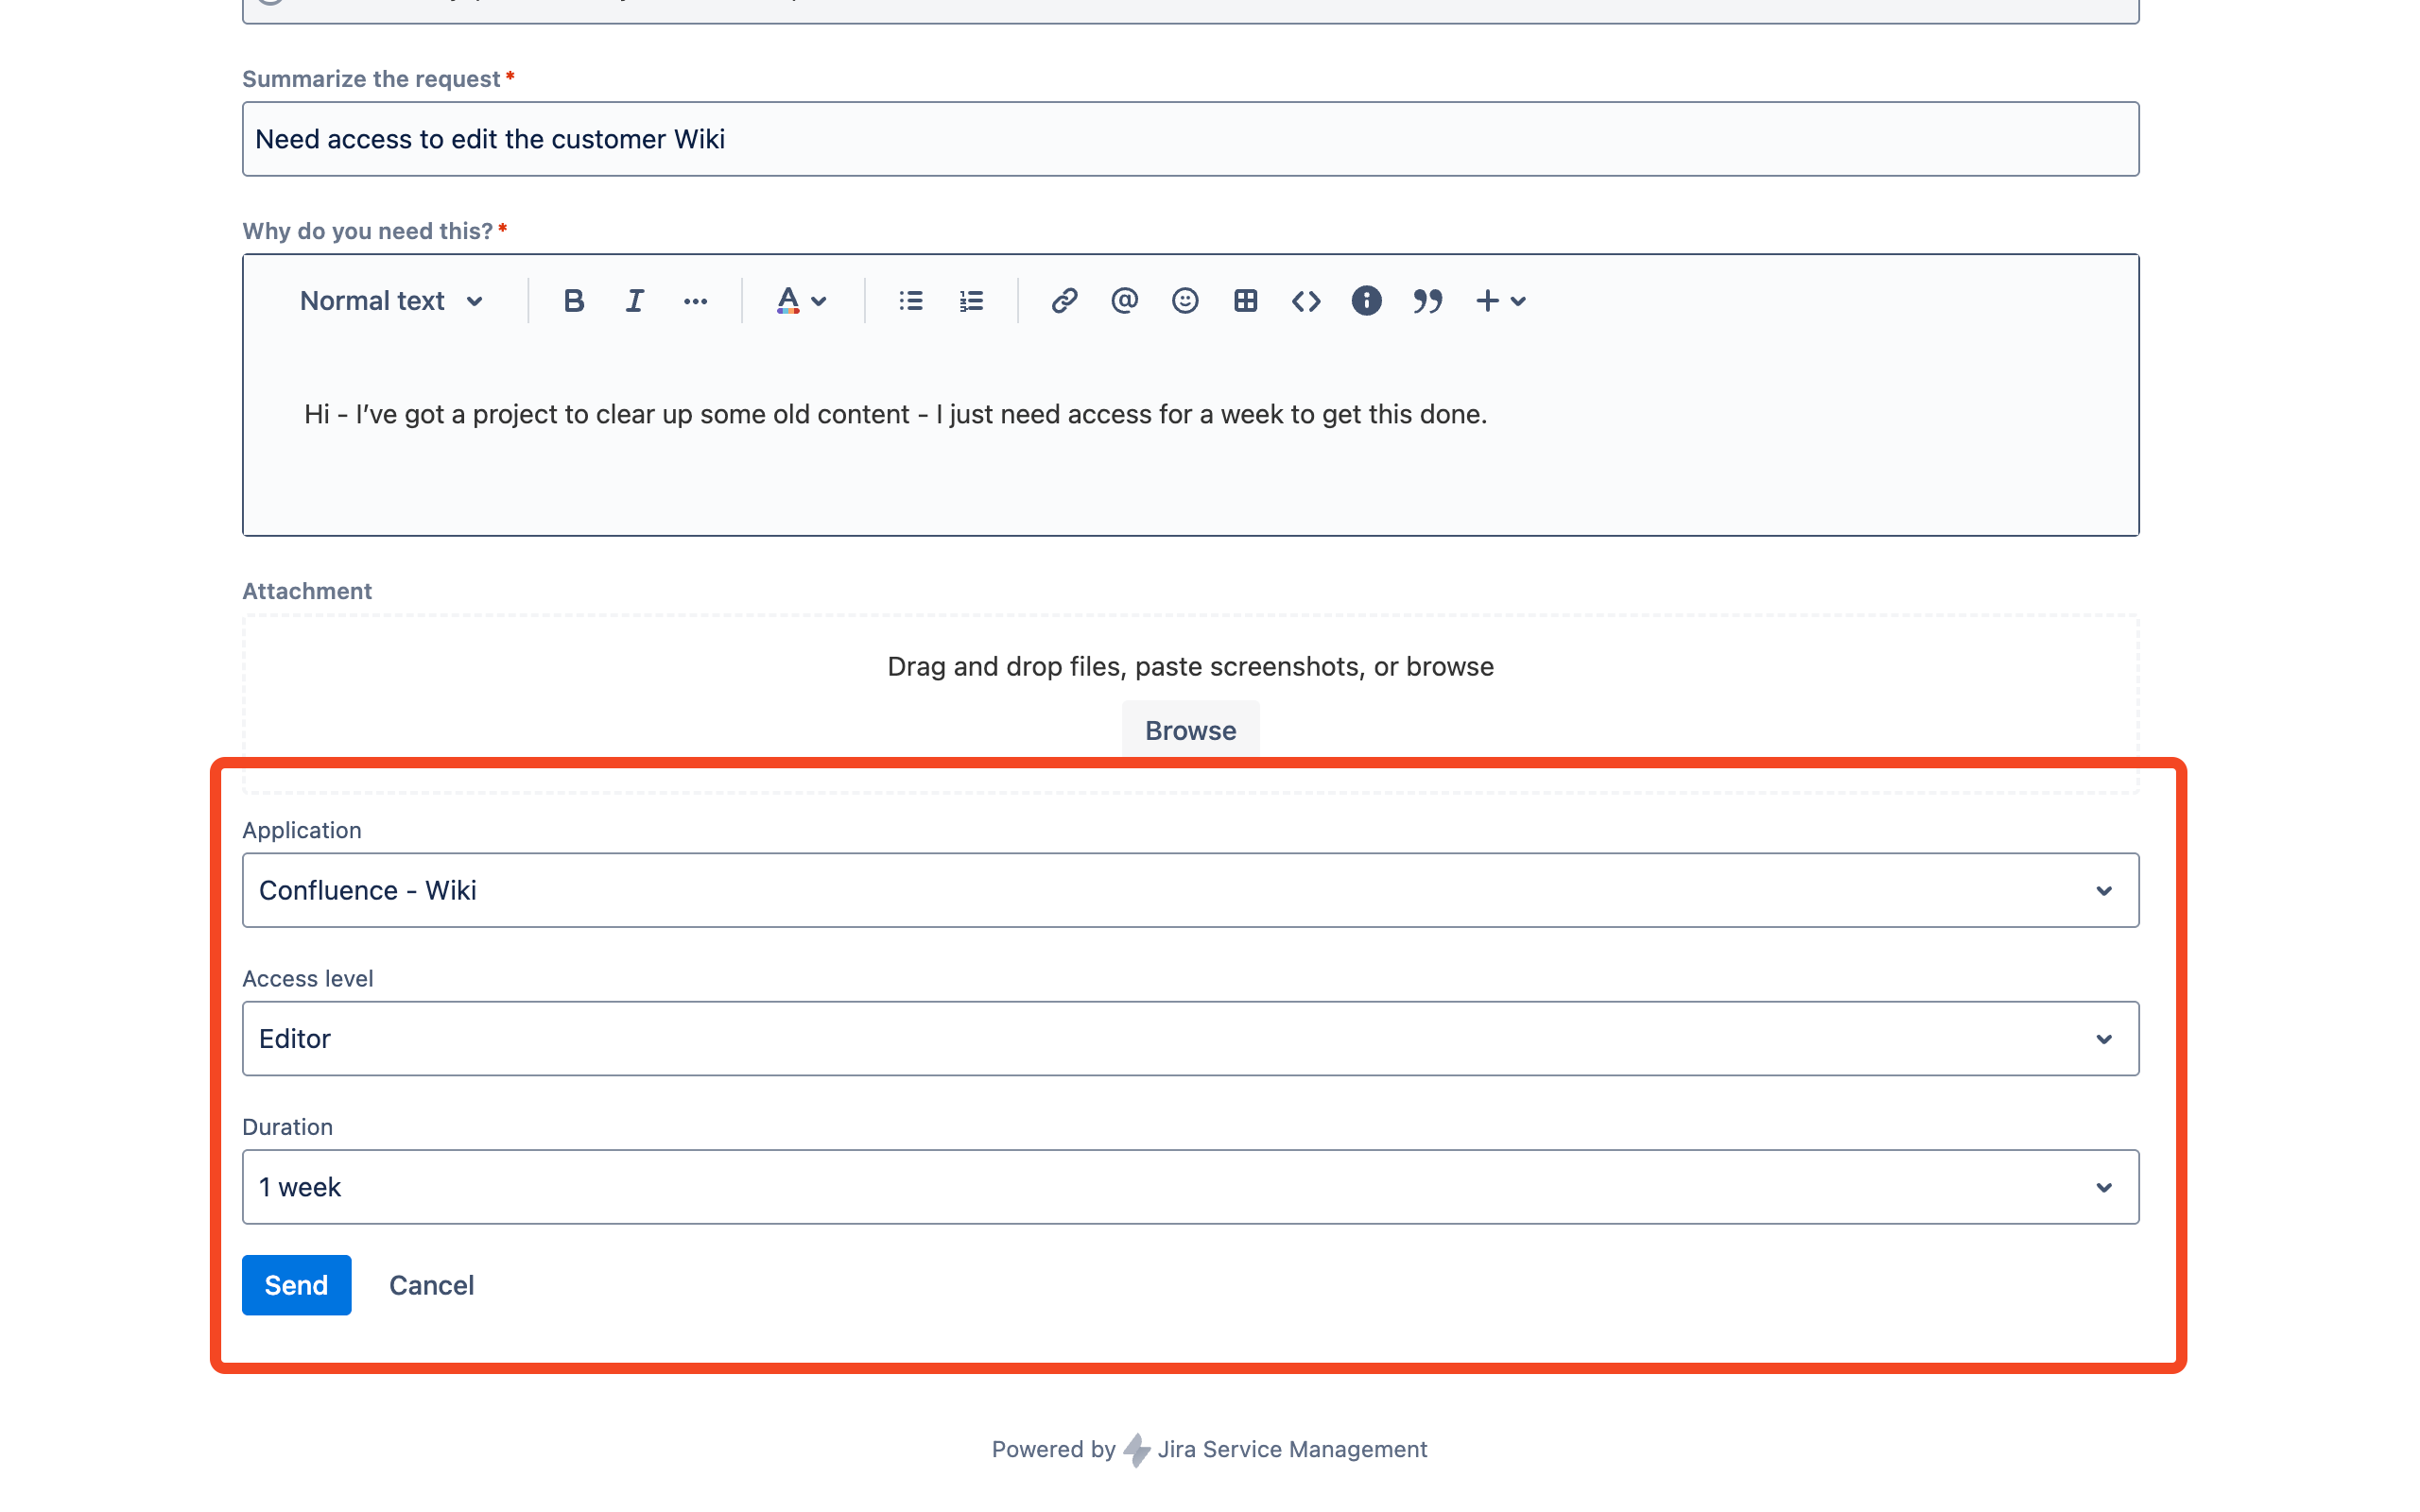
Updating a 'New joiners' field
Jira Service Management is often used for processes around onboarding. SaaS Manager can initiate Jira requests as part of onboarding but you may have manual Jira processes that need to reference new joiners.
To support this there is a SaaS Manager workflow action for Jira which will update a Jira dropdown field with a list of new joiners.
Staff can therefore initiate onboarding tickets in Jira, assigning them to the correct new joiner email, which also helps if you then trigger SaaS Manager workflows from Jira automations as SaaS Manager will be passed the correct email address to identify the user.
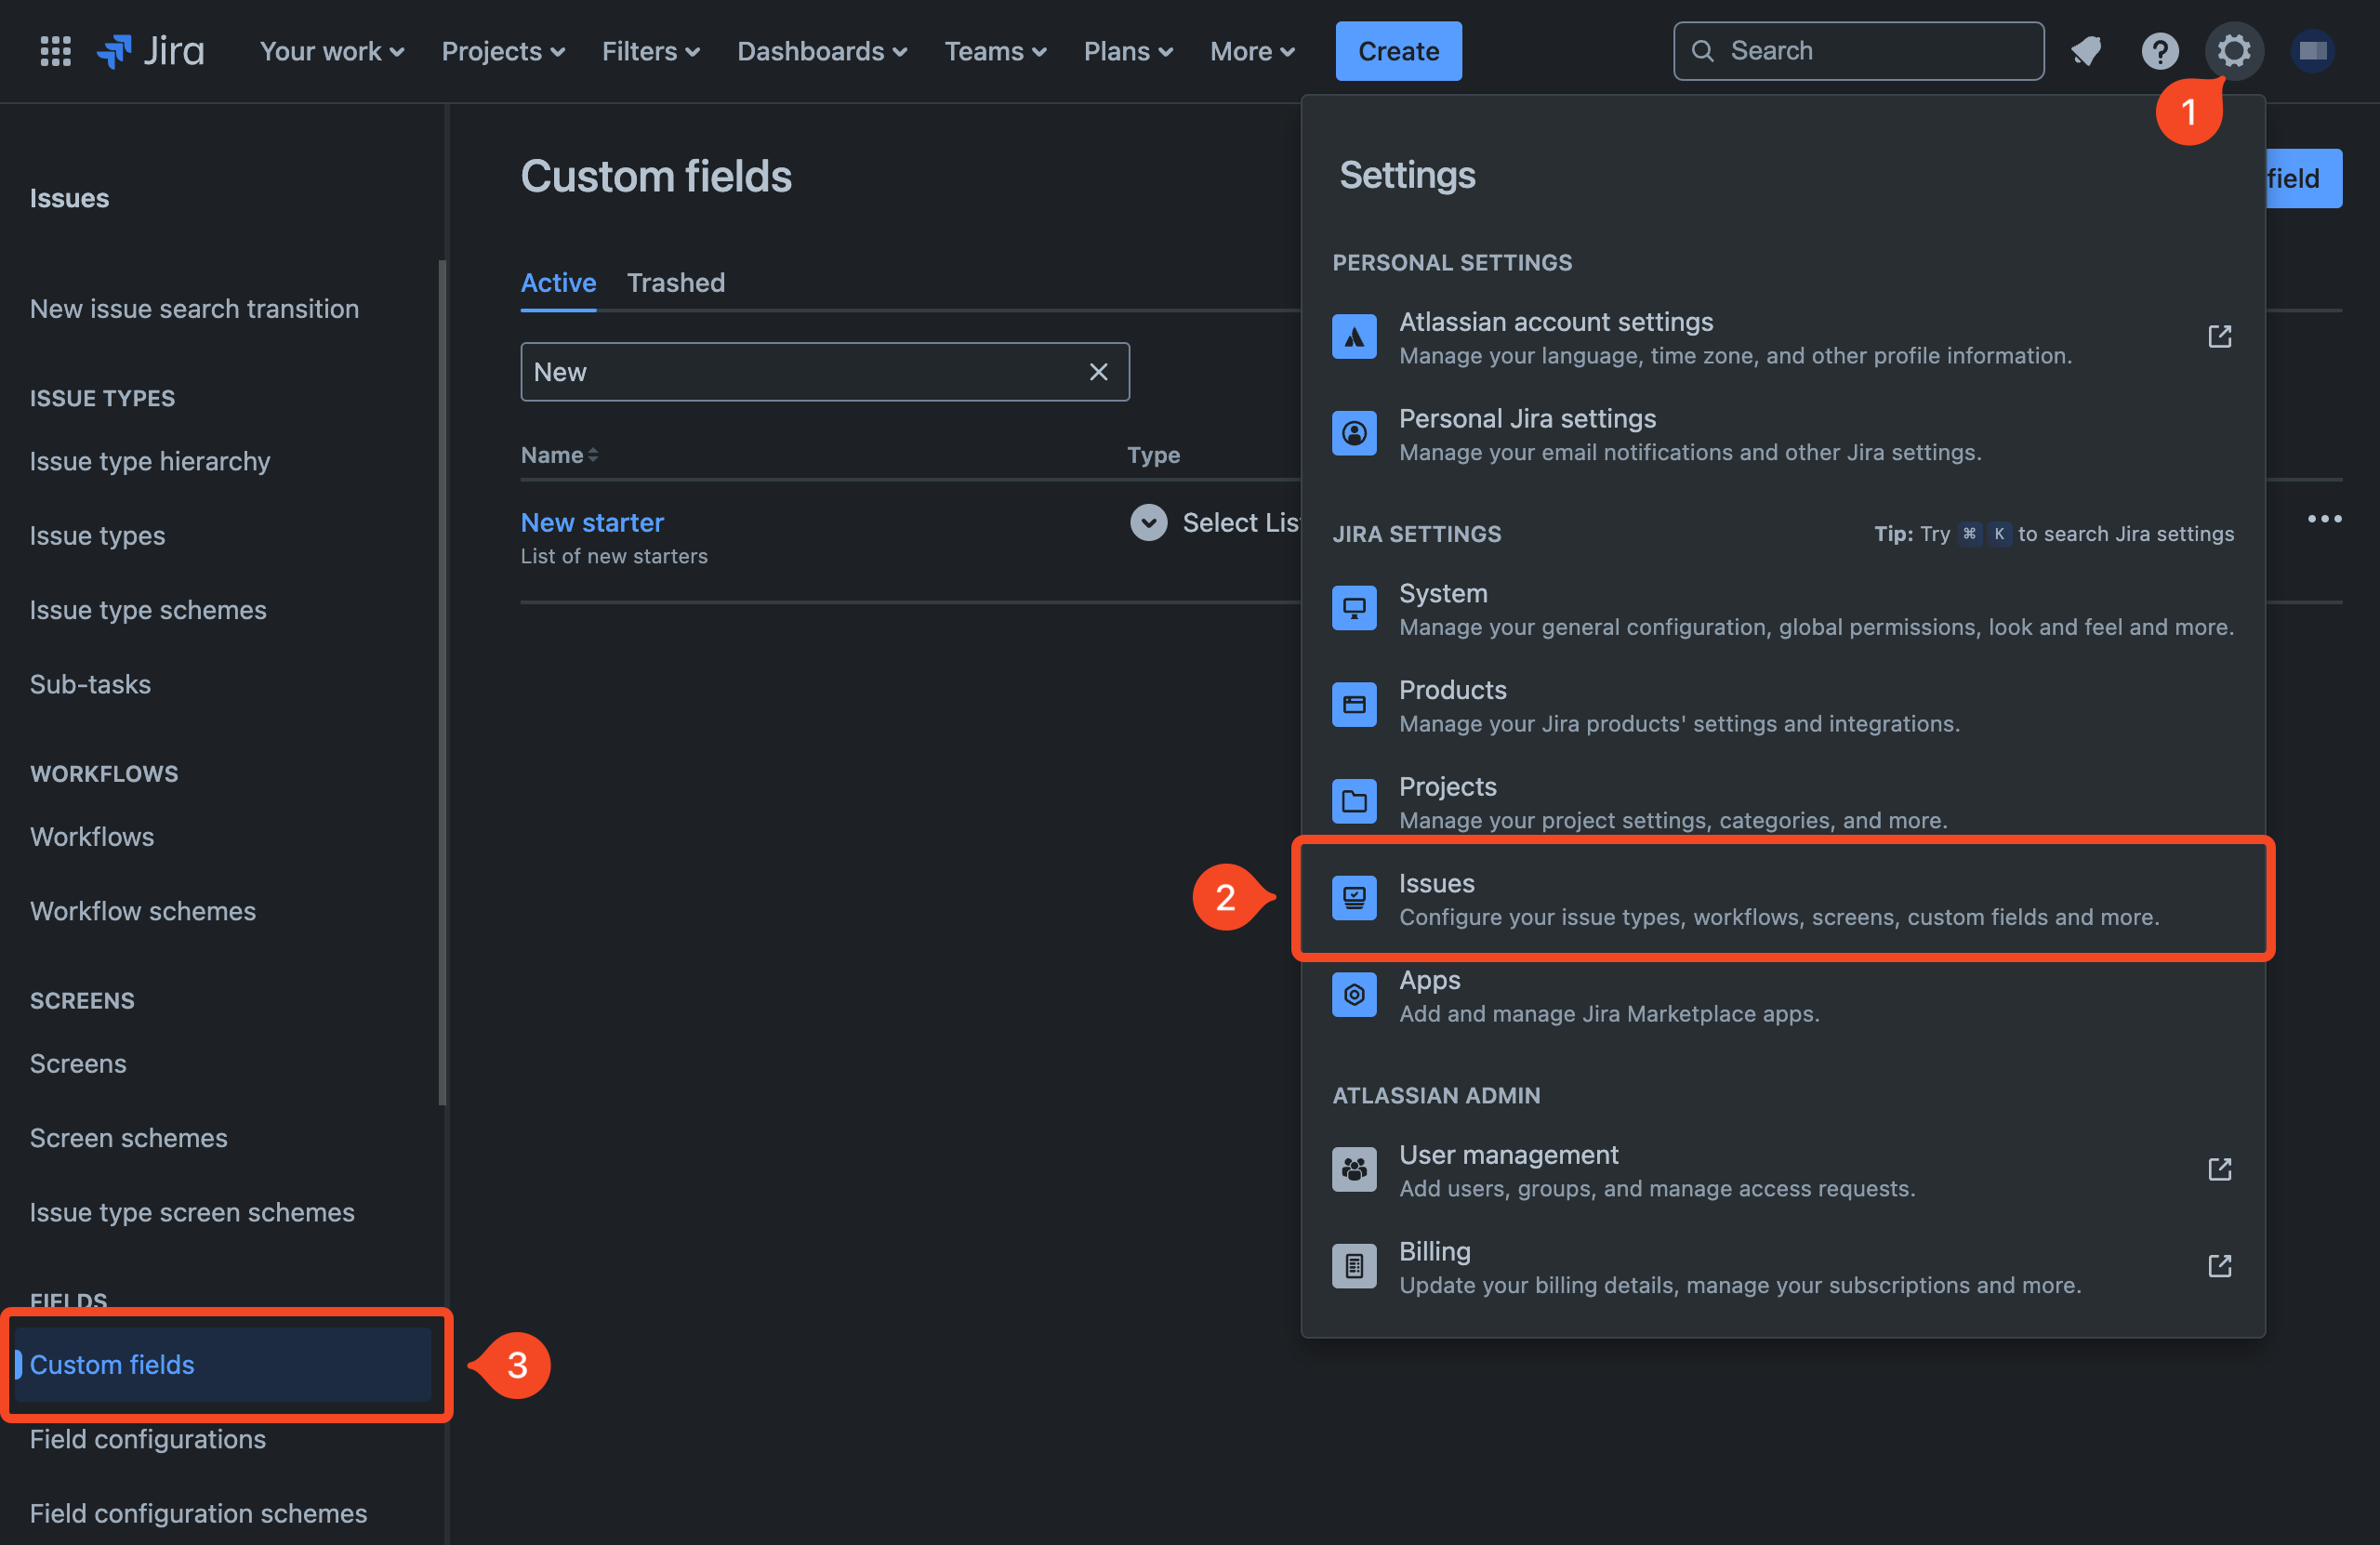
To configure an appropriate field in Jira:
- Click the Settings 'cog' at the top-right.
- Choose Issues under Jira Settings.
- Choose Custom fields:
- Click Create custom field in the top-right and search for Select List (single choice).
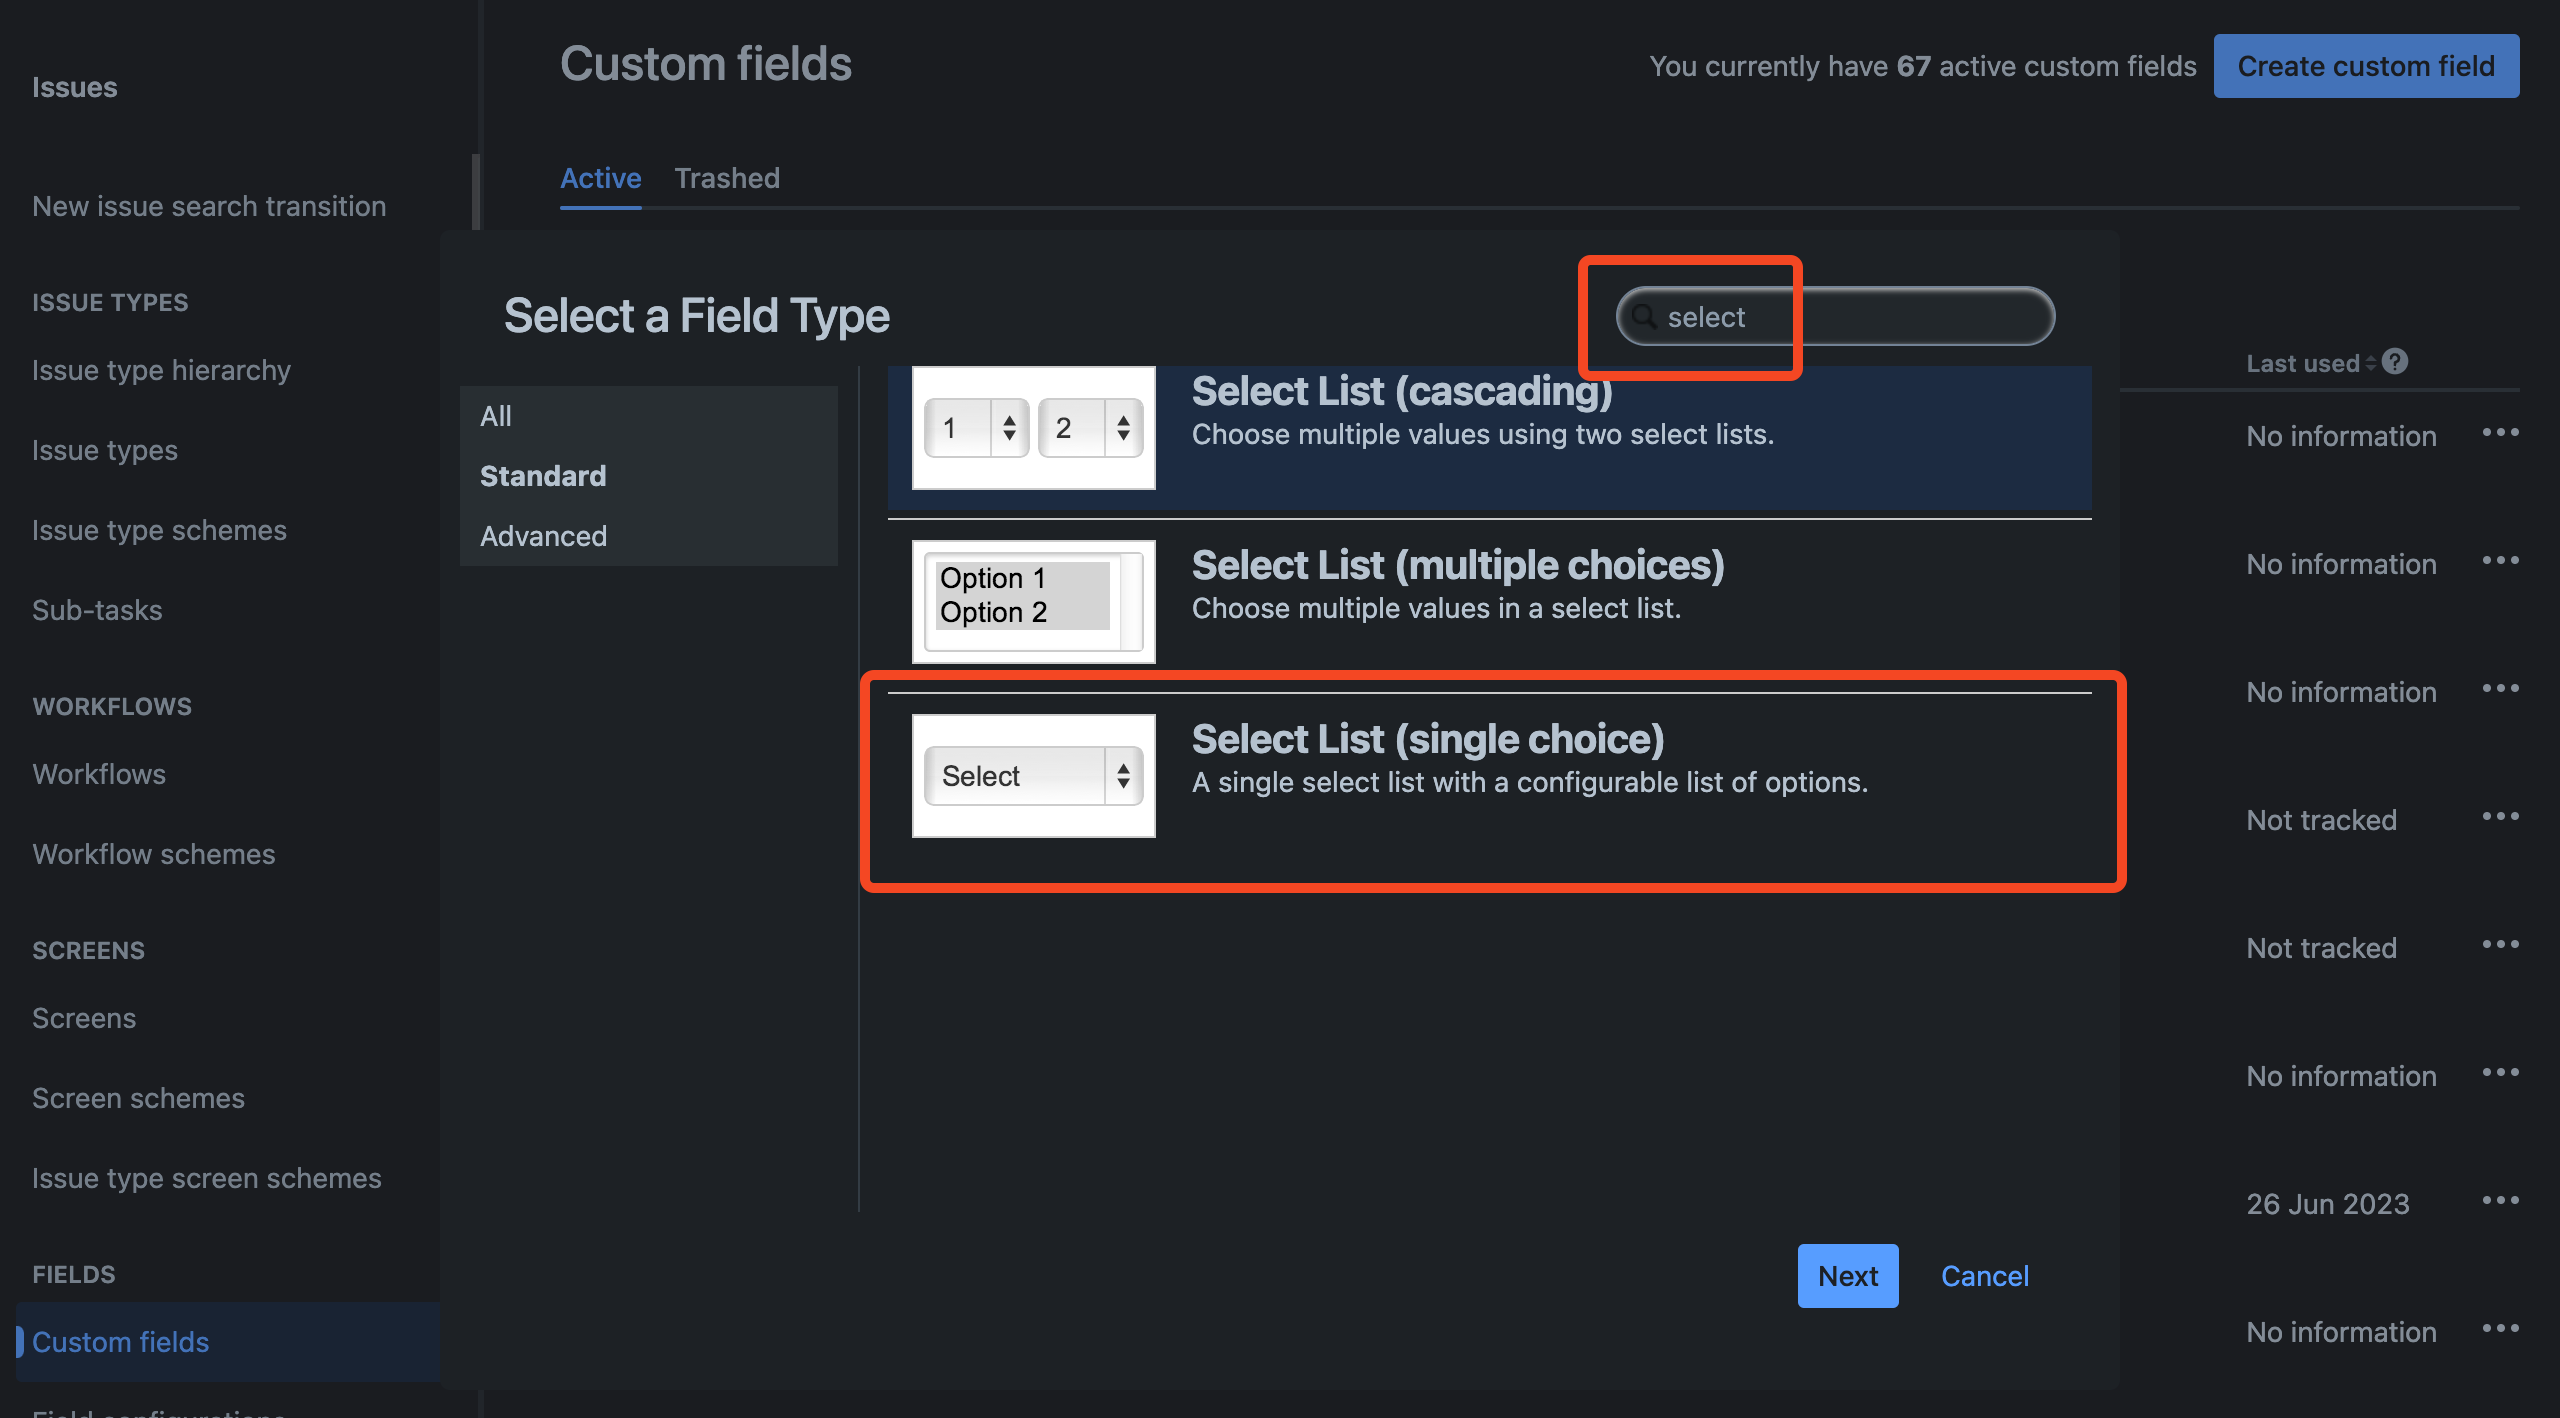
- Click Next.
- Enter a name for the field (you will need to enter this into SaaS Manager later). You will also have to enter at least one option. This can be any text as SaaS Manager will remove this automatically later when the workflow step first runs.

- Click Create
- Use the checkboxes to assign the field to at least on screen, e.g. Default Screen.
- Click the Update button at the bottom of the screen when you are done.
In SaaS Manager you can now add the Update new joiner custom field workflow action. Enter the field name that you just created in Jira.
FAQs
I have multiple Jira cloud sites
If you have multiple Jira properties (e.g. site1.atlassian.net and site2.atlassian.net) you will need to connect to each one separately.
I get the message "Could not create a Webhook - this means we will not get status updates when Jira tickets are updated"
This warning message is shown if you connect to the same Jira instance multiple times from SaaS Manager with the 'Create Jira Service Management Requests feature' enabled. SaaS Manager can only receive messages from a single Jira instance. To resolve this either:
- Disconnect the other SaaS Manager instance and reconnect, or
- Create a separate Jira user account for each SaaS Manager instance you want to connect.
What happens if I deactivate a user?
Deactivating users will only be available if you selected the 'Include Atlassian Admin data' feature when you connected.
If you deactivate a user they will be removed from all Atlassian Cloud products and you will not pay for the seat. Reactivating the user restores them to their original groups.
If you manage multiple Jira Cloud sites, but want to remove access from a single Cloud site, then you should remove the user from the Atlassian groups that are controlling product access.
How do I create an Atlassian Admin access token?
Log in to Atlassian Admin and, if prompted, select the organization you used to connect to Jira.
Click on the Settings menu and choose API Keys:
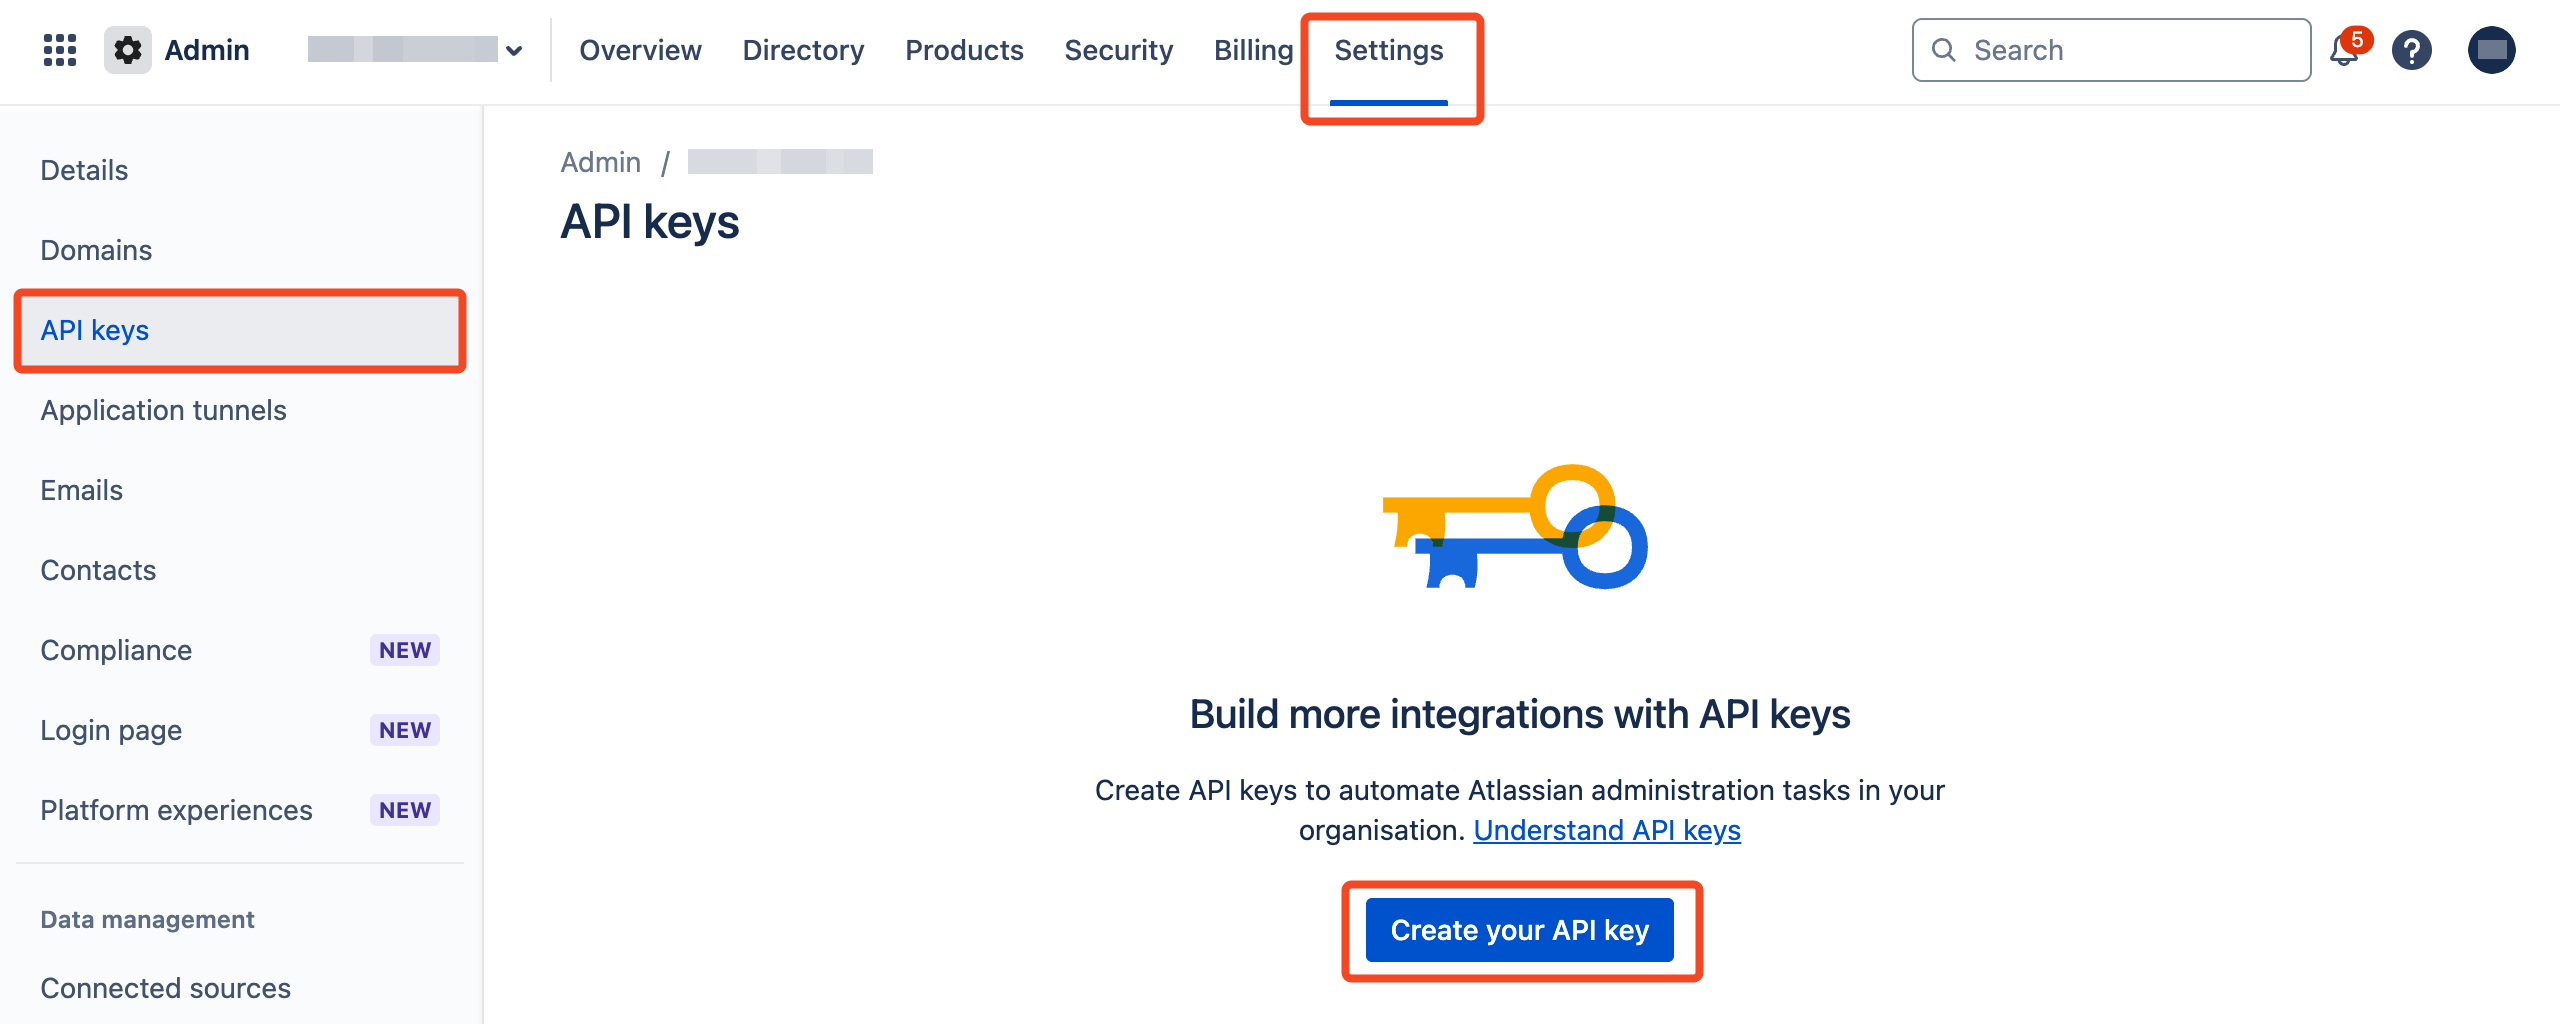
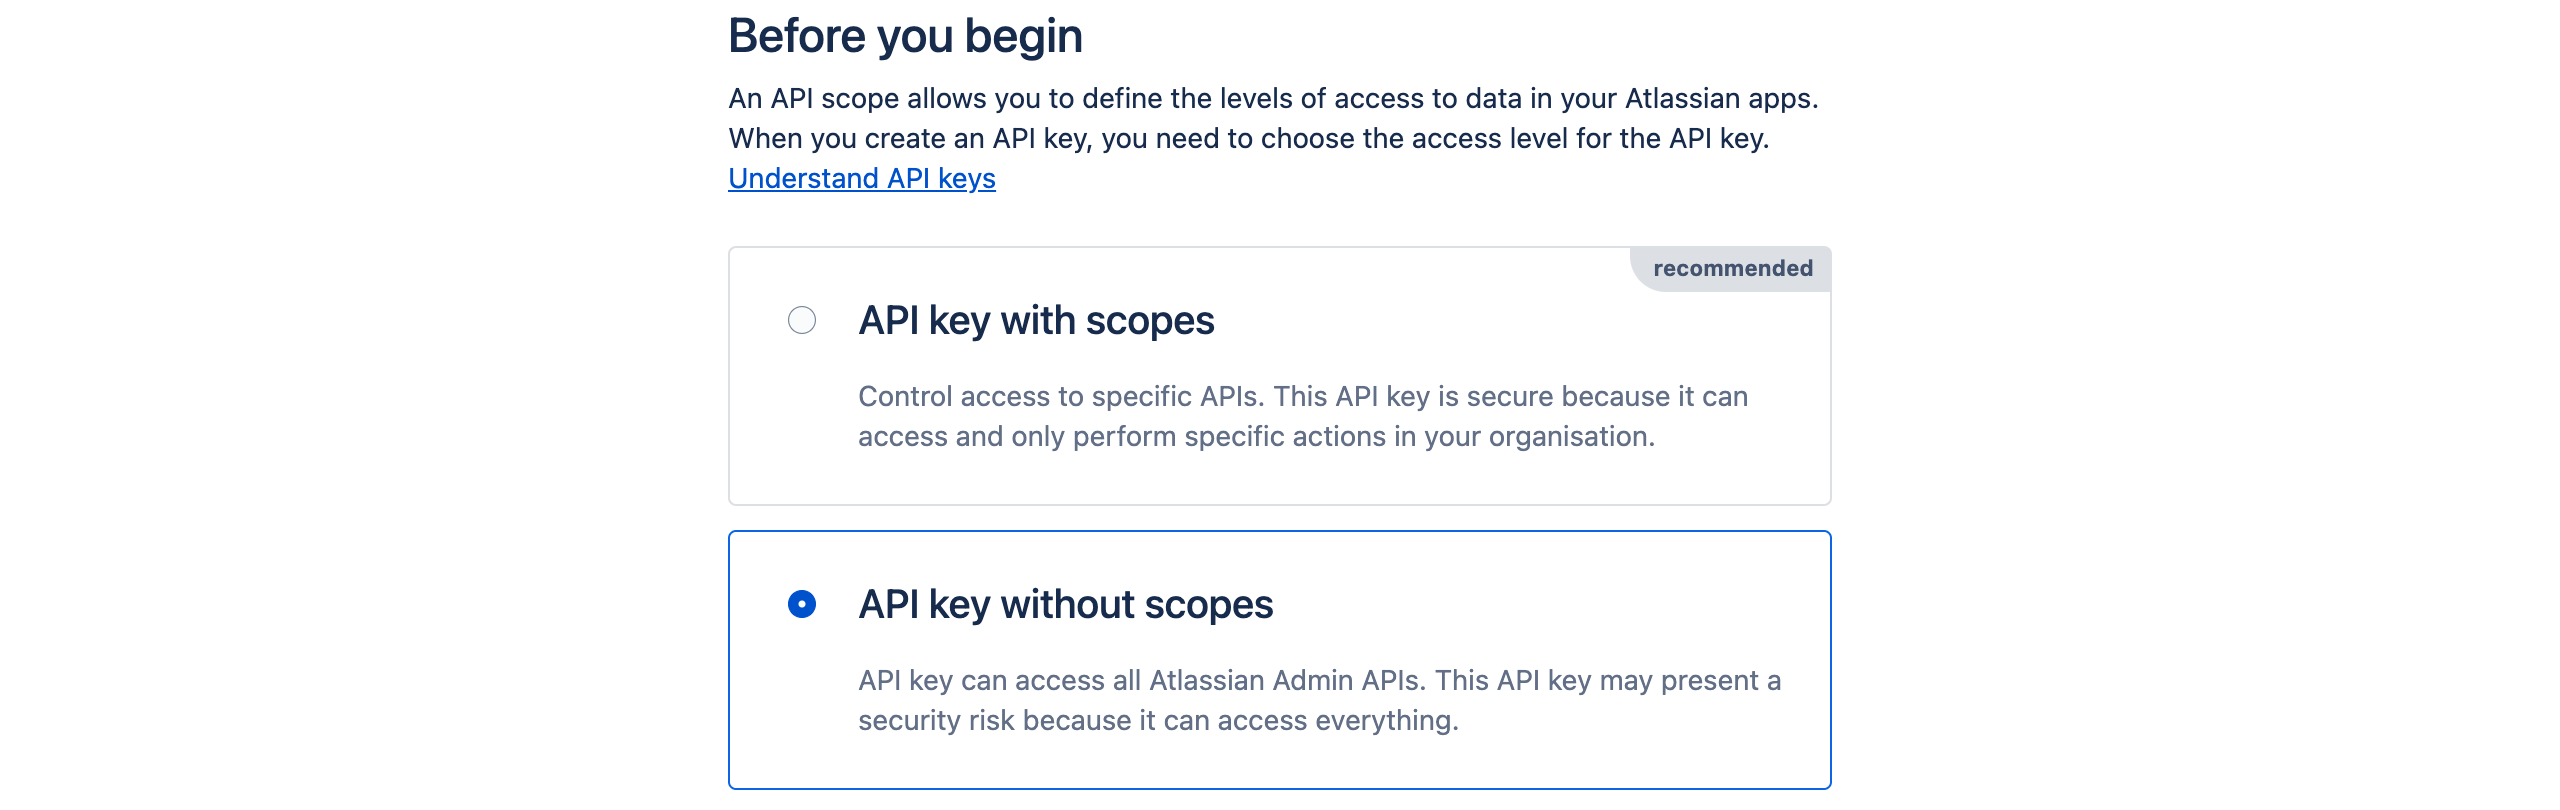
Click Create API key and choose API key without scopes:
In the dialog that appears, enter a name (e.g. SaaS Manager) and an expiration date. We suggest using the maximum expiry date which is 1 year from today. Then click Next.
You will be asked to confirm your selection. Click Create API key.
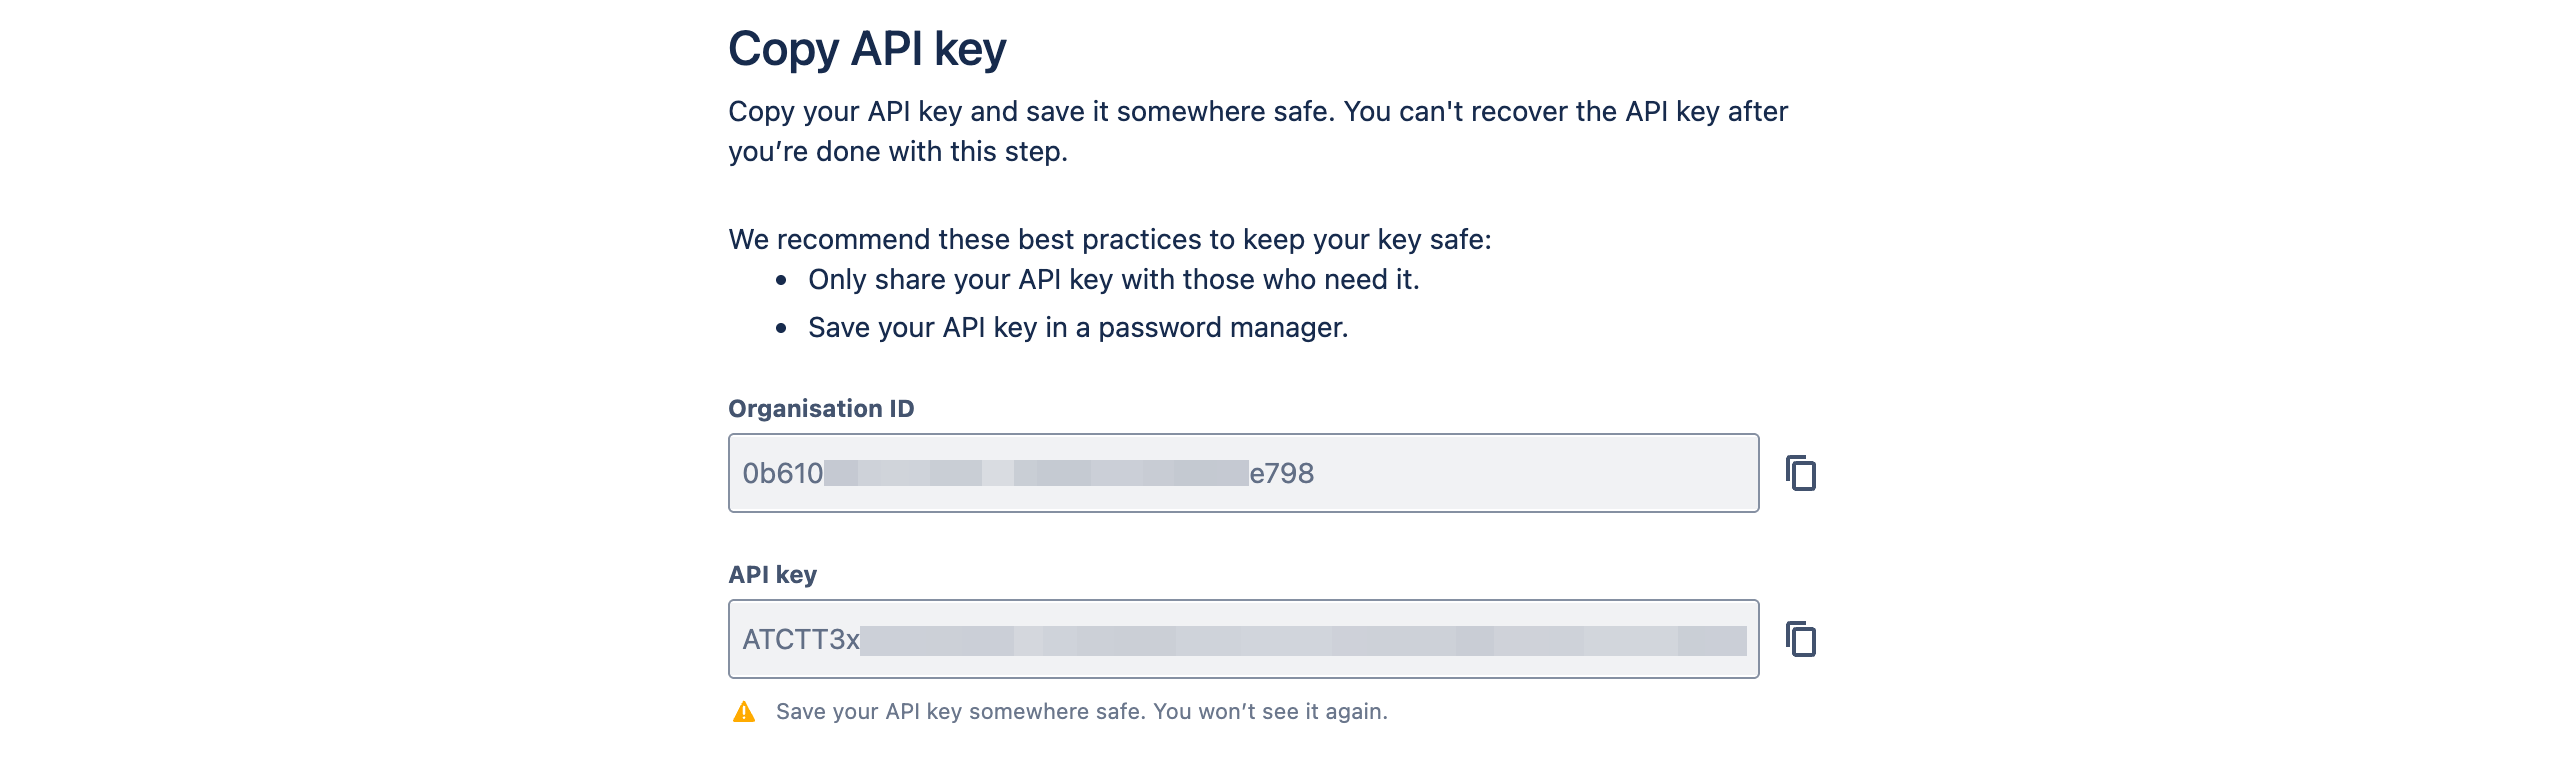
Finally you will see your Organization ID and API key:
How do I create a personal access token?
This is only required for the Invite users to Jira feature.
Go to https://id.atlassian.com/manage-profile/security/api-tokens and click Create API token. The Jira API call used to invite a user does not work with scoped API tokens.

Give a descriptive name (e.g. 'SaaS Manager invite users to Jira') and select an expiry date (we recommend using the maximum of 1 year). Click Create and copy your token to the clipboard.
I get the message "Atlassian Admin data is not included as you have no managed accounts."
Consider turning off the Include Atlassian Admin data feature that you selected when connecting to Jira from SaaS Manager.
If you do wish to use managed accounts then you will need to configure this in Atlassian Admin.
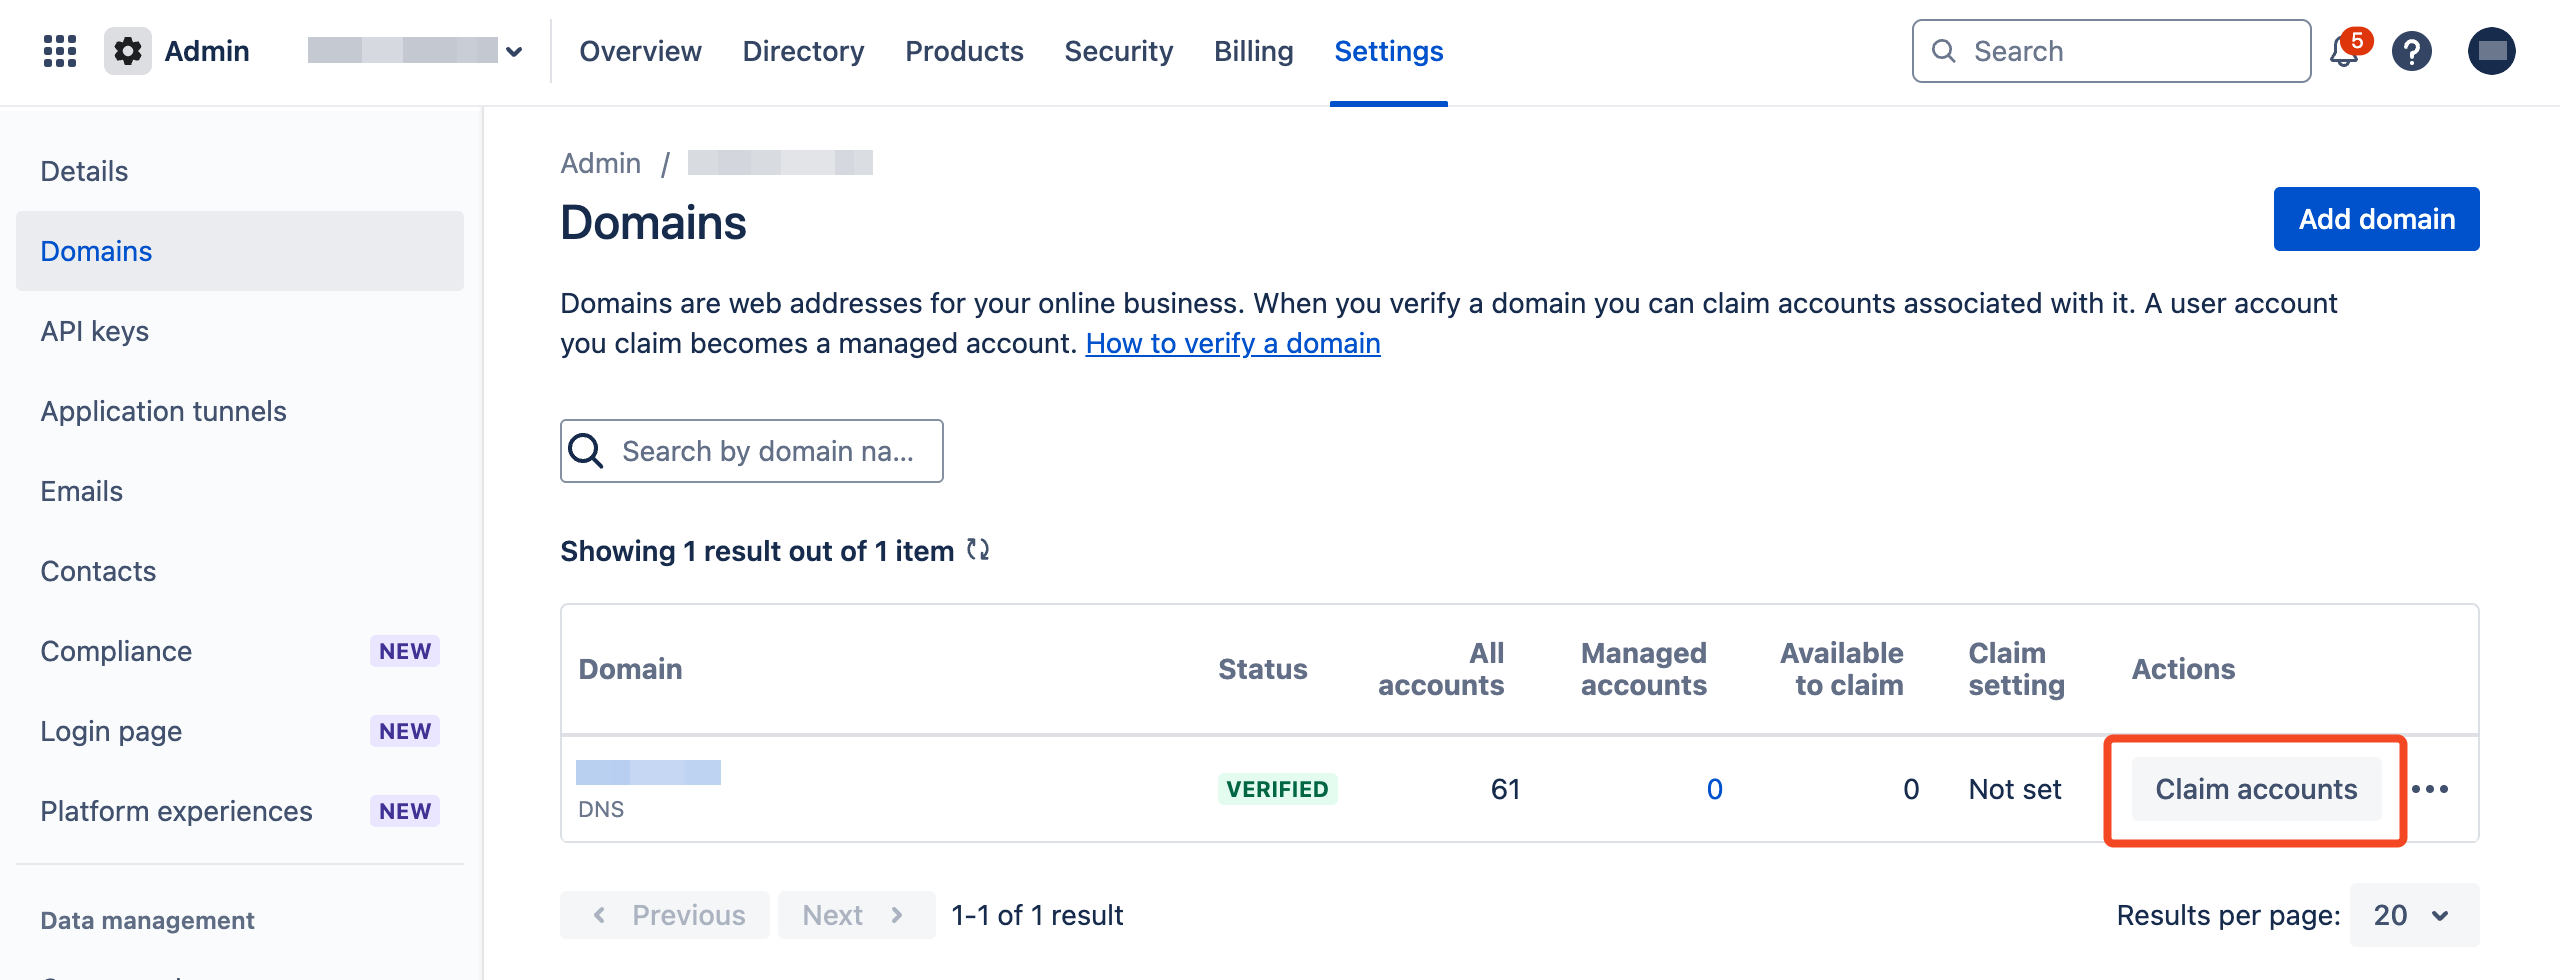
Log in to Atlassian Admin and go to Settings > Domains.
You will see a message prompting you to verify your company domain. This must be done before you can start managing Atlassian accounts.

Once your domain is verified you can then Claim accounts.
Once the accounts are claimed you can refresh the SaaS Manager integration.
Related to
Comments
0 comments
Please sign in to leave a comment.