Many organizations use Atlassian tools to manage IT helpdesk tasks. While 1Password SaaS Manager can take leaving dates from HR systems and run workflows at the right time, it's sometimes easier to work within existing processes.
In this example we assume that offboarding tasks are raised within Jira, and someone on the service desk will trigger the offboarding process at the correct time.
You can also refer to a more sophisticated example related to onboarding.
Scenario
In this simplified example we're going to create an automation in Jira that will run a workflow in SaaS Manager to remove an account in Google Workspace.
We have a Jira project called Offboarding and we've added a text field called Email address of leaver which we will use to tell SaaS Manager which user to offboard:
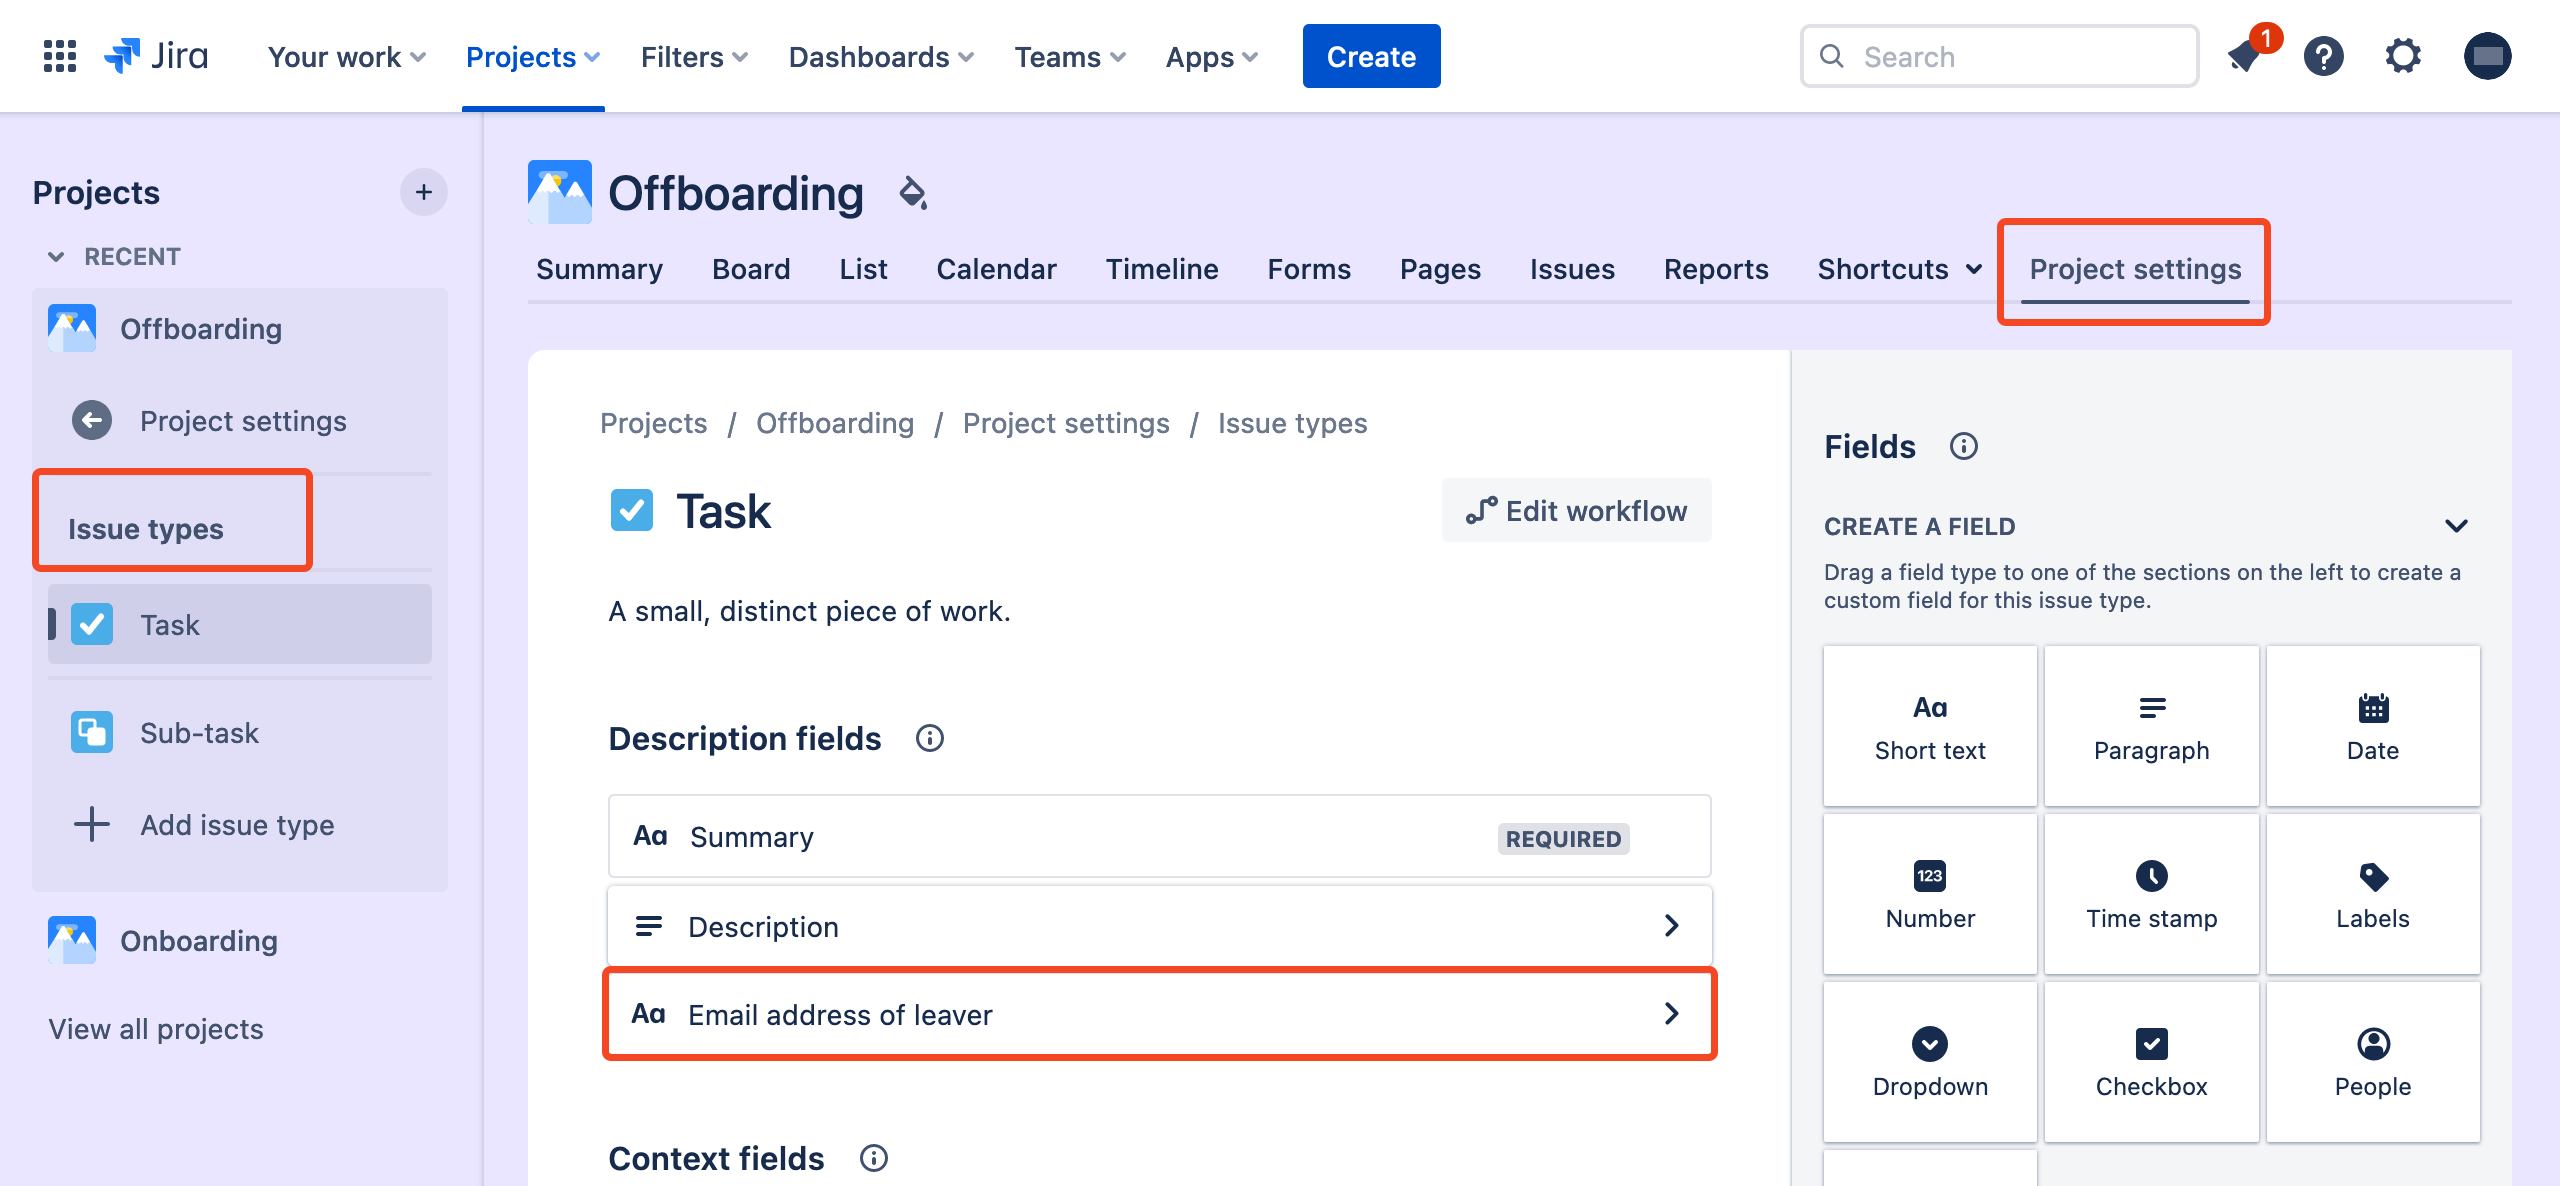
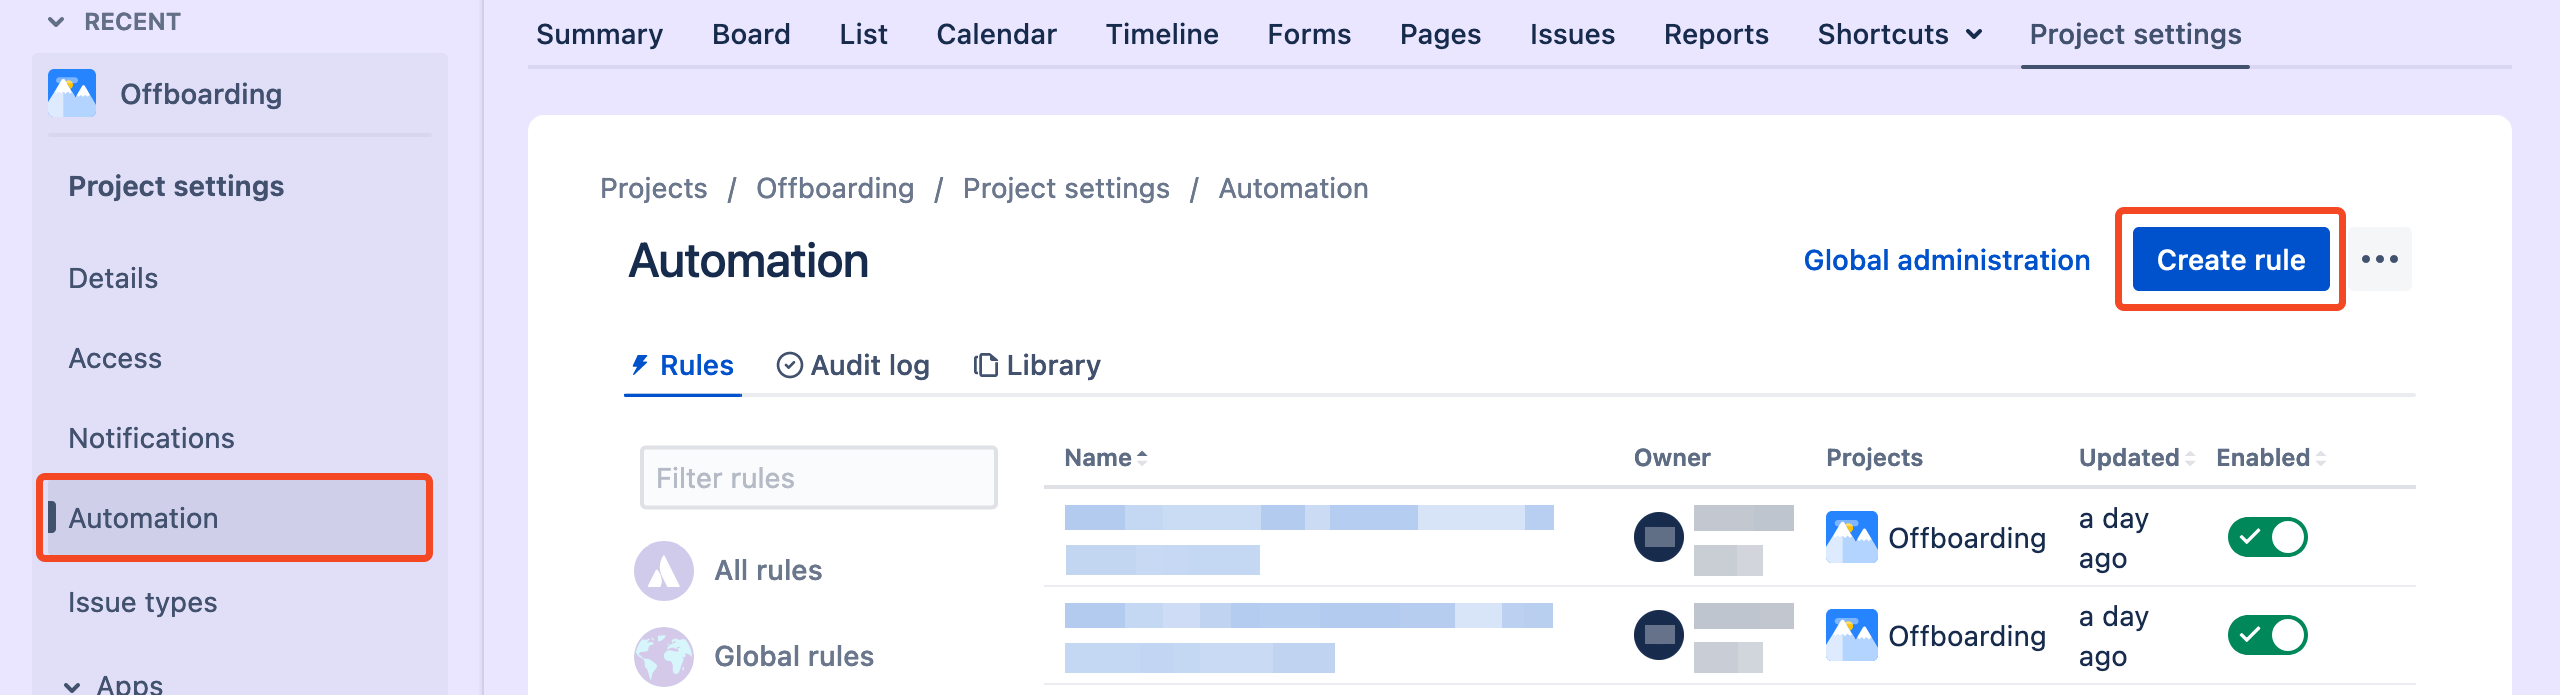
Create the Jira Automation
Navigate to Project settings > Automation and select Create rule:
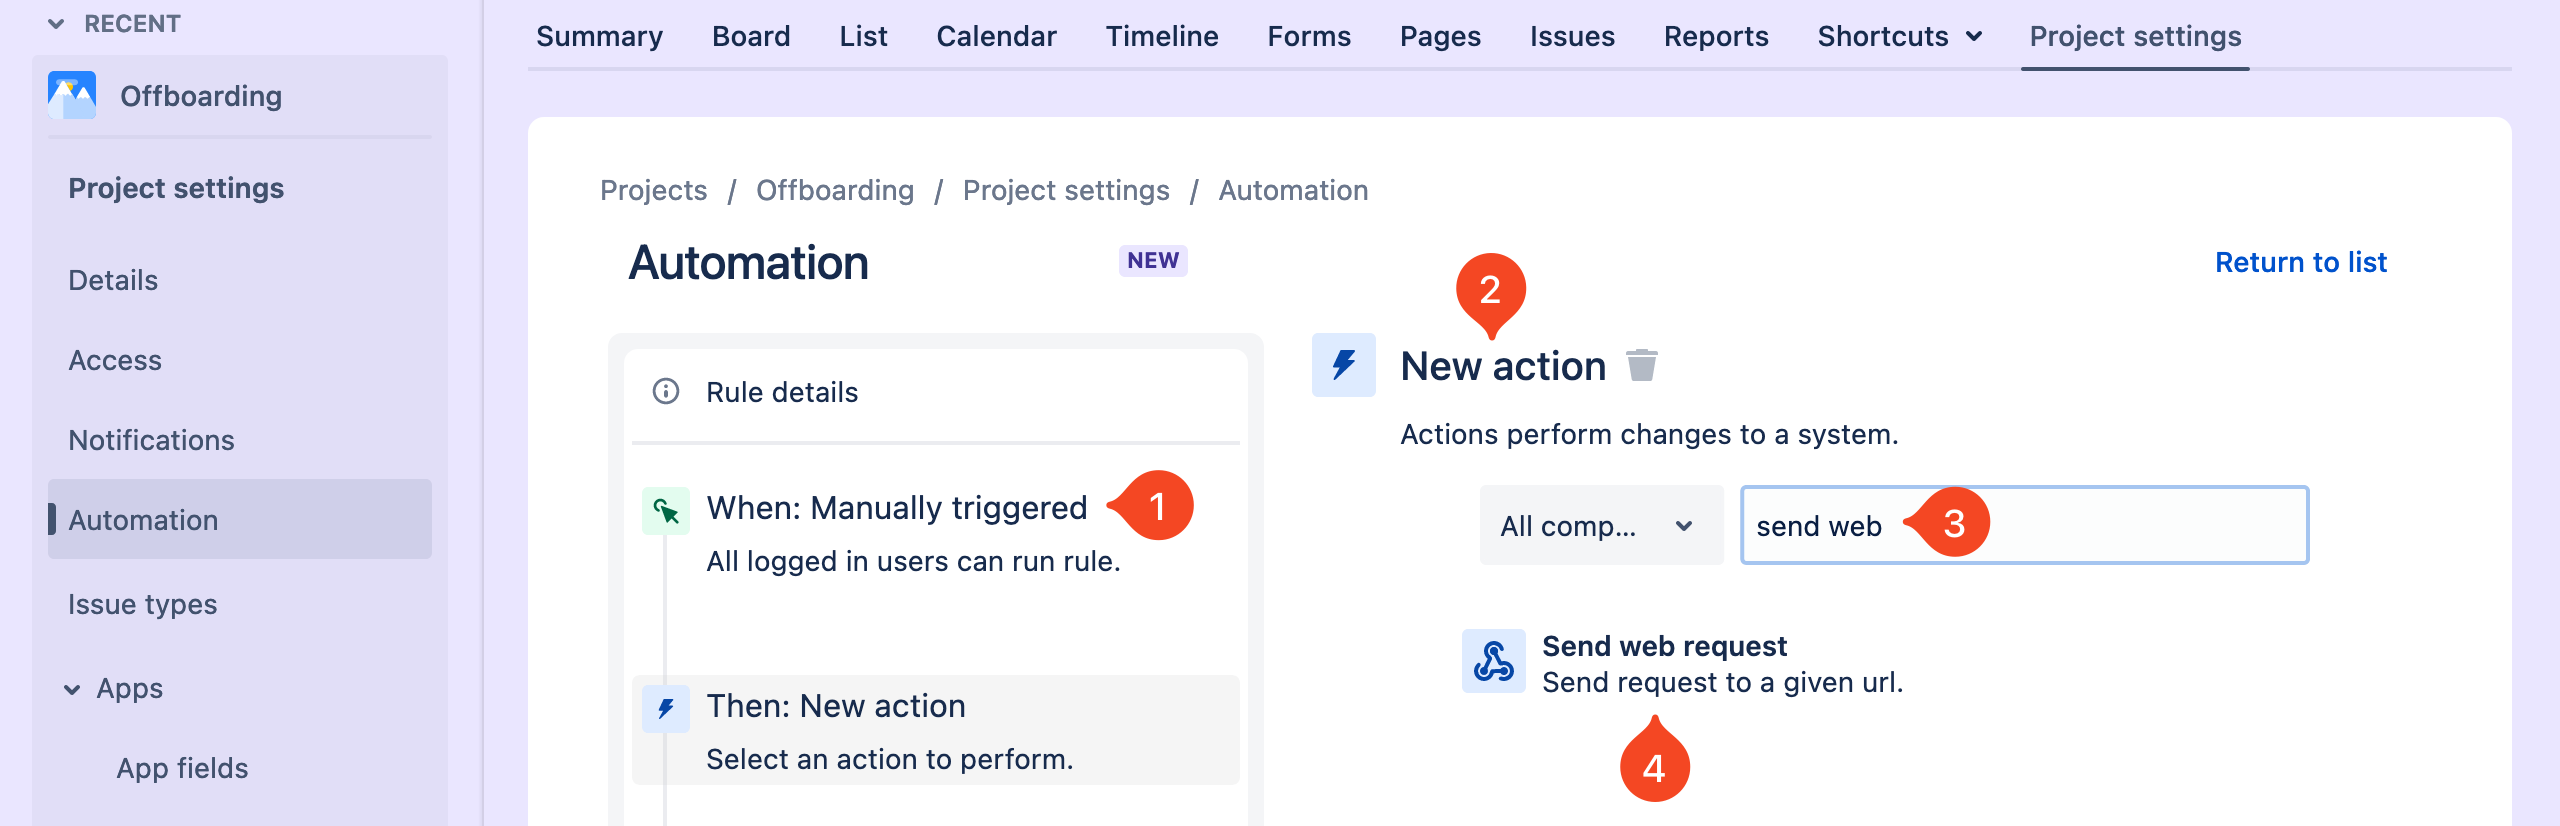
Every Jira automation has a trigger. You could use anything you want, for example transitioning to a specific status, but in this example we have chosen Manual trigger from issue.
You can choose who can run Jira triggers and you might want to restrict access to members of the IT team.
The second step is to add a New action.
Search for, and then select Send web request:
We now need to enter a web request URL.
This is going to be provided by SaaS Manager, so let's now switch to SaaS Manager and configure the workflow.
Test the data flow from Jira to SaaS Manager
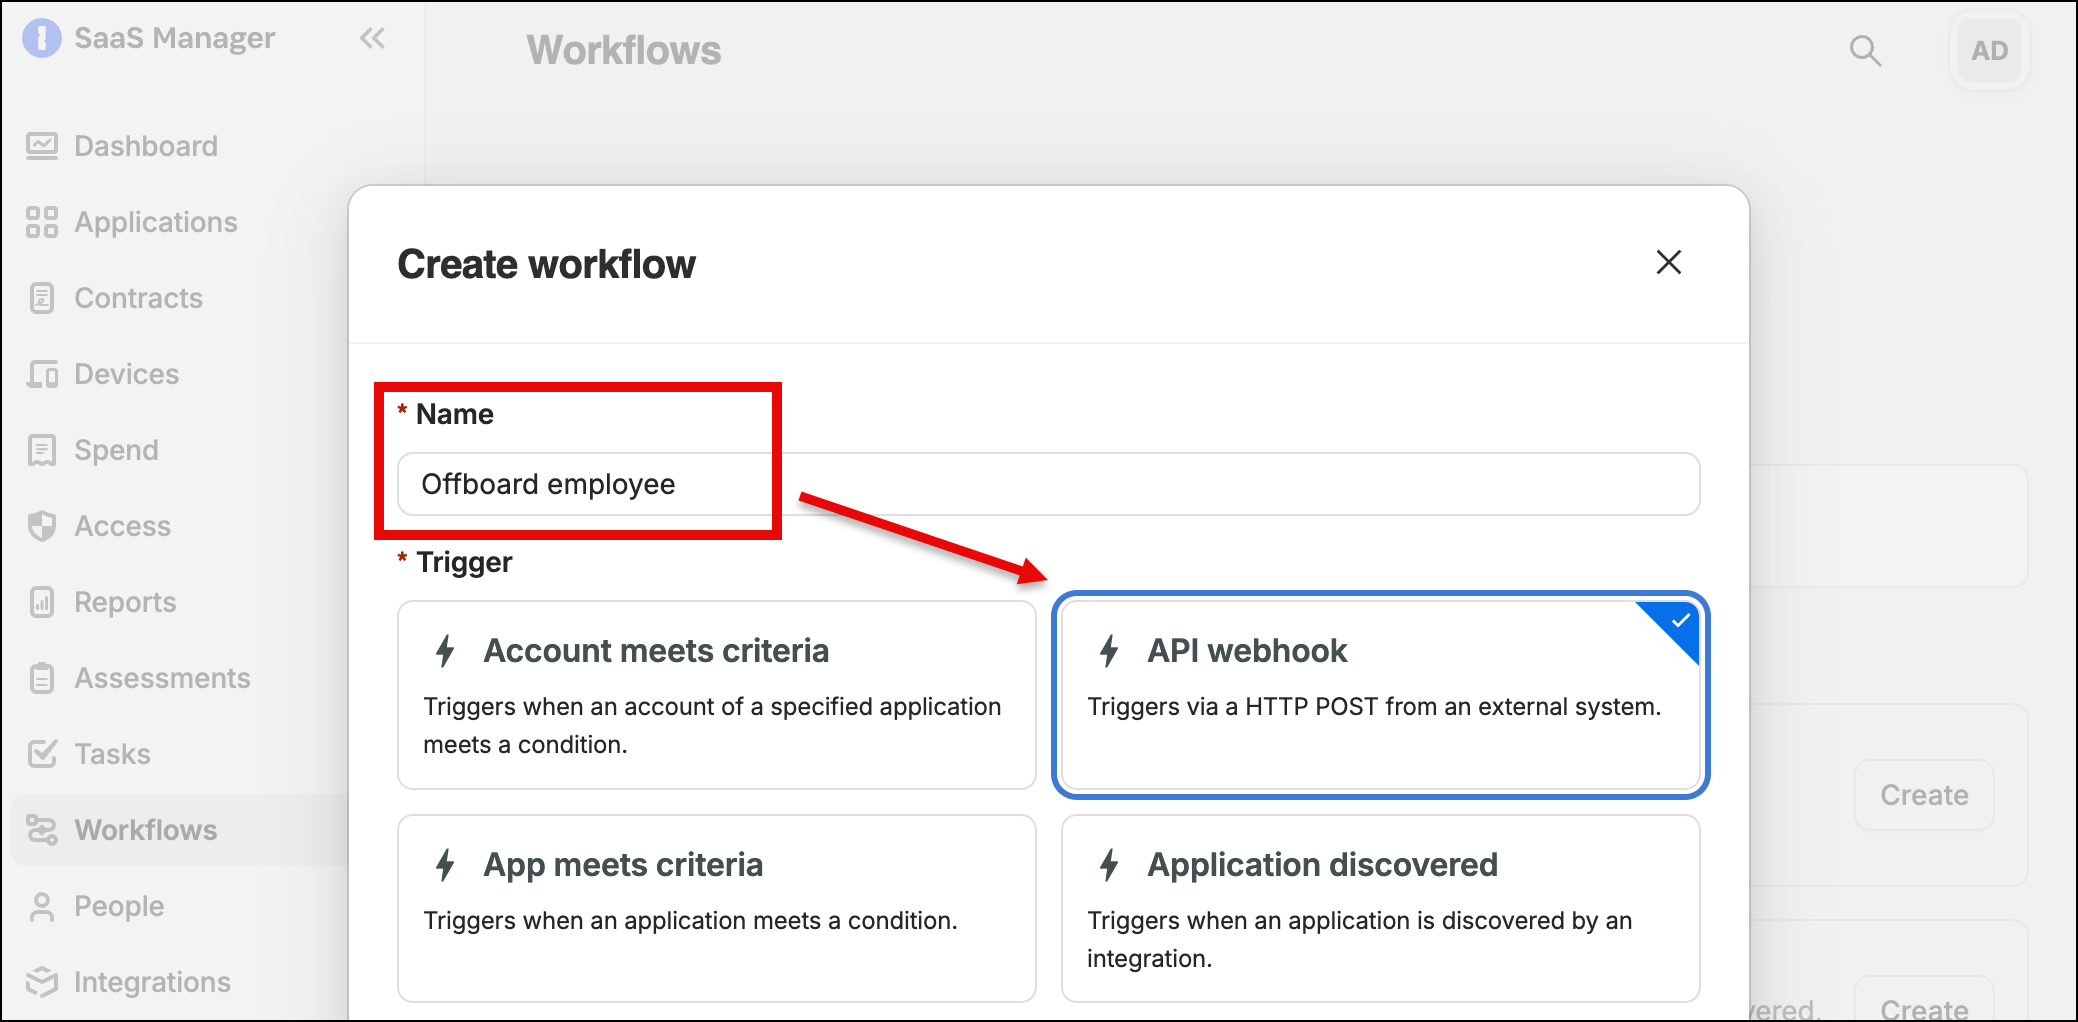
In a new tab in your browser, sign in to SaaS Manager, navigate to Workflows tab, and create a new workflow from scratch.
We'll call it Offboard employee, and the trigger will be API webhook.
We'll start by testing things out to get the basics going. Select Test Webhook.
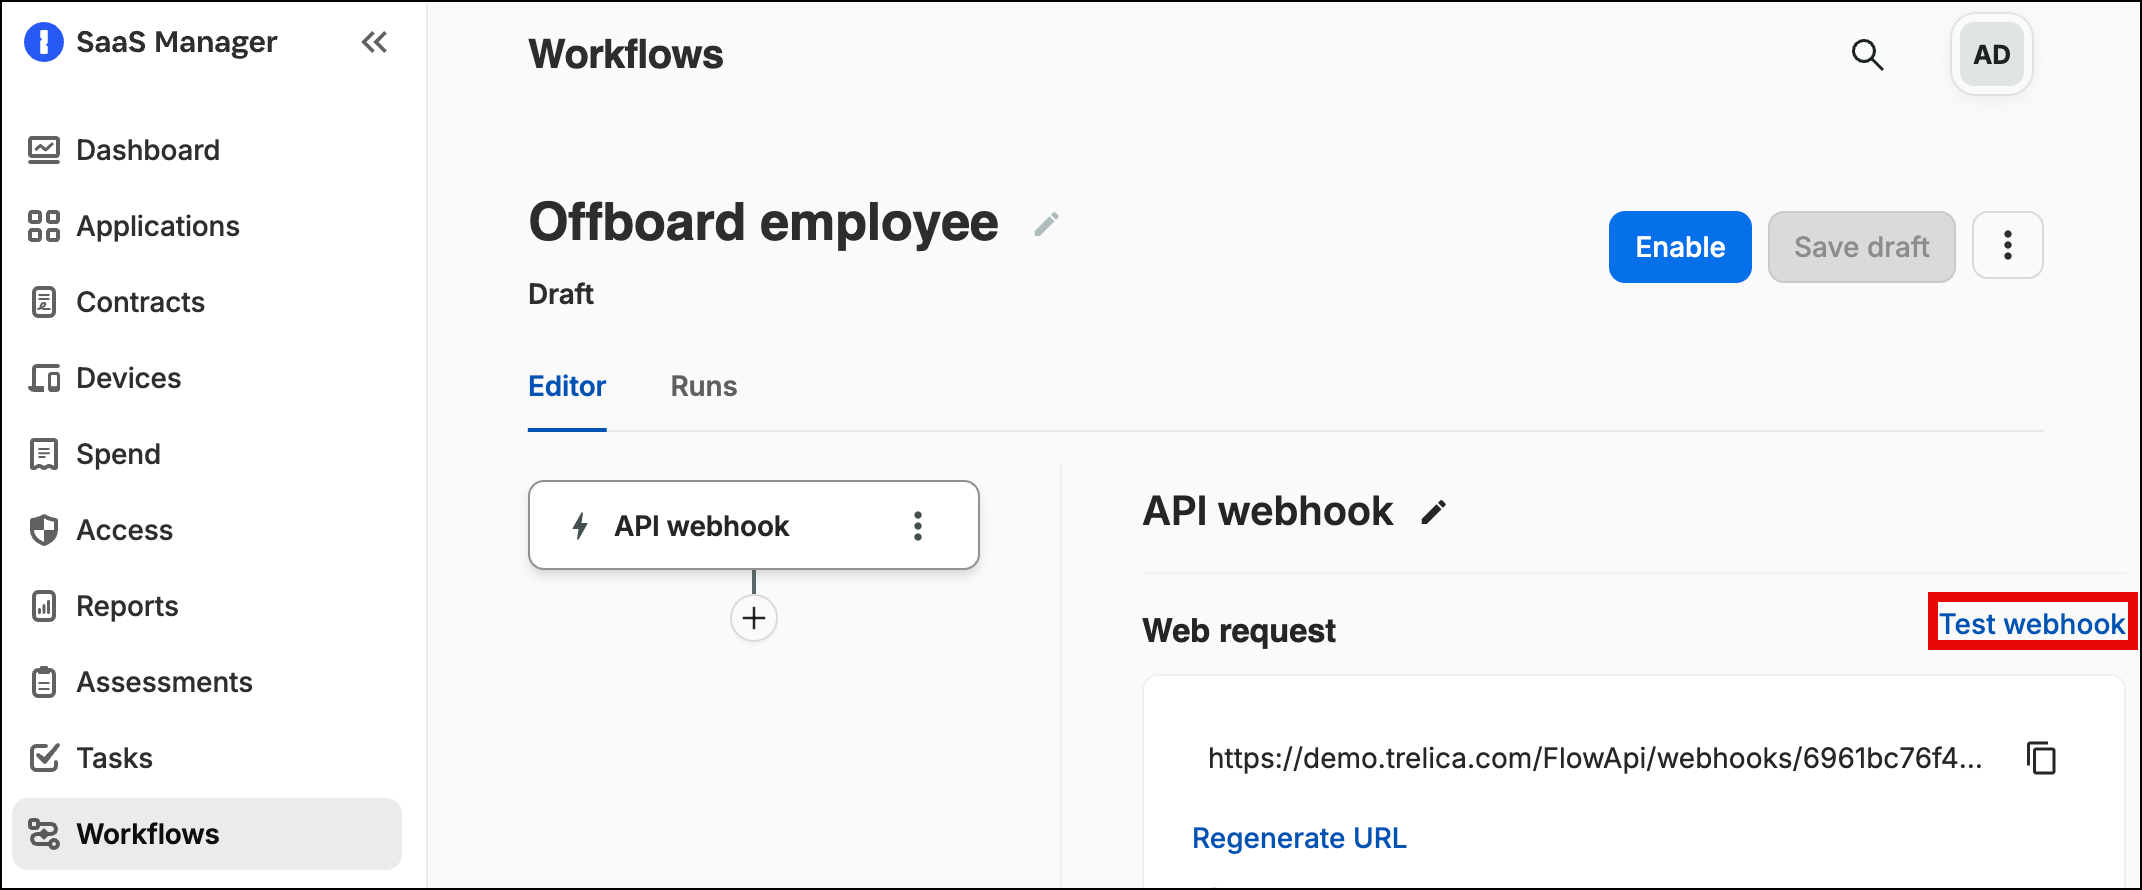
SaaS Manager will provide you with a special URL for testing. Select the copy icon to copy the URL to your clipboard.
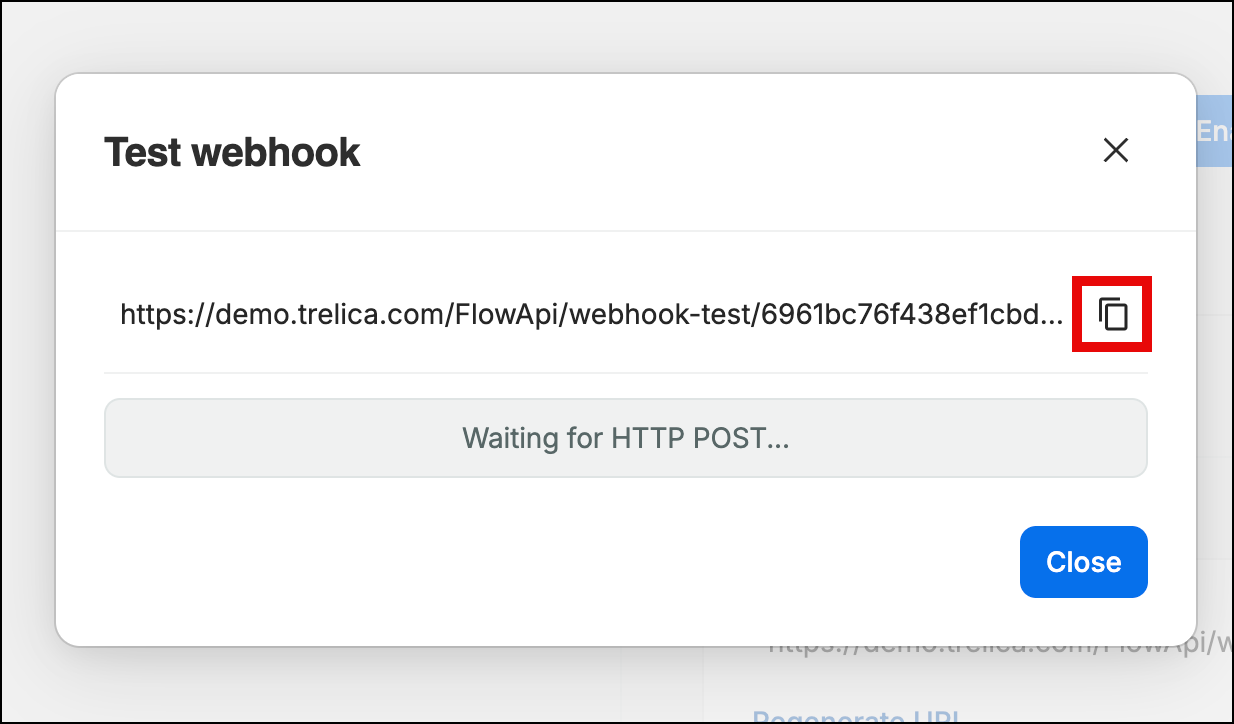
Keeping the SaaS Manager dialog open, go back to Jira.
- Paste in the URL from SaaS Manager
- Select POST as the HTTP method
- Select Custom data as the Web request body
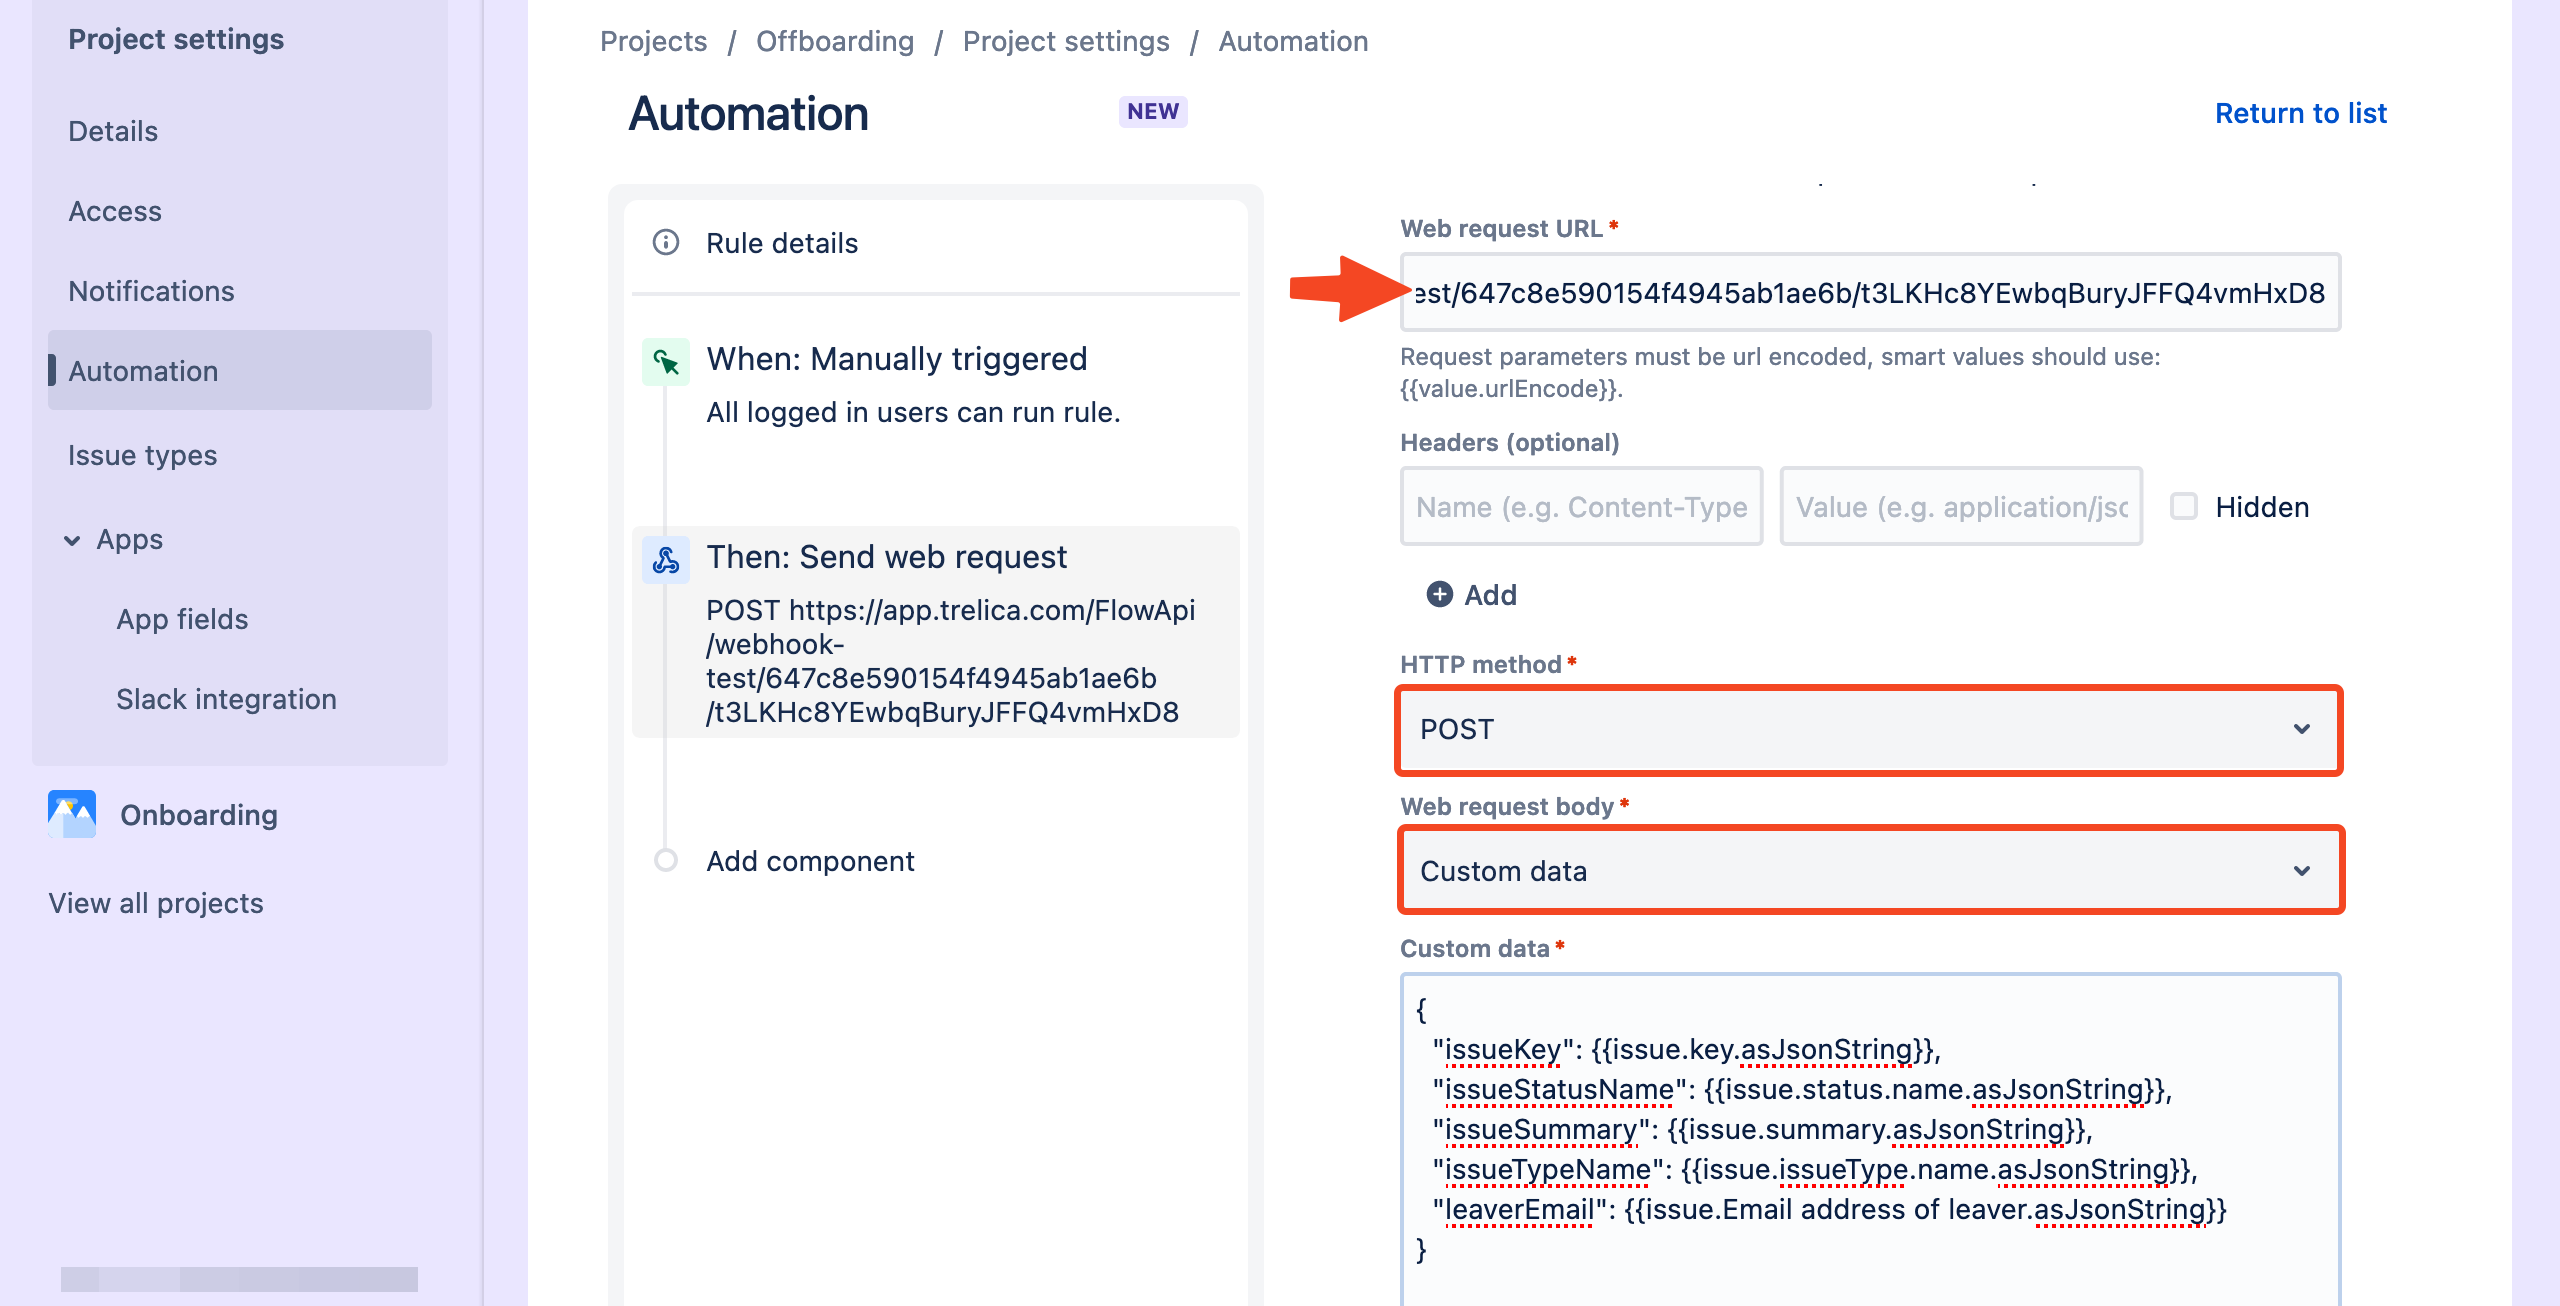
Jira supports several 'payload' types for the web request body, including Automation format and Jira format. These tend to include a lot of superfluous information and can be hard to follow, so we generally recommend using Custom data as it lets you see what gets sent more clearly and gives more control over the structure.
For the Custom data, paste in the following:
{
    "issueKey": {{issue.key.asJsonString}},
    "issueStatusName": {{issue.status.name.asJsonString}},
    "issueSummary": {{issue.summary.asJsonString}},
    "issueTypeName": {{issue.issueType.name.asJsonString}},
    "leaverEmail": {{issue.Email address of leaver.asJsonString}}
}
The 'double braces' are Jira smart values which will be substituted when the workflow runs.
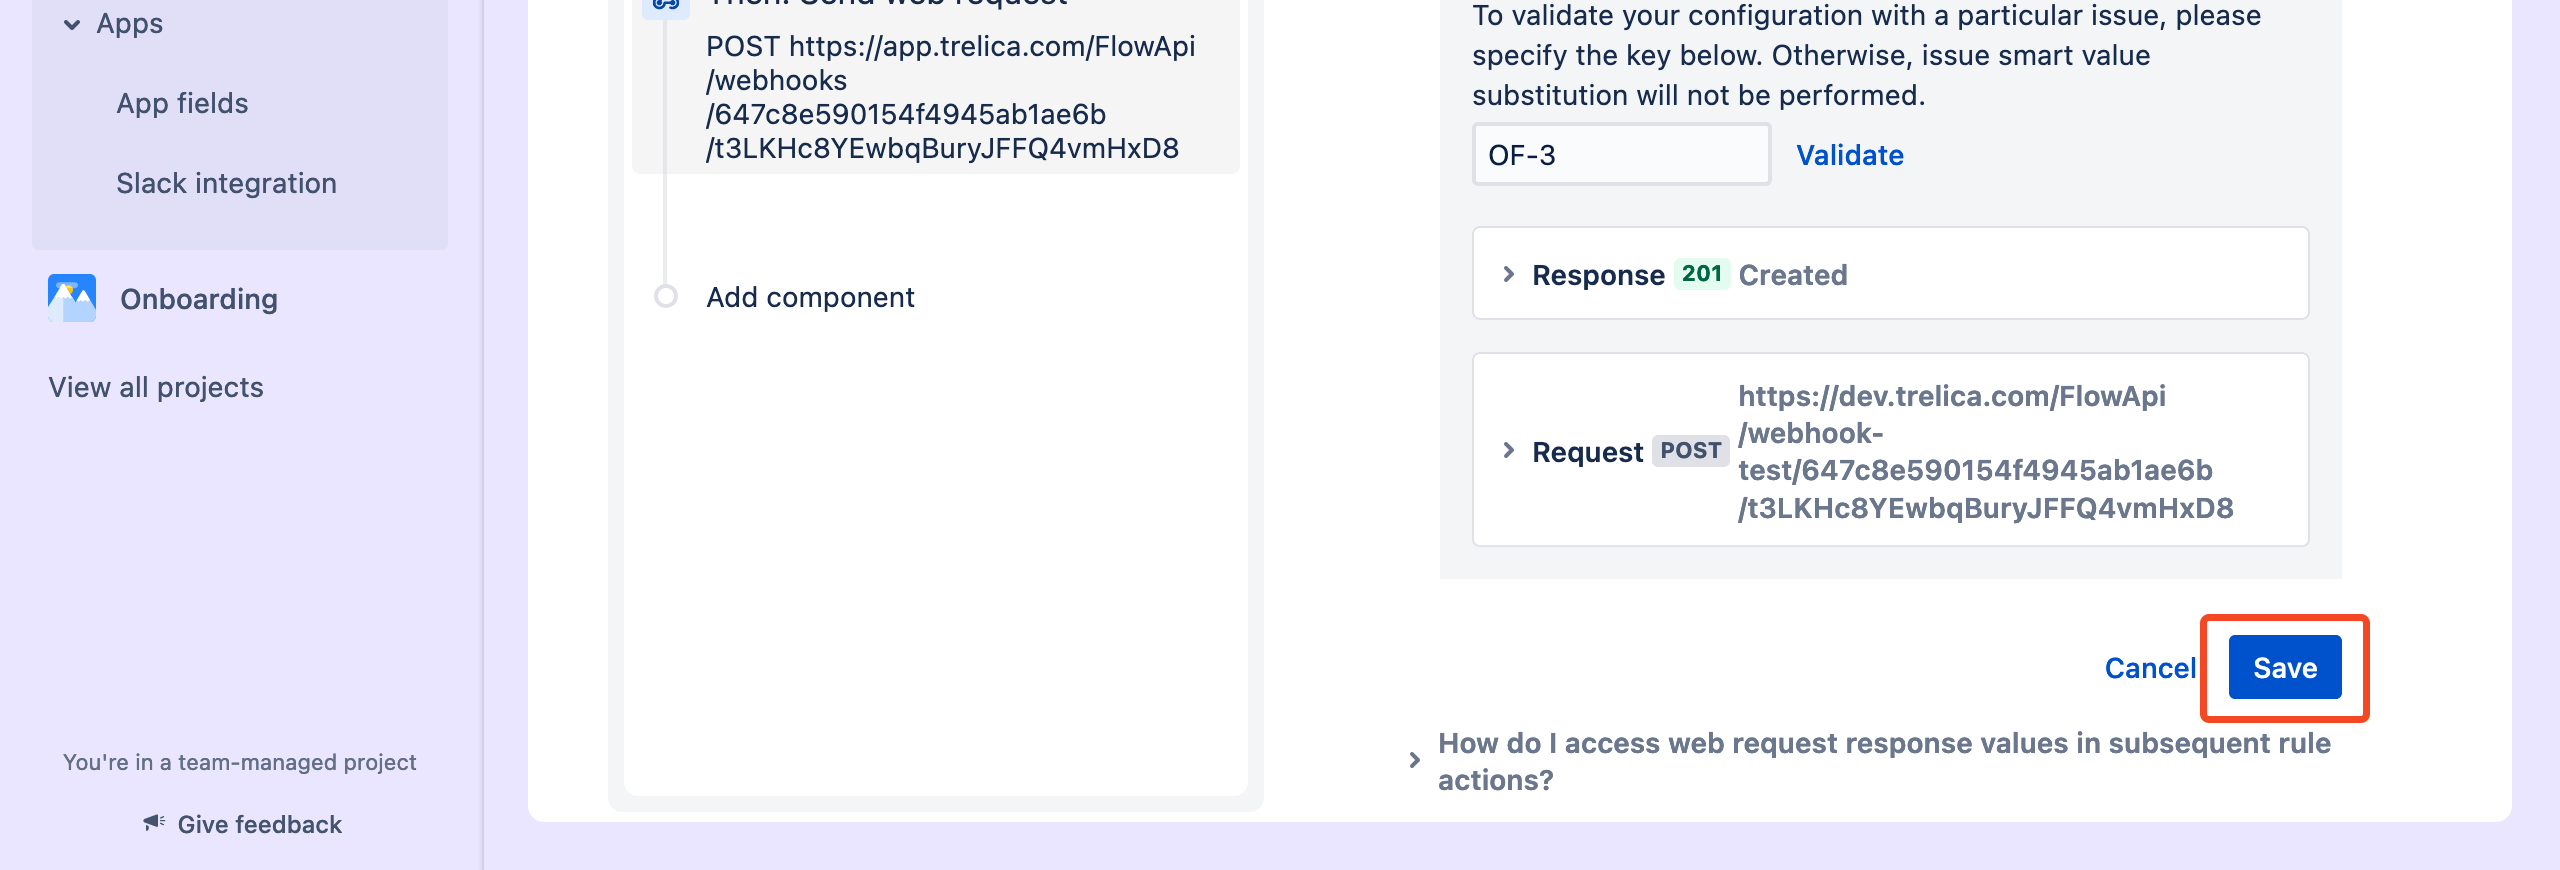
Jira lets you test very easily. Expand Validate your web request configuration and enter the issue key for an issue in the project.
Then select Validate.
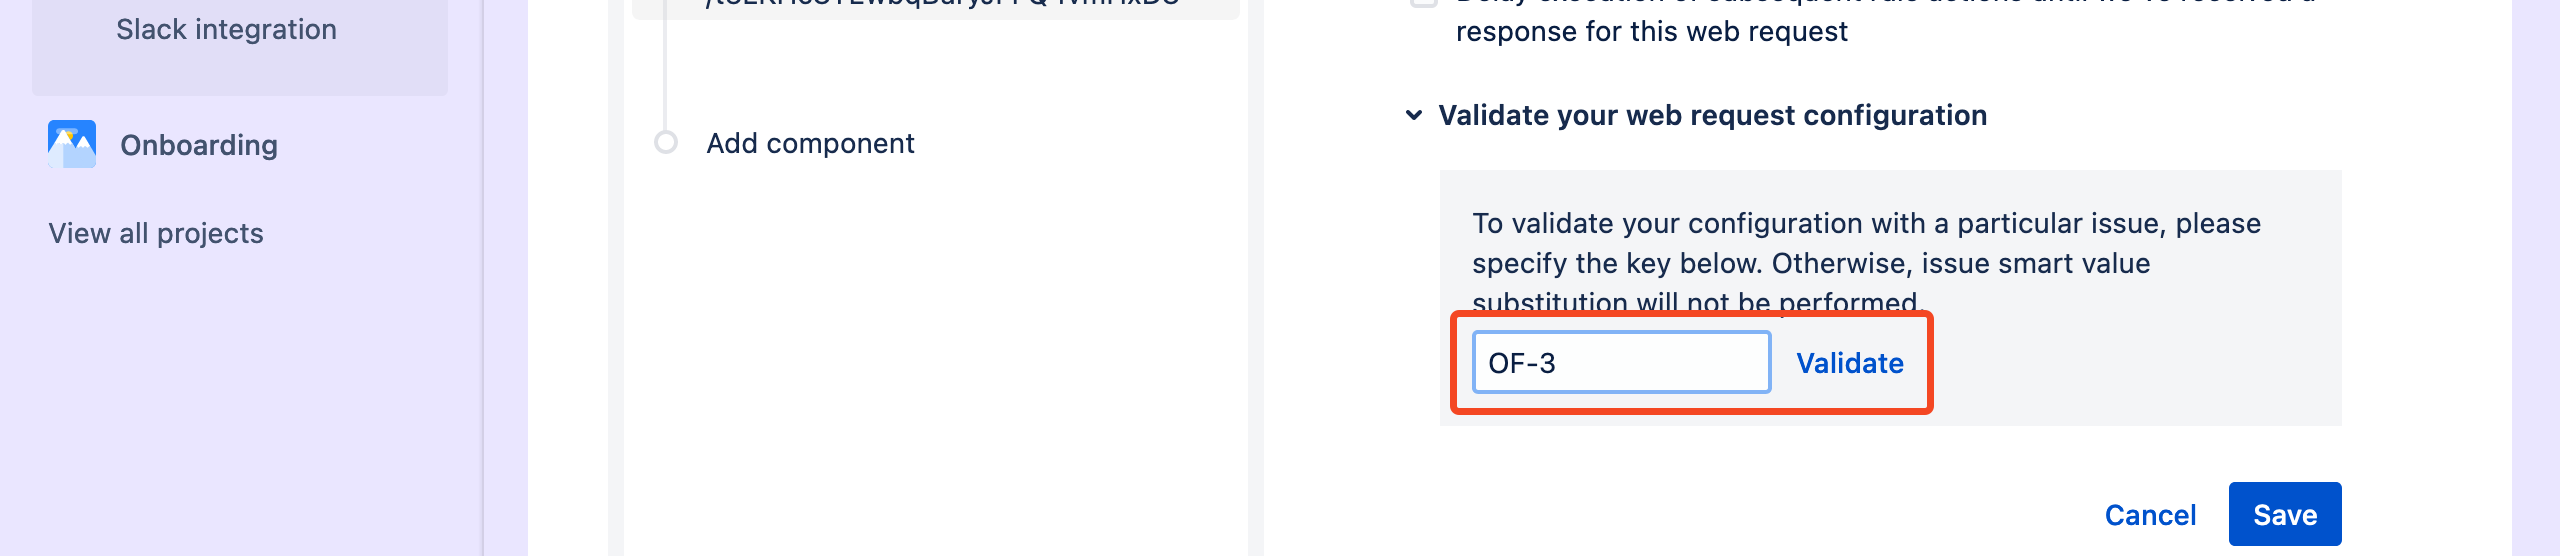
You should see a 201 Created response in Jira, and if you go back to your SaaS Manager tab you will see what Jira posted.
Verify that it's Jira calling the SaaS Manager workflow
You can close the Test webhook dialog in SaaS Manager and we will configure the rest of the trigger.
First select Verify request.
Although the SaaS Manager URL is reasonably unguessable, we don't want anyone who knows the URL to be able to trigger a workflow.
A simple way to do this is to get Jira to send a shared secret value that SaaS Manager can check.
Under Header name enter x-secret, then select the pencil icon to set a value.
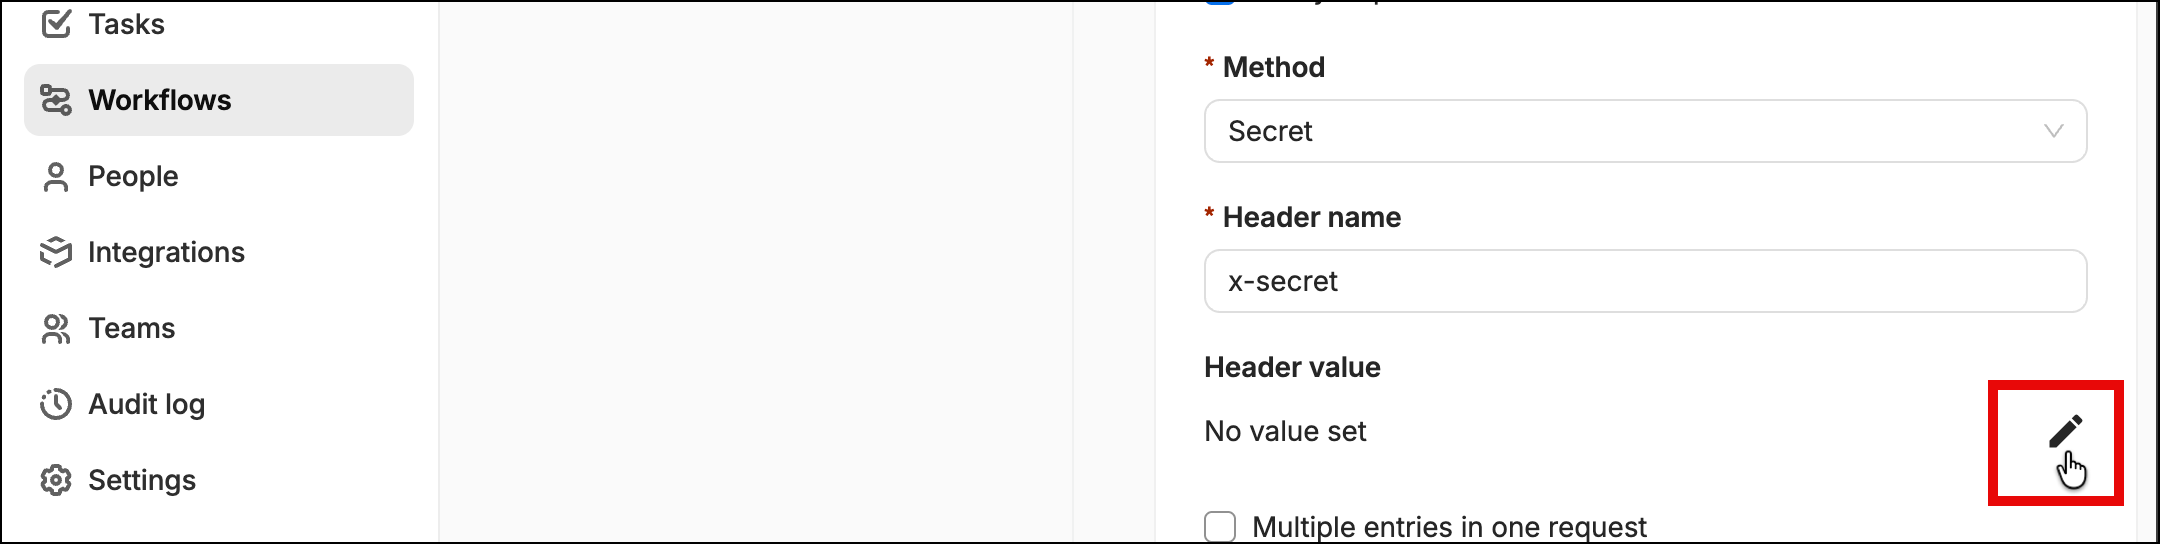
You can type in a value but it's easier to select Generate and SaaS Manager will give you a random value.
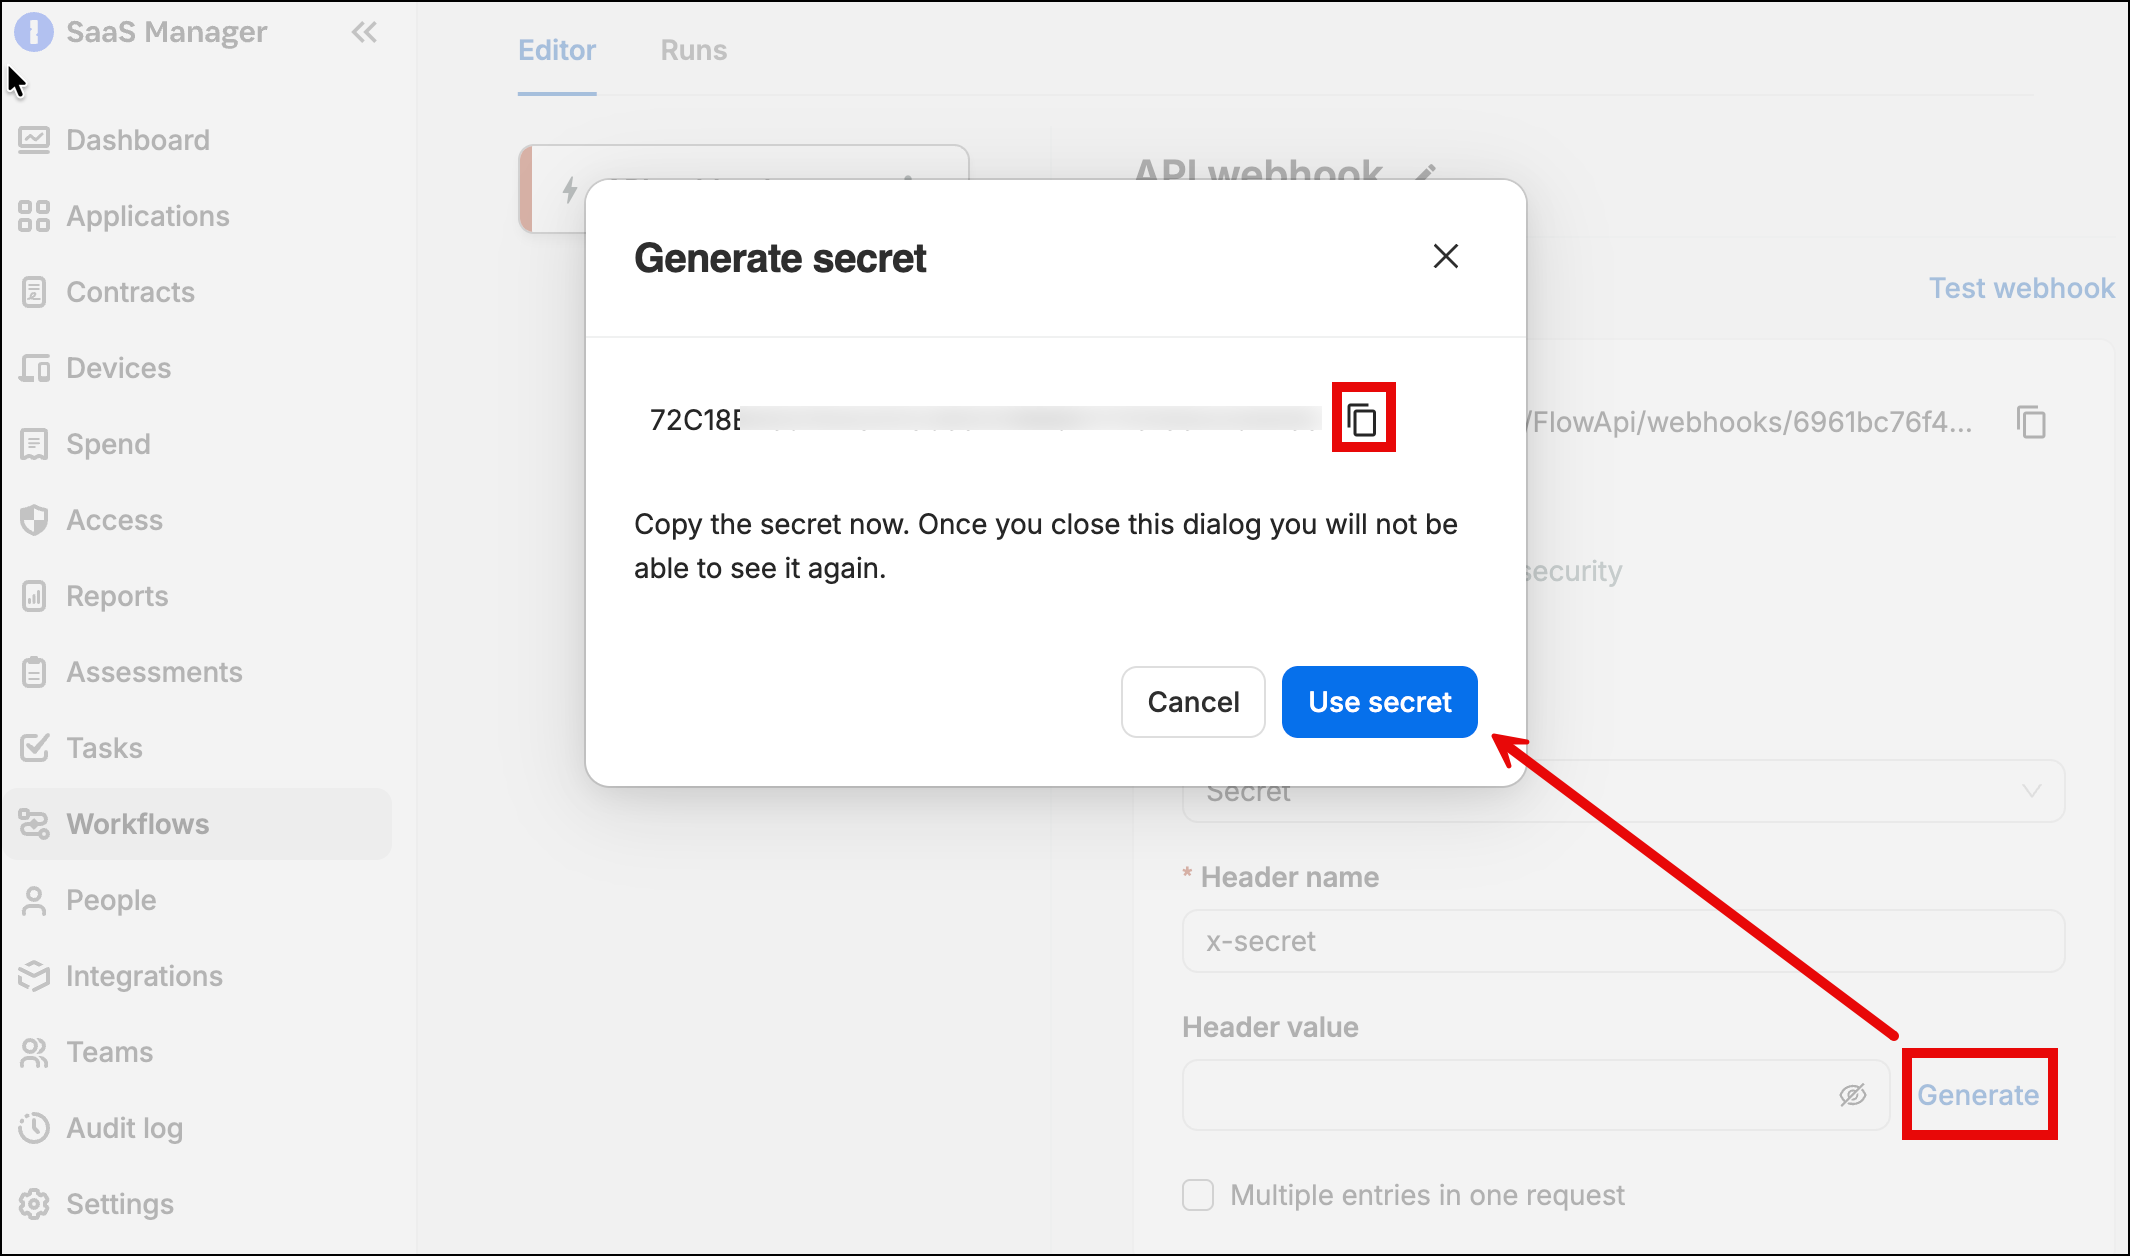
Copy the secret and now paste this into Jira.
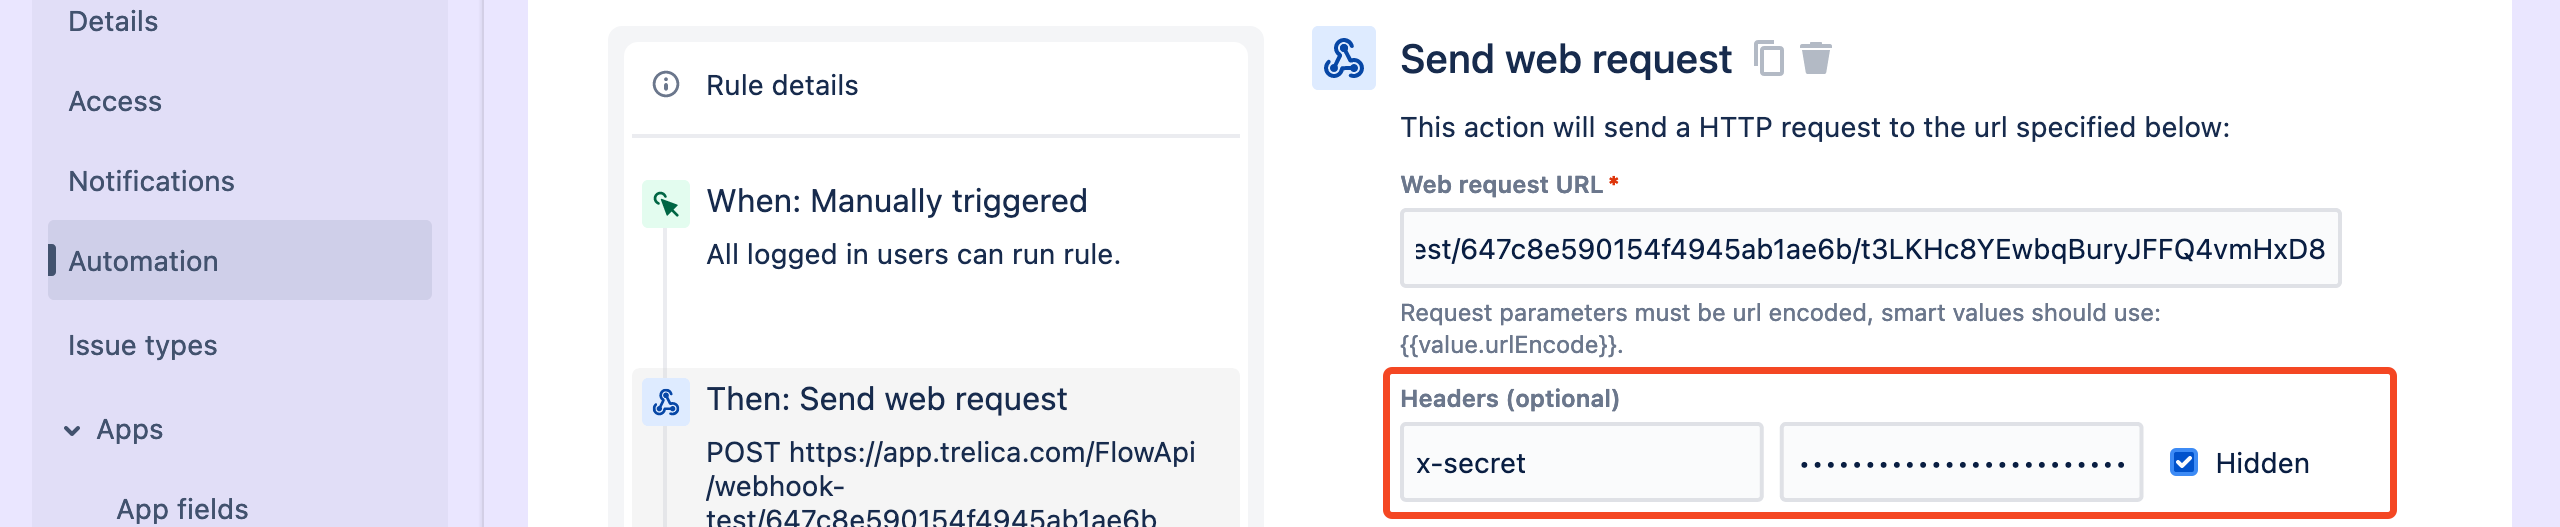
Set the header name to x-secret, and we also recommend selecting the Hidden checkbox in Jira.
We now want to set the Context of the SaaS Manager workflow.
For this we want to:
- select Person.
- set the Type to email.
- set the JSON path to
leaverEmail.
The final step is to correct the URL in Jira.
The URL SaaS Manager provides when you test the webhook is purely for testing and a different URL is used for triggering workflow runs.
Copy this from SaaS Manager and paste it into Jira.
Jira configuration is now complete, so scroll down and Save the automation.
Now you can enter a name e.g. Offboard user, and enable the automation.
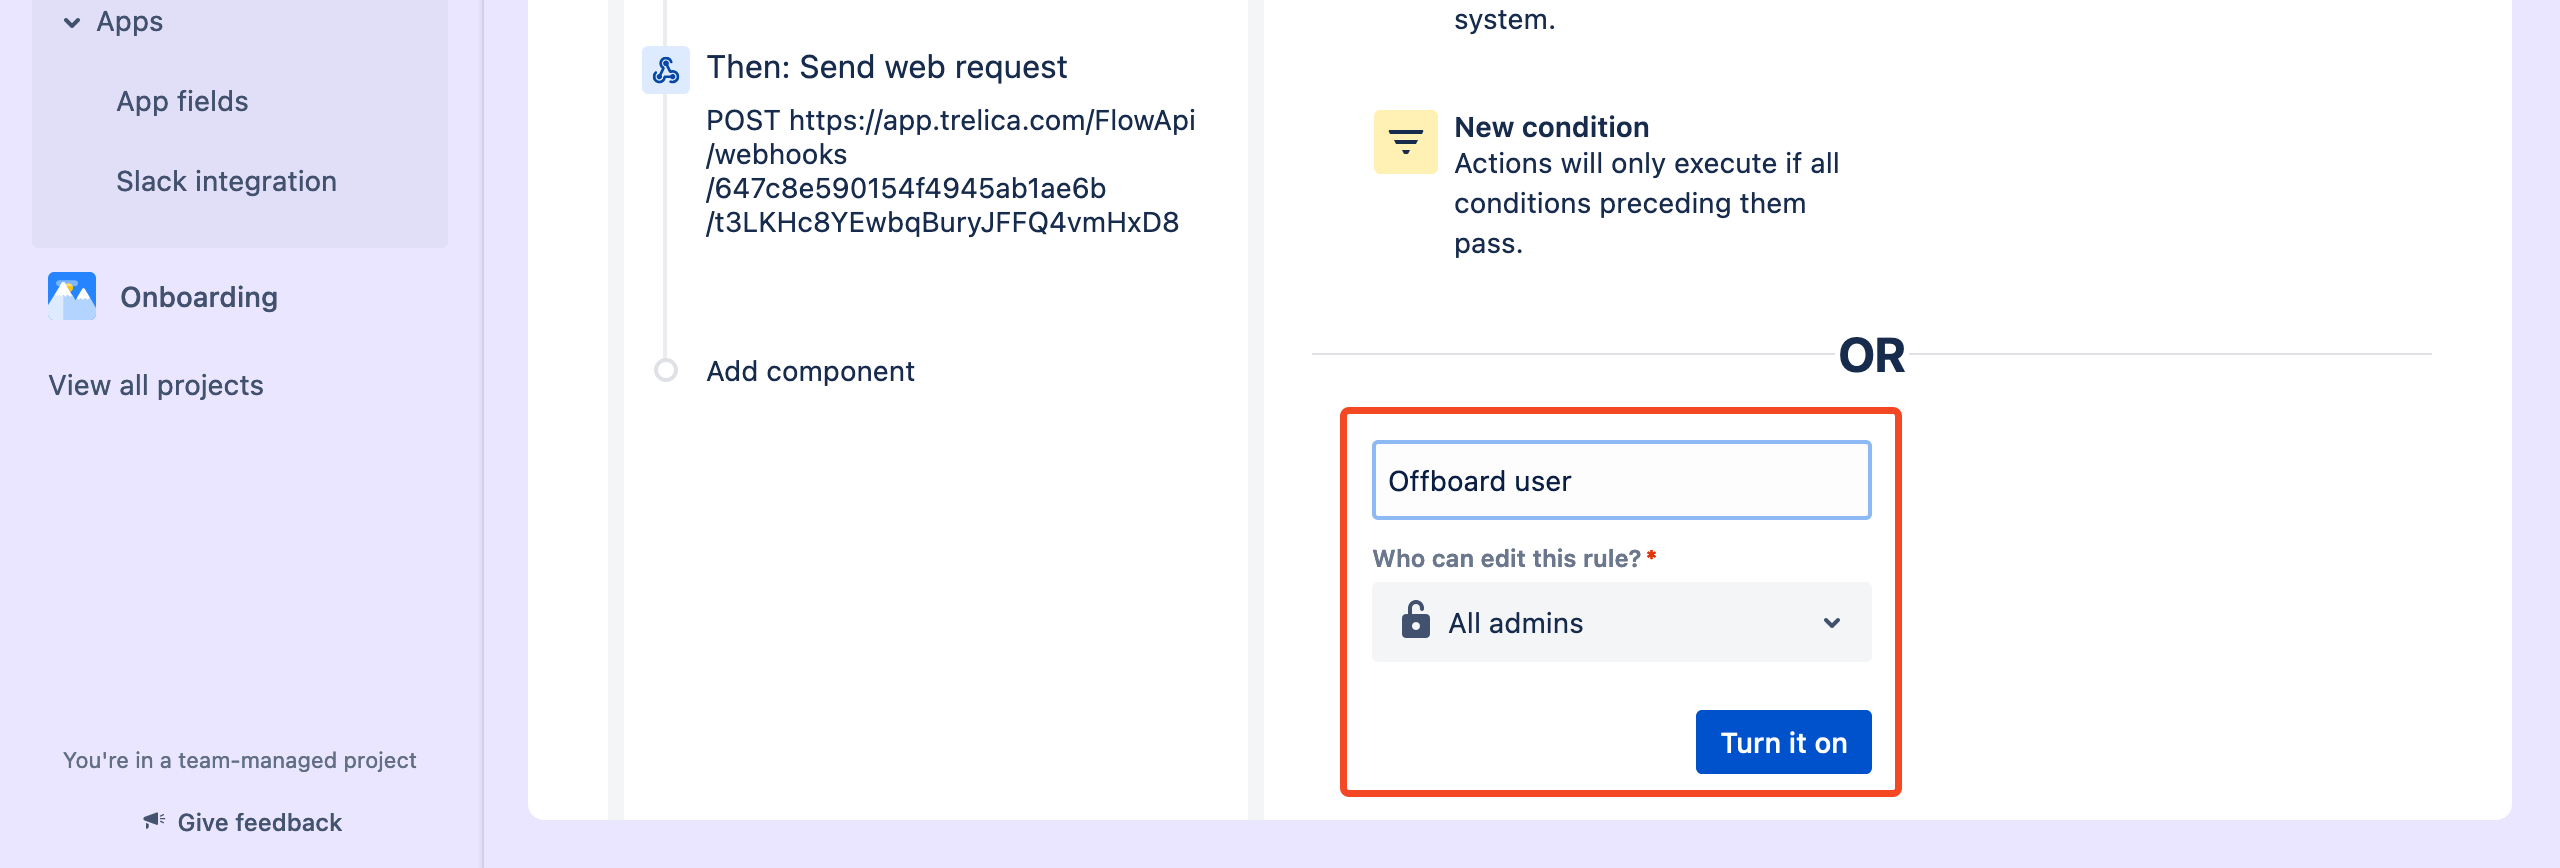
We recommend only letting other admins edit the rule, since it contains the shared secret with SaaS Manager.
Select Turn it on to enable the automation.
Finish the workflow in SaaS Manager
Add some actions to your workflow - in this case we're going to suspend a user in Google Workspace by clearing down basic details like aliases, revoking access and suspending the account.
Select Save Draft to save your workflow and Enable it before it can be run from Jira.
If a SaaS Manager API webhook workflow is not Enabled then it cannot be triggered
Run the automation in Jira
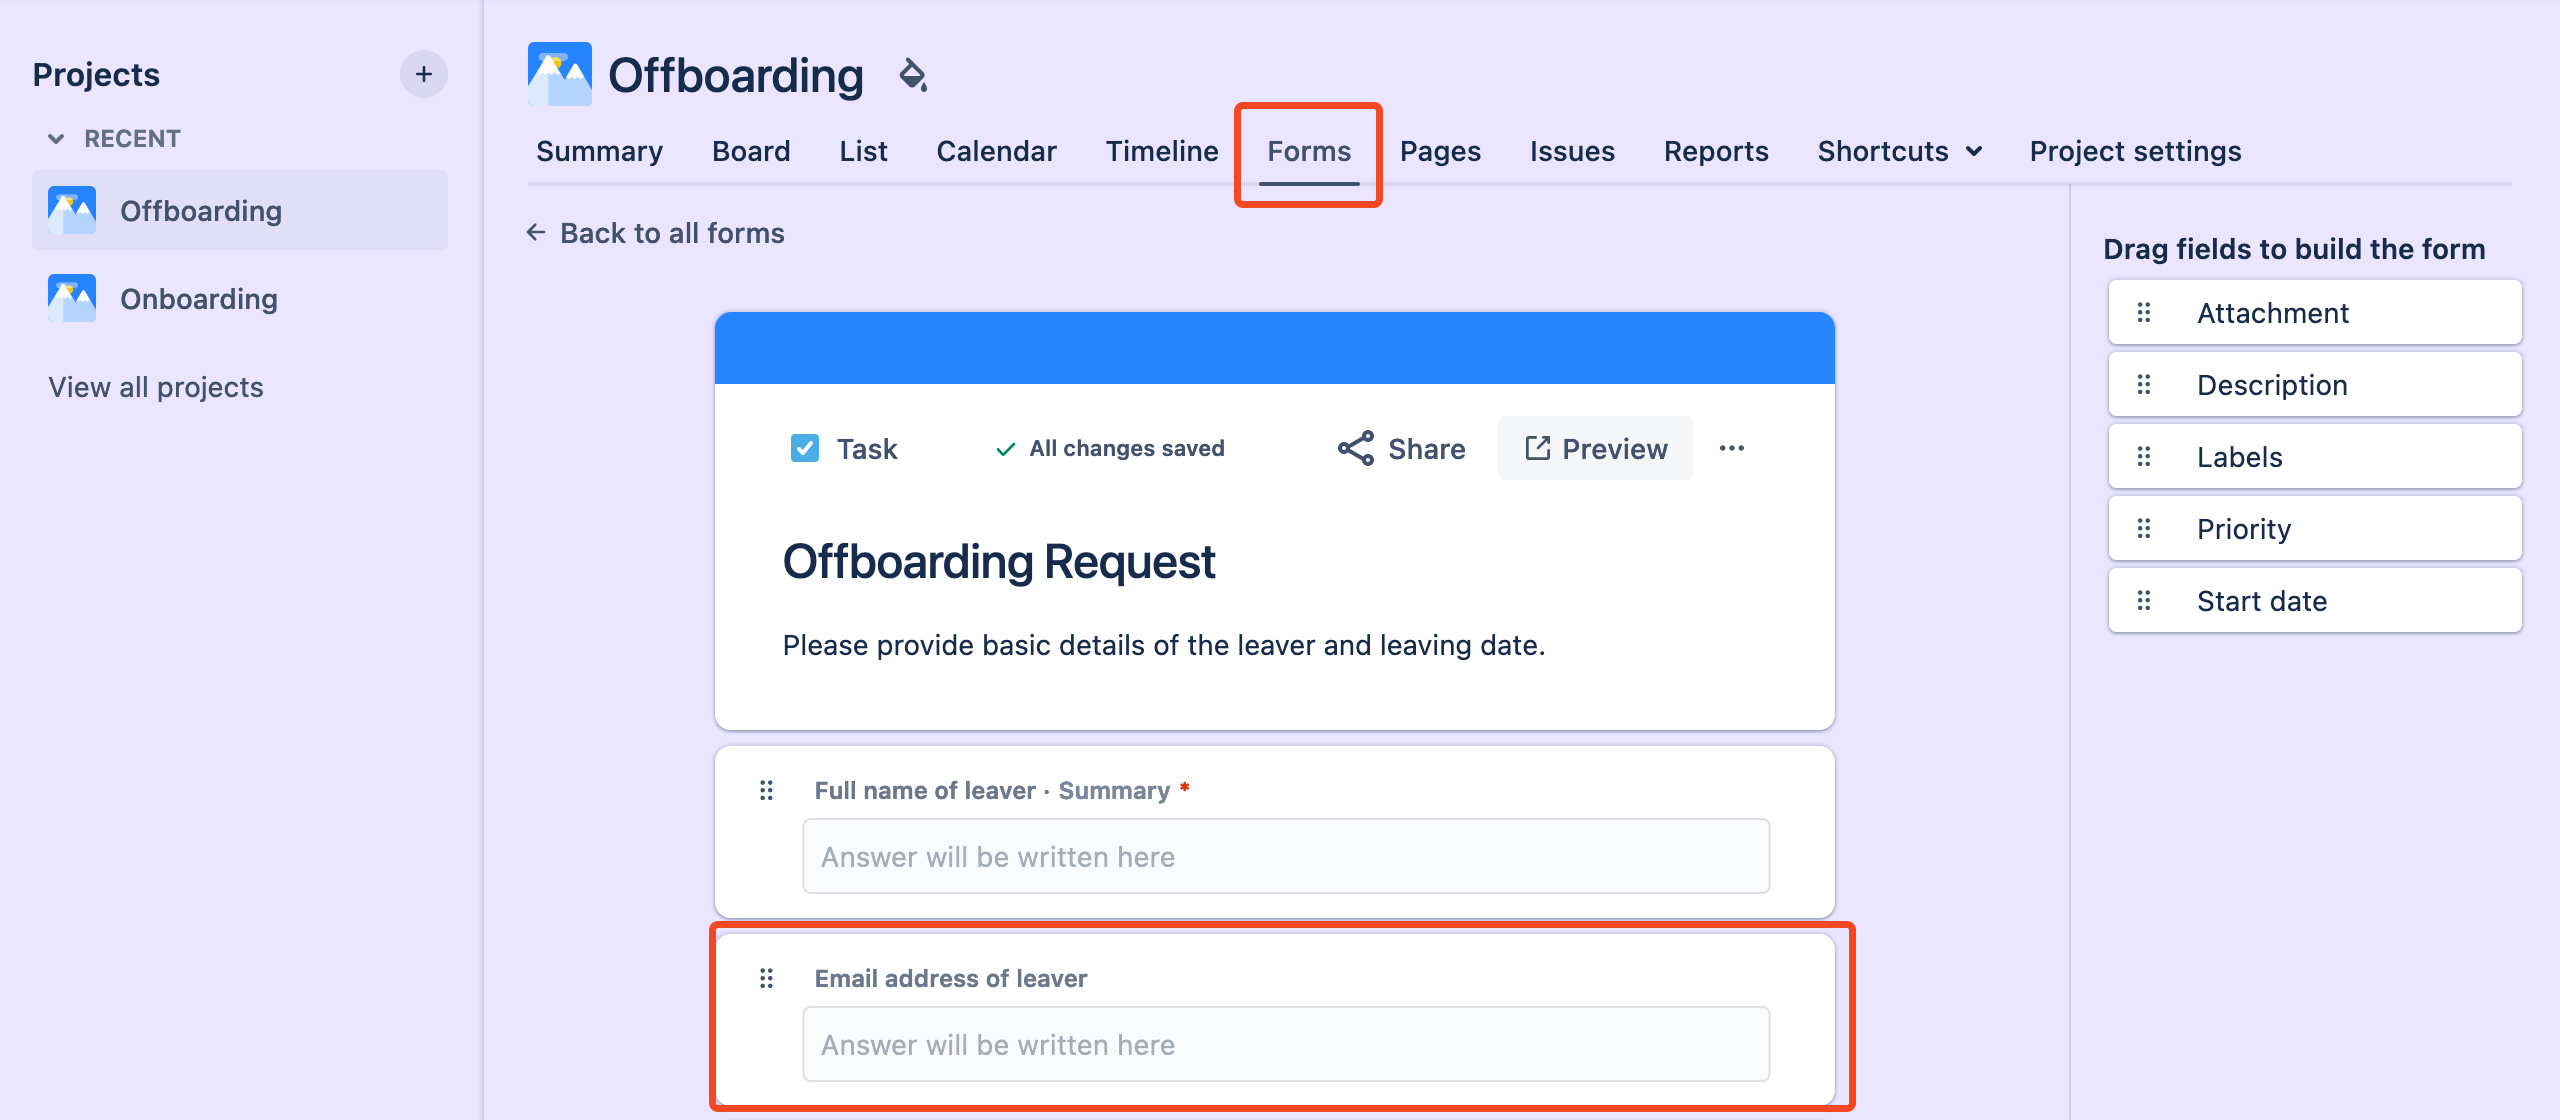
We created a form to put the basic details into the Jira Issue. The most important thing is that the email address of the leaver must be populated as SaaS Manager will use this to work out which user to deprovision:
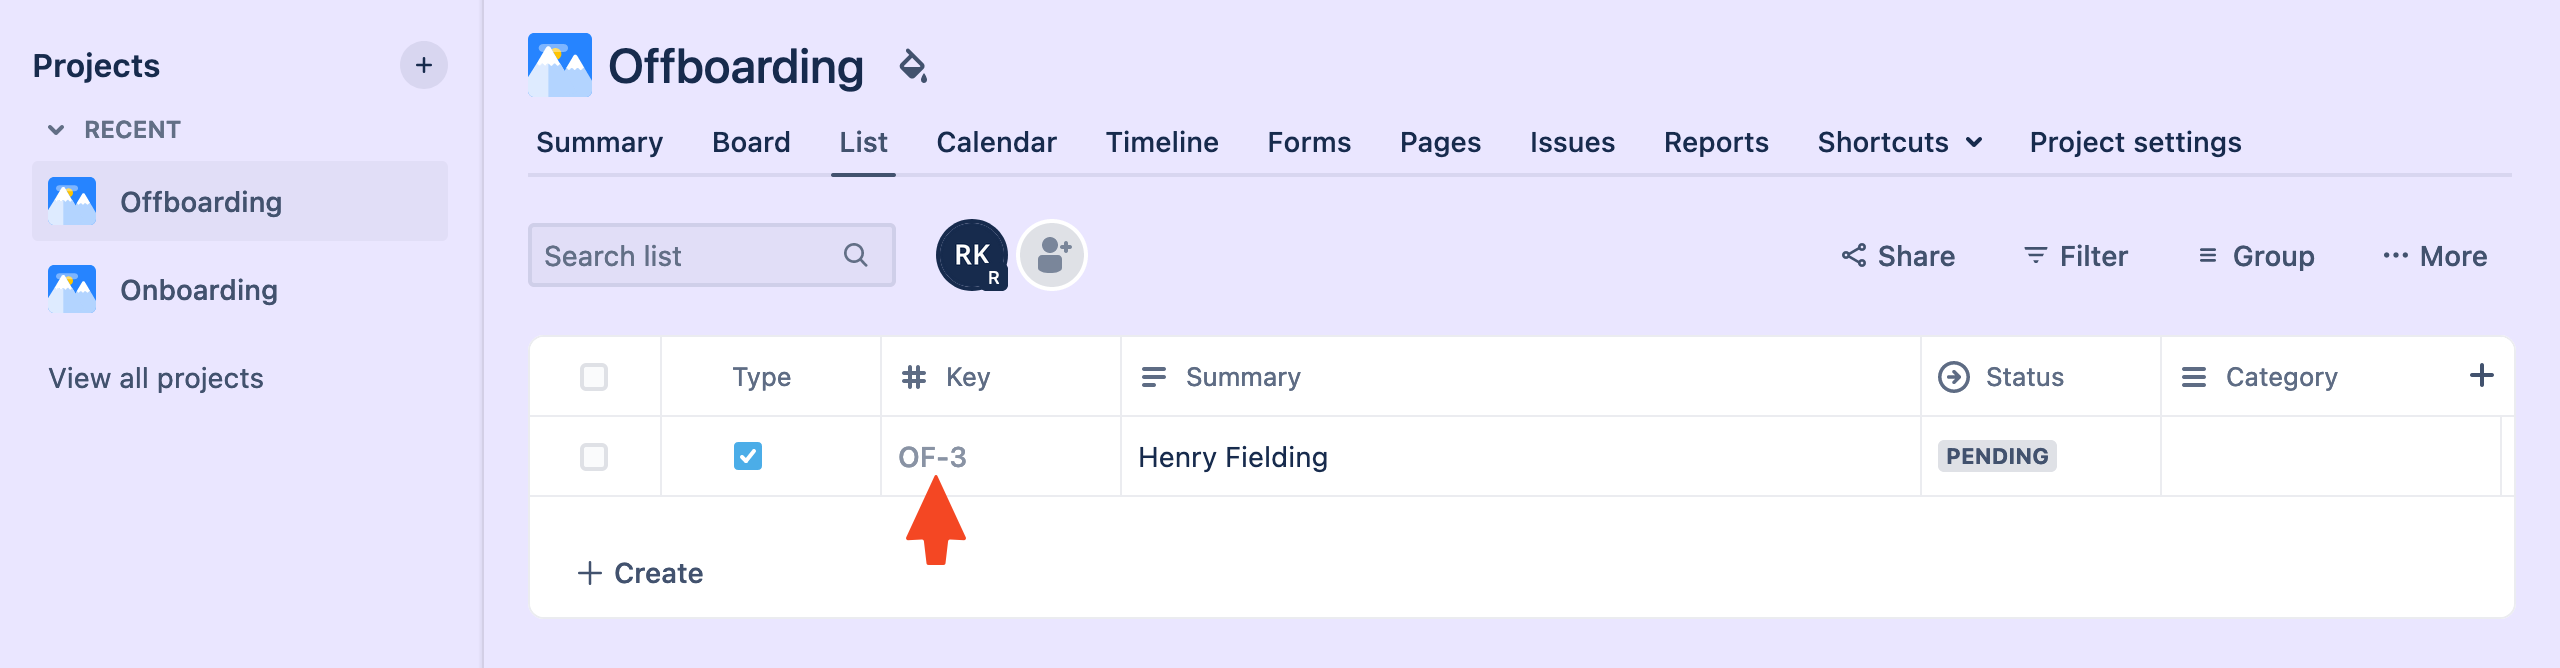
When you've created an issue, then find it and open it up:
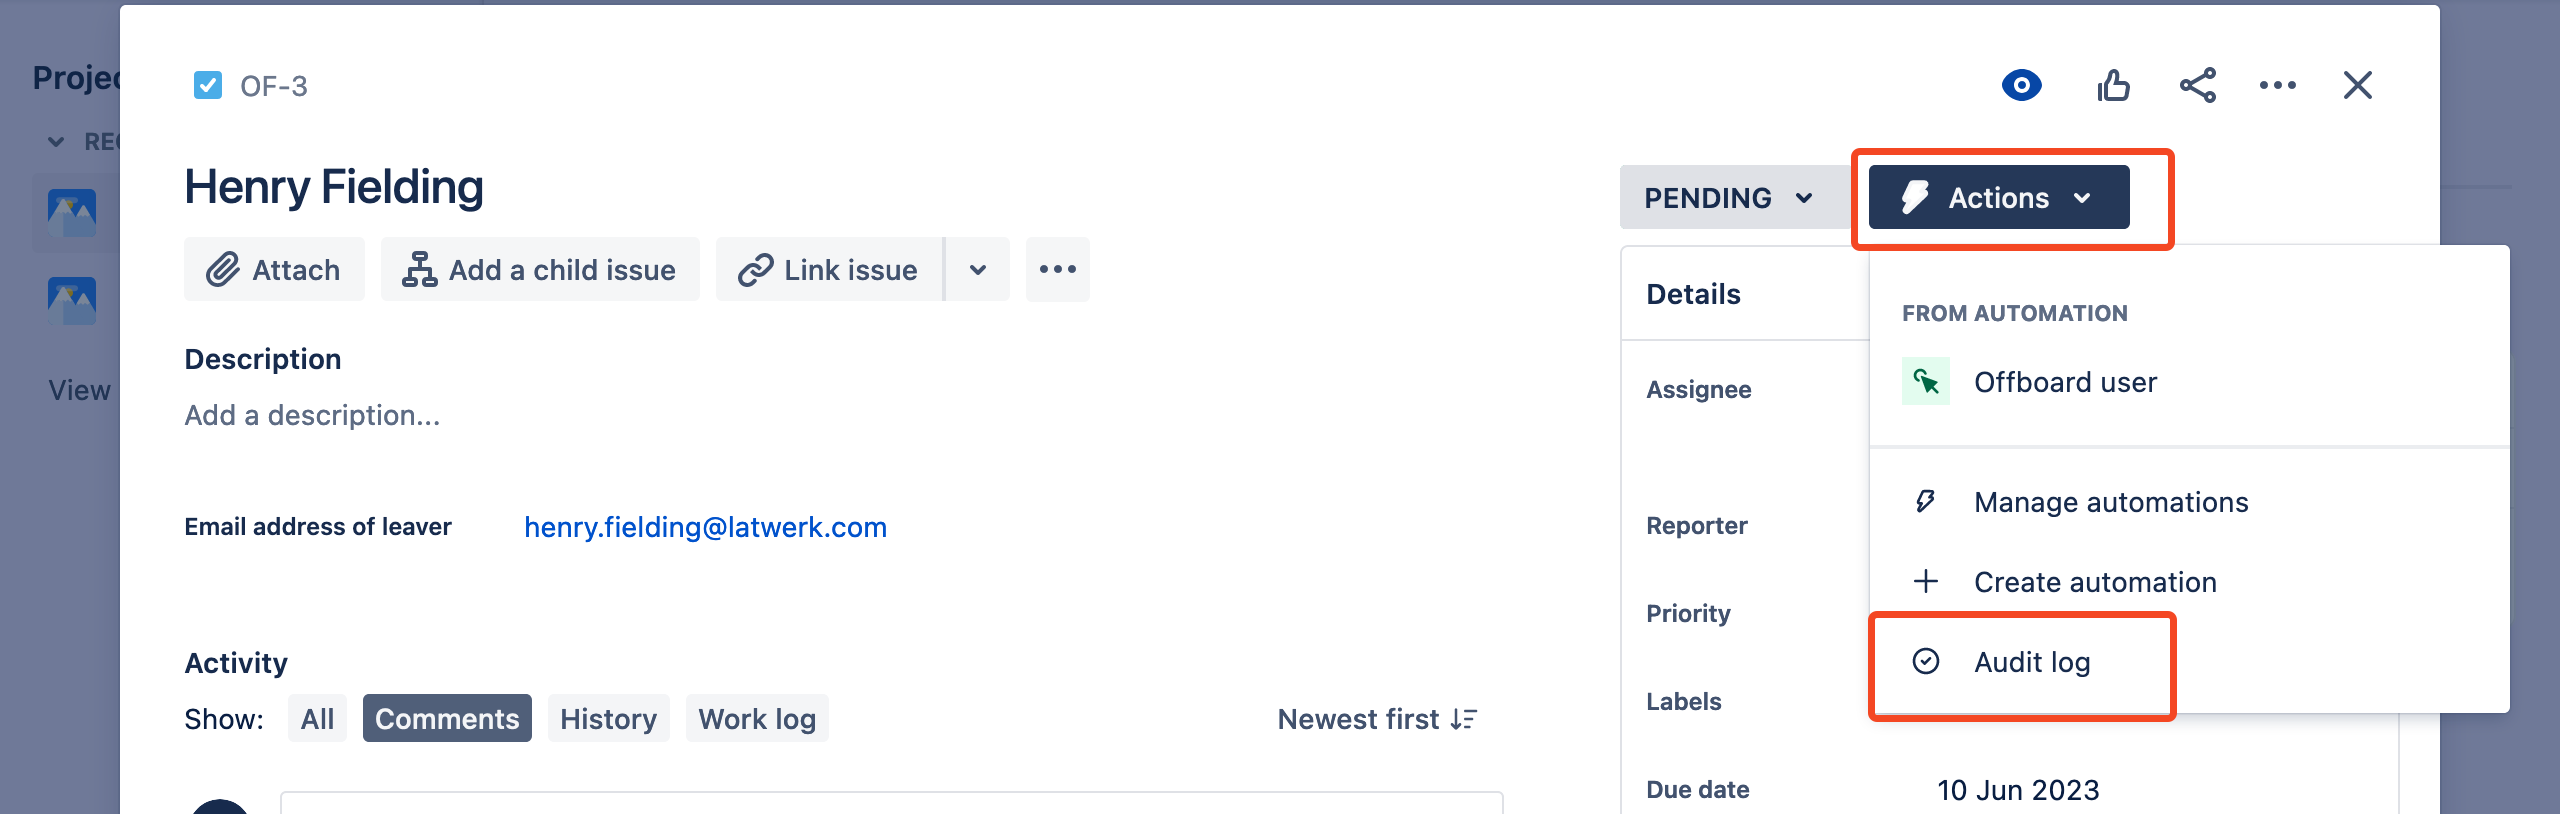
To run the automation, select Actions and then select Offboard user (or whatever you named your automation).

Jira will confirm that the automation has been run.
Check what happened in Jira and SaaS Manager
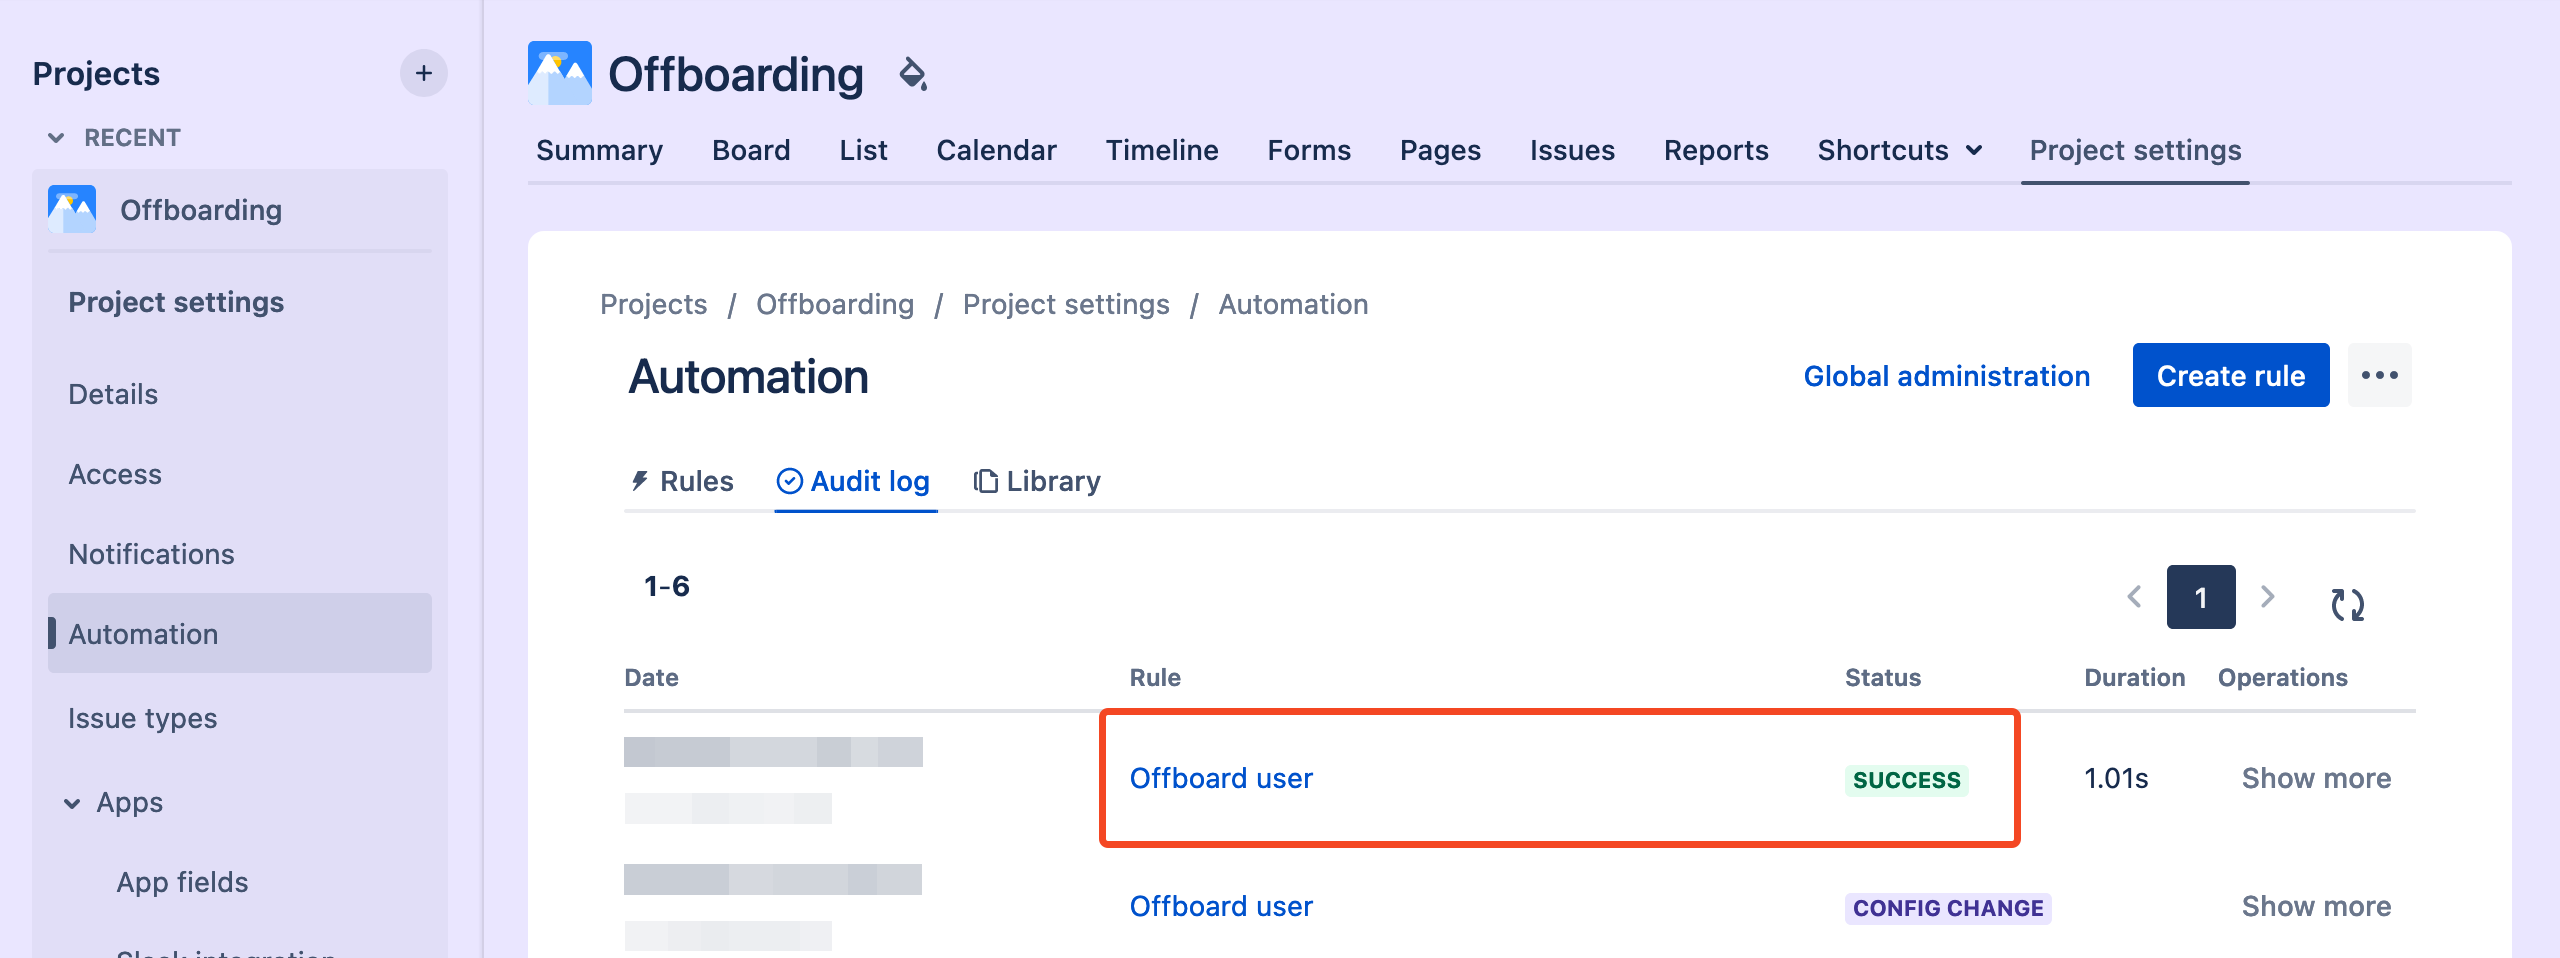
To check things from the Jira side, view the Automations Audit log.
To check what happened in SaaS Manager, select the workflow run.
You can expand the JSON to see what Jira posted.
Comments
0 comments
Please sign in to leave a comment.