When you try to connect Atlassian Cloud to 1Password SaaS Manager you will be asked for an Atlassian Organization ID and API key. This article shows you how to configure these.
Atlassian Cloud has different administrator roles. You must be an Organization Admin with Atlassian Cloud in order to connect with SaaS Manager.
As an Organization Admin, you may have received an invitation from someone in your IT team asking you to connect Atlassian Cloud to SaaS Manager.
The Atlassian Cloud integration will bring in information about users of Cloud Atlassian products like Jira Core, Jira Software, Jira Service Desk, Confluence, Bitbucket, and Trello.
Separate integrations are available for Jira (both self-managed and cloud versions).
To get started, log in to the Atlassian Admin portal.
Checking whether Atlassian Cloud is configured
Atlassian Cloud brings together all users from one or more specified domains that have Atlassian accounts into an organization directory. These accounts then become "managed" by your organization. You need to register at least one domain to start managing cloud accounts.
You can easily check whether you have done this.
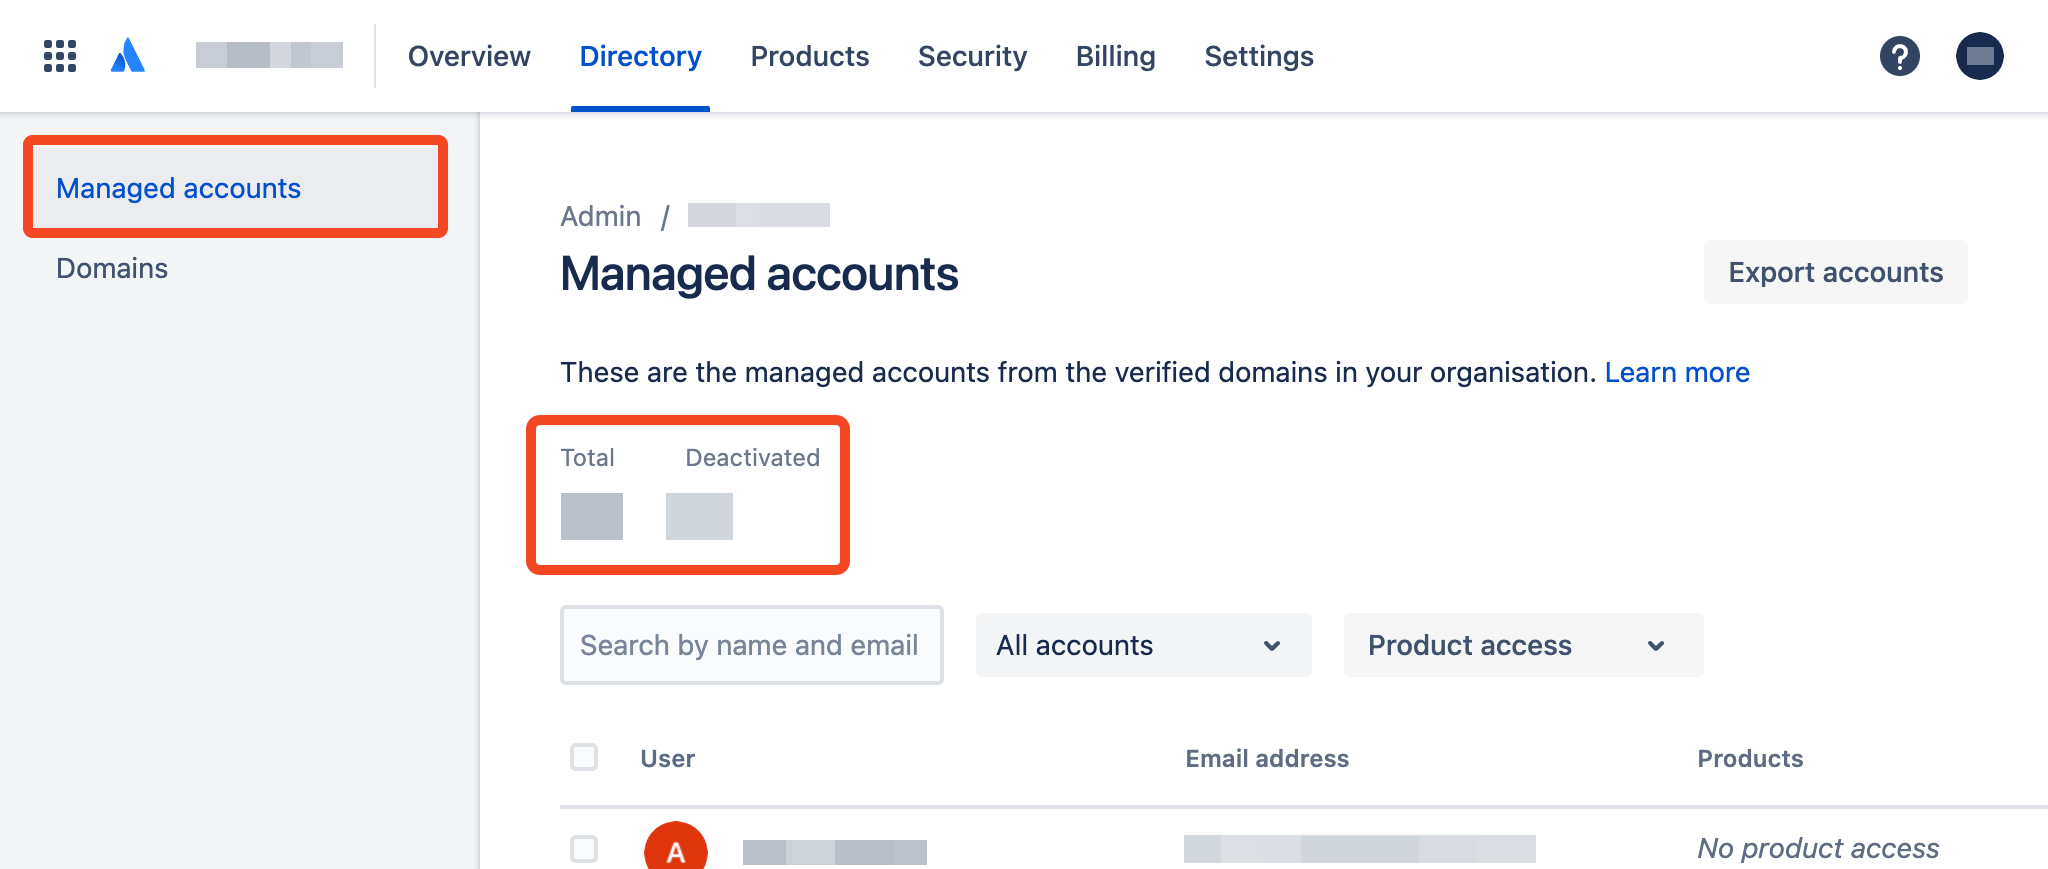
Go to Directory and choose Domains

Clicking on Managed accounts you should see a list of user accounts:
You need to have ownership of a domain to connect to Atlassian Cloud.
If you don't then please configure this under the Directory > Domains menu option.
Find out more about connecting Google Workspace to Atlassian Admin or if you are using a different Identity Provider, you will need to subscribe to Atlassian Access.
Creating an API key
Click on the Settings menu and choose API Keys:
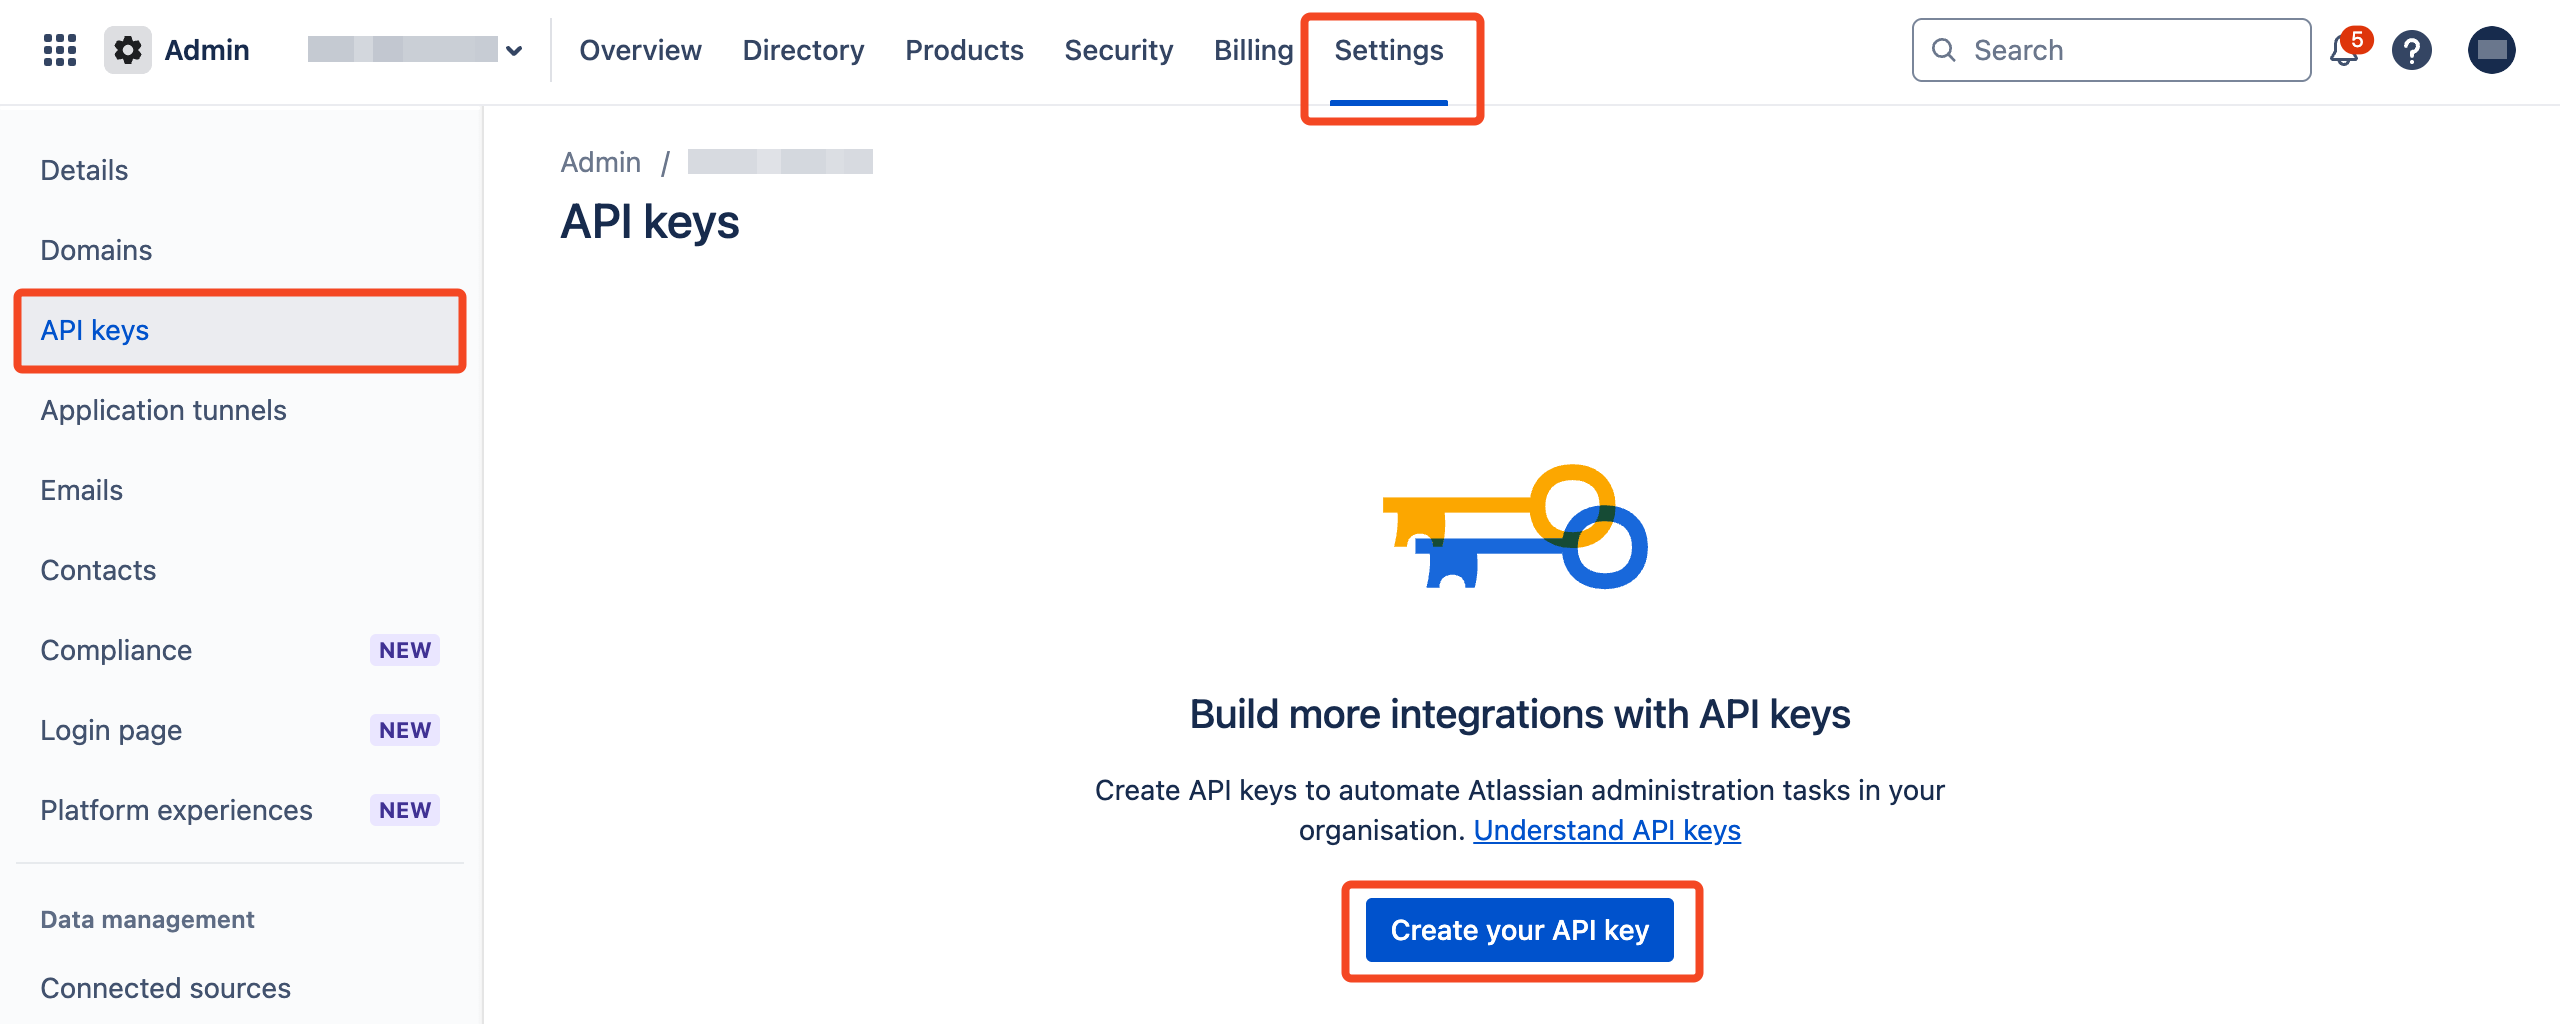
Click Create API key and choose API key without scopes:

In the dialog that appears, enter a name (e.g. SaaS Manager) and an expiration date. We suggest using the maximum expiry date which is 1 year from today. Then click Next.
You will be asked to confirm your selection. Click Create API key.
Finally you will see your Organization ID and API key:

You should copy these and paste them straight into SaaS Manager (in SaaS Manager, navigate to Integrations > Atlassian Cloud, then select Connect and you will be prompted to enter the organization ID and API key), or keep them secure until you are ready to configure the Atlassian integration in SaaS Manager.
Manage user provisioning and product access with Atlassian Access
Atlassian Access is a paid additional module for Atlassian Cloud which lets you manage user accounts.
If you do not pay for Atlassian Access you should consider using the SaaS Manager Jira Cloud integration.
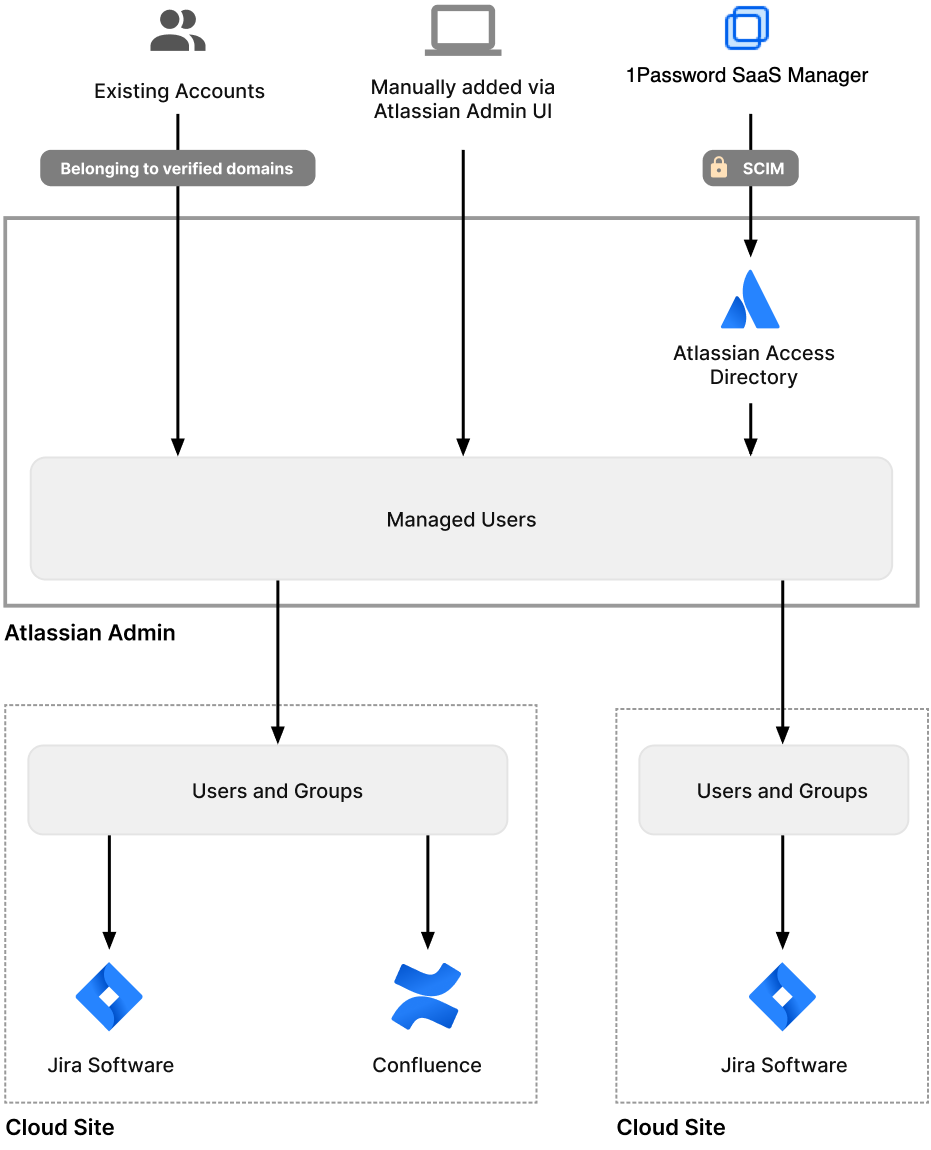
Atlassian Access provides a centralized directory of users that can be managed by a third-party service such as SaaS Manager using a protocol called SCIM.
Users or groups managed through Atlassian Access cannot be changed through the normal Atlassian Admin UI, only through the third-party service.
If you're already using Okta or another IdP for SCIM provisioning, we recommend deprovisioning through that IdP, e.g. using the Okta Disassociate user from App SaaS Manager workflow action.
You use the regular Atlassian Cloud Admin tools to assign groups and users managed through Atlassian Access to Atlassian products.
Creating an Atlassian Cloud Directory
If you need to configure a new directory go to Security > Identity providers.
Choose Other provider:

Enter a directory name, e.g. SaaS Manager and click Add.
When asked to connect your identity provider choose Set up user provisioning.
Click Next on the Before you begin step and take a copy of the SCIM base URL and API key on the Set up provisioning step:

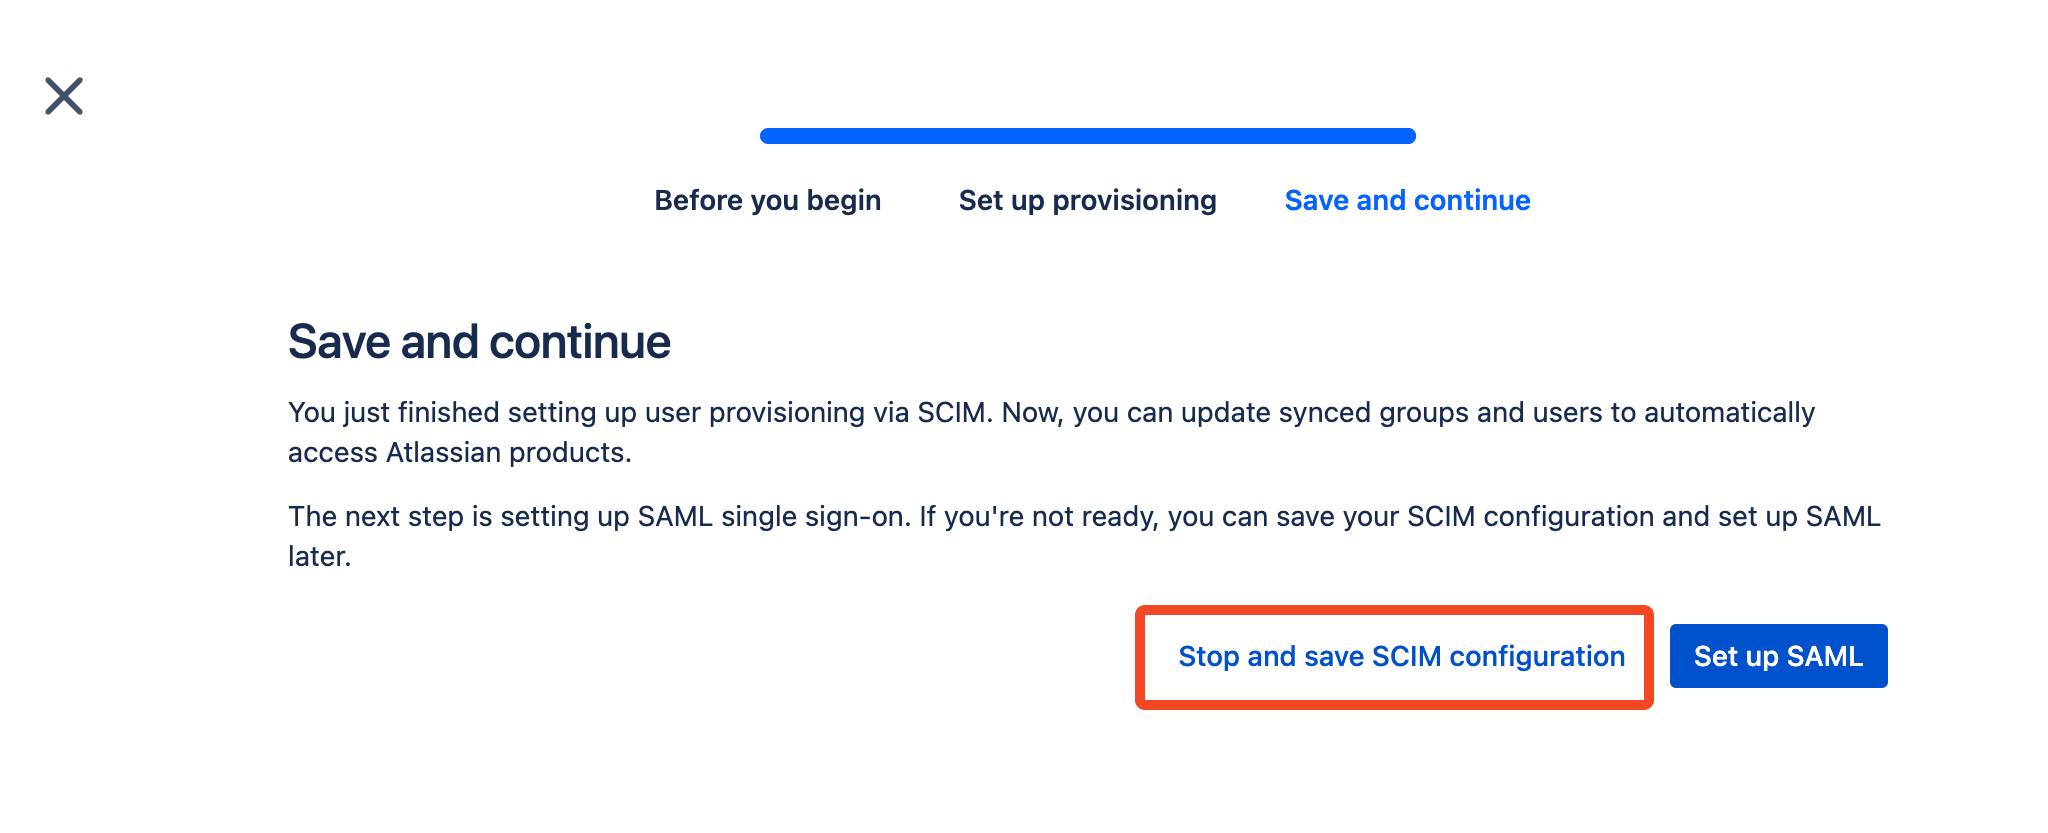
When you reach Save and continue, choose Stop and save SCIM configuration:
You can now ready to connect Atlassian Cloud to SaaS Manager.
Connecting to Atlassian Cloud
When you connect to Atlassian Cloud from SaaS Manager you must select the Provisioning checkbox, and as well as the Organization ID and API key described earlier in this article, you will need to enter the Directory base URL and Directory API Key.
These are shown when you first create the directory in Atlassian Access:

If you don't have these to hand then you can find the ID for the Directory by going to Directory > User provisioning > Groups tab
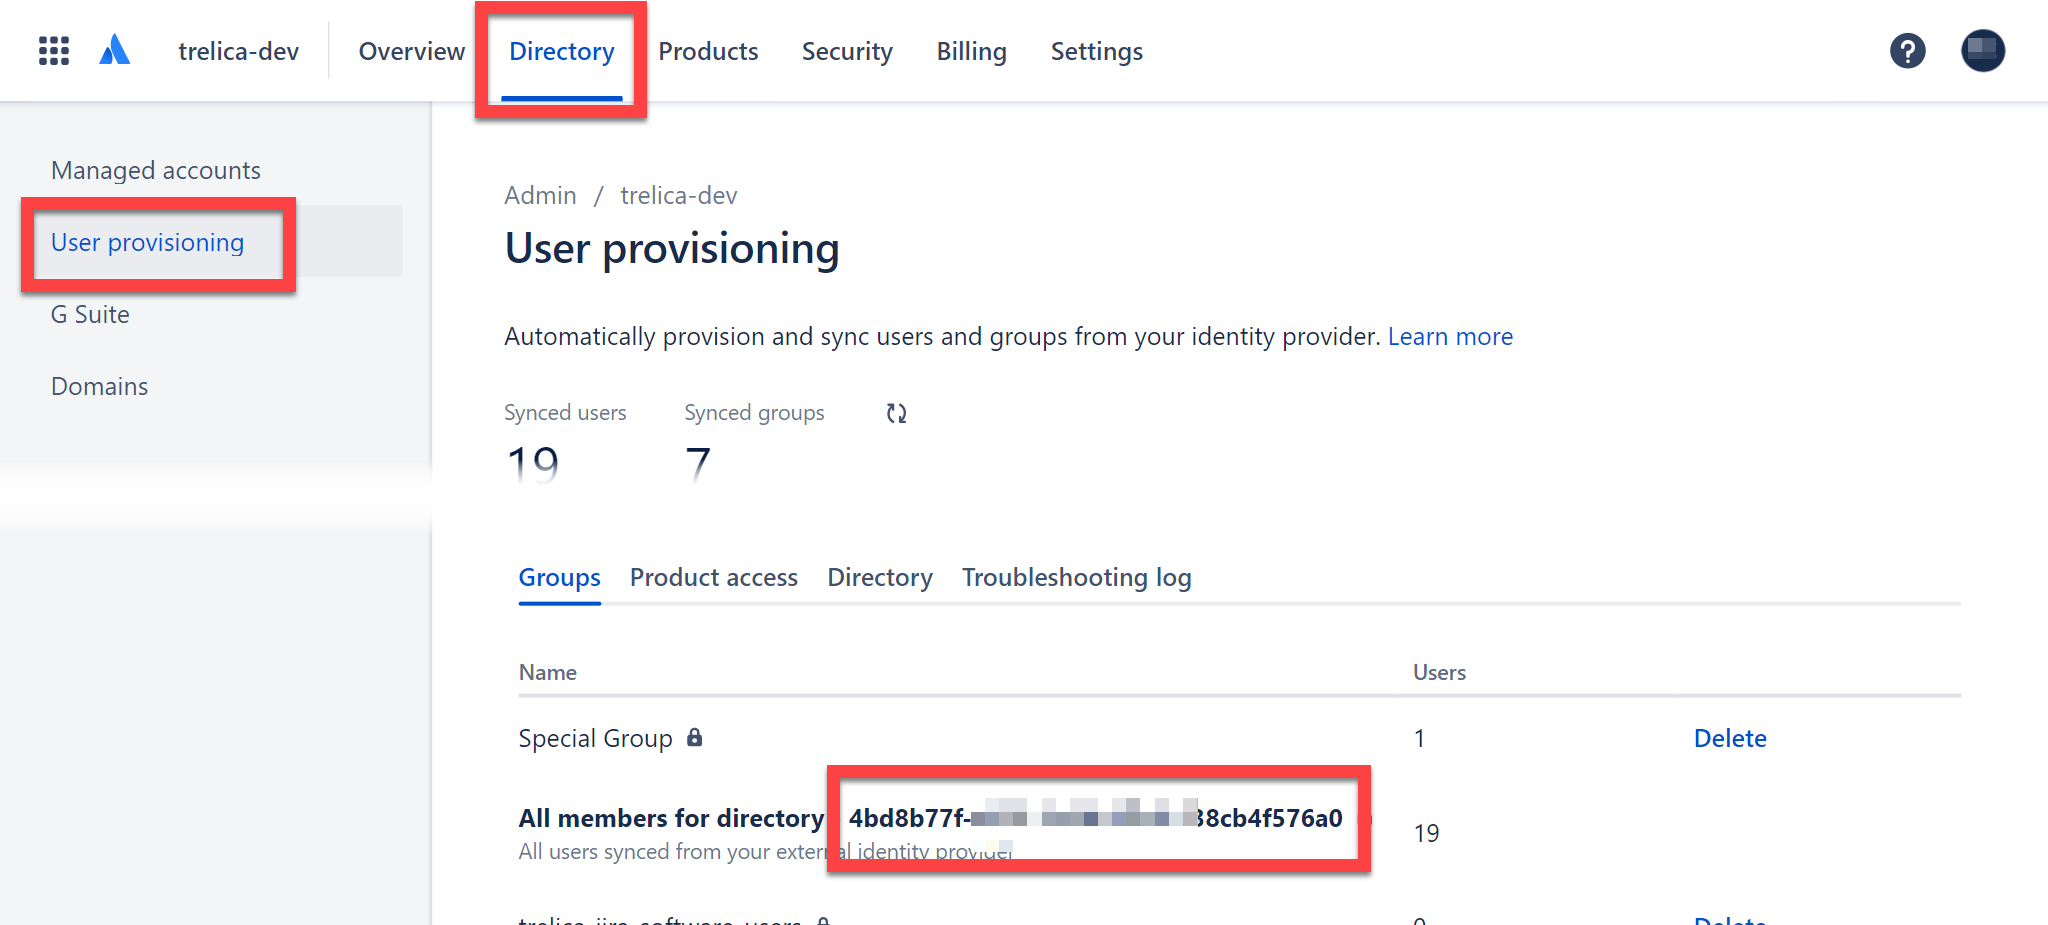
The Directory base URL will be https://api.atlassian.com/scim/directory/{ID}
To regenerate the API key go to Directory > User provisioning > Directory tab and click Regenerate API key:
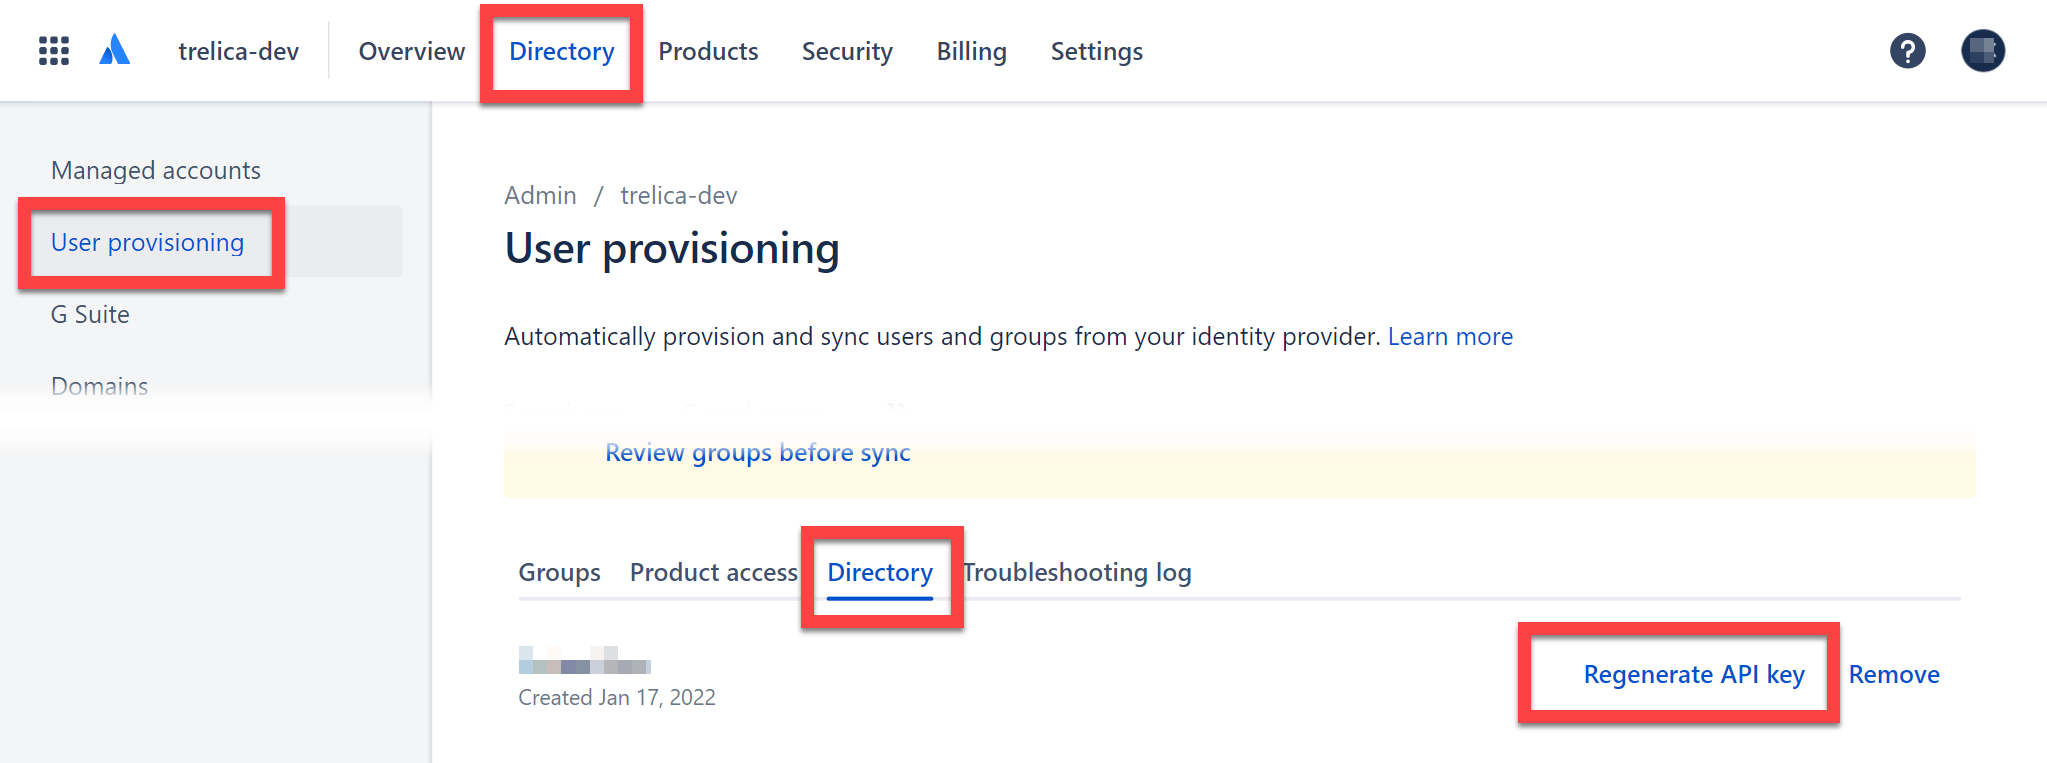
If you regenerate the API key then any other applications using the Directory will need to be updated with the new key, as the previous key will be invalidated.
Groups
When SaaS Manager connects for the first time it creates four new groups in the Atlassian Access Directory:
- saas-manager-jira-core-users
- saas-manager-jira-servicedesk-users
- saas-manager-jira-software-users
- saas-manager-confluence-users
These mirror the standard Atlassian Admin default groups for assigning users to applications.
You will need to manually assign these groups to the relevant products under the Product access tab:
Choose Add group:
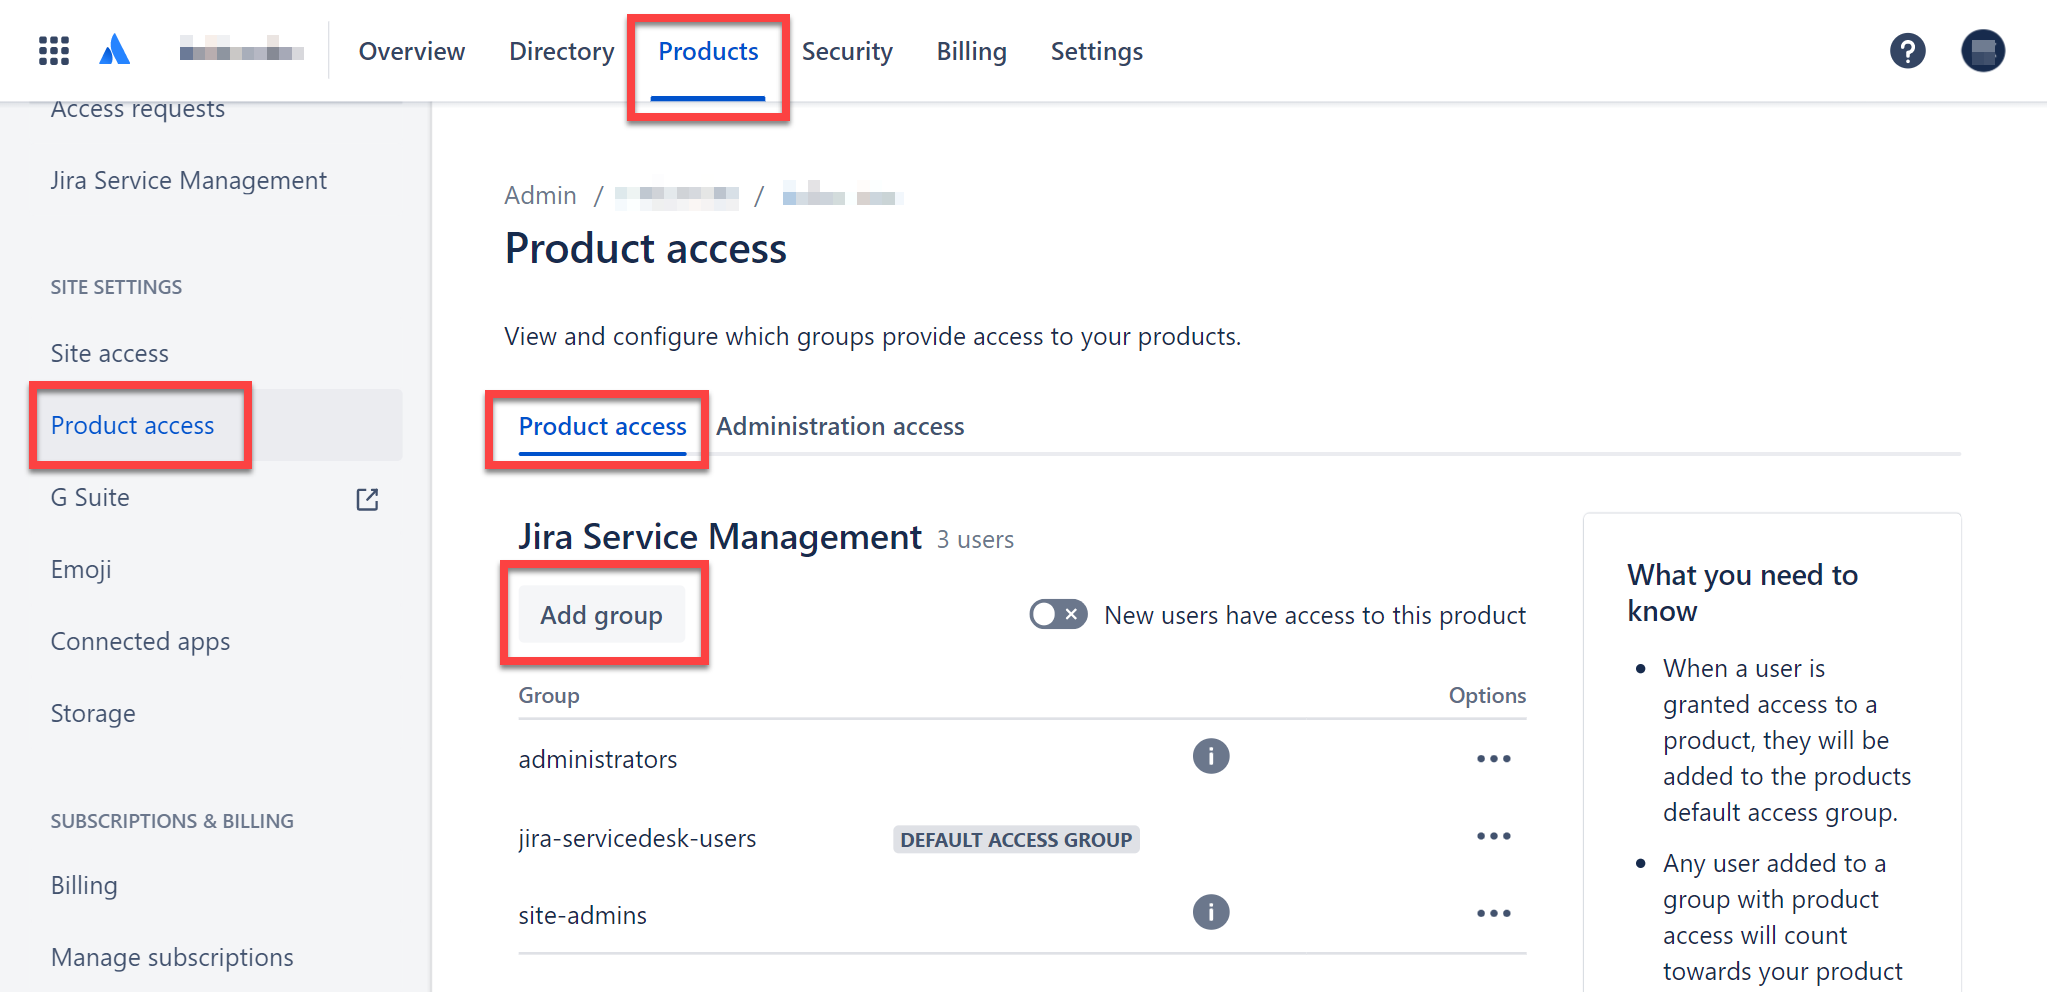
Search for the relevant group and click Add groups.
You will see a message confirming that access has been updated. There appears to be a bug in Atlassian Access which means that you only see the group in the list after you refresh the page.
In SaaS Manager you can now provision users to Atlassian applications by assigning users to these groups.
Related to
Comments
0 comments
Please sign in to leave a comment.