When new employees join an organization, they usually need to be given access to a number of apps and IT systems. However, setting up accounts for new starters manually can be a laborious process.
You can use 1Password SaaS Manager to manage IT onboarding for new employees and contractors, thereby streamlining the process and reducing the risk of mistakes. For apps with suitable integrations, you can provision new user accounts automatically. For apps that don't support this, you can assign provisioning tasks to the app owner or IT liaison and use these to keep track of whether users have been provisioned manually.
The SaaS Manager App catalog complements automated onboarding by allowing individuals to request additional apps when they need them. In the event that a user is granted access to an app that they subsequently don't use, you can automate deprovisioning to recover unused app licenses.
When an employee leaves or a contractor's engagement finishes, you can also use SaaS Manager to revoke their access to apps automatically with automated offboarding.
Onboarding prerequisites
Automatic onboarding requires an accurate starting date for each new employee or contractor. You specify the source of this information by setting the lifecycle source. This is usually an HR system or your Identity Provider (IdP).
If the lifecycle source is an HR system, you can use SaaS Manager to add new starters to your IdP as well as to other apps. If you want to provision new employees' IdP accounts from SaaS Manager, keep in mind the following:
- You will need to know how employee email addresses are formed (e.g. {firstName}.{lastName}@company.com). For example, consider how the email address for Elise van der Linden Vooren would be rendered.
- You will need a mechanism for informing new starters of their organization email address and login details. This could involve sending the details to their line manager or to a personal email address. In either case, this information needs to be provided (either as part of the HR system integration or manually).
If the lifecycle source is your IdP, an organization email address will already exist for the new starter so these considerations are not relevant.
Identify the apps you want to include
You can use access policies to identify the apps that everyone in your organization should have access to (such as your employee benefits system) and apps that everyone in particular teams requires to do their work. You can then use an onboarding workflow to grant new starters access to the appropriate apps.
We recommend starting small and building up your onboarding logic incrementally. With the exception of your Identity Provider (such as Google Workspace, Okta, JumpCloud or Microsoft Entra ID), create access policies for one or two apps initially so you can test the process. You can then add access policies to more of your managed apps without updating your onboarding workflow. When you create an access policy, you specify whether new users should be provisioned directly via an integration with SaaS Manager, or manually by assigning a task to the app owner.
If you do not want to use access policies, you can add provisioning steps for individual apps. To check whether SaaS Manager can provision user accounts for a particular app, refer to the app-specific guidance in the Integrations section. You may need to grant SaaS Manager additional permissions or generate an API key for the app in order to enable automatic provisioning. In some cases, automatic provisioning is only available for an app with certain license tiers. If automatic provisioning is not supported for an app, you can configure the workflow to assign tasks or send Slack messages, Microsoft Teams messages or emails to individual(s) within your organization.
Configure an onboarding workflow
You can configure one or more workflows to grant individuals access to apps when they join your organization. The exact workflow logic will depend on your organization's needs and can include:
- A Slack message, Teams message or email to the new starter's line manager to confirm that the individual should be onboarded. This provides a useful validation step when you first enable an onboarding workflow. This is also useful if you are concerned that your lifecycle source may supply incorrect starting dates.
- If you're using an onboarding workflow to add individuals to your IdP, include a step to provision the IdP user account before provisioning any other apps so that the new starter's organization email address is available.
- Steps to provision user accounts for specific apps. You can generate these steps automatically based on your access policies, or add steps for individual apps. If you're using Okta or JumpCloud, you can add steps to provision user accounts for supported apps via your IDP.
- If you're not using access policies and you want to grant new starters access to apps that do not support automatic provisioning via SaaS Manager, add a step to provision the user account manually. You might want to send a Slack/Teams message or email to the individual responsible for the app asking them to create the new user account and confirm when they have done so. Alternatively, you can assign tasks to the app owner and use these to keep track of onboarding progress.
To configure an onboarding workflow, from your SaaS Manager dashboard, navigate to the Workflows tab and then select Create. The New Workflow page is displayed. Select Start from scratch, add the Person joins trigger, then select Create.
Configure the "Person joins" trigger
The "Person joins" trigger initiates workflow runs based on individuals' starting dates. You can restrict the workflow to employees or contractors, or create one workflow for both person types.
The workflow is triggered automatically when the individual's starting date (provided by the lifecycle provider or entered manually in the People directory) matches the current date.
You can specify when the workflow runs relative to that date. We recommend provisioning app access either on or shortly before an individual's start date, both to reduce license costs and to avoid issues with invitation links expiring. If you need to trigger onboarding earlier (for example, to allow time to prepare laptops and other devices), you can use a wait step to delay app provisioning and other steps, as described below.
Add provisioning steps for your IdP
If your lifecycle source is an HR system rather than your IdP, we recommend starting the onboarding process by adding new starters to your IdP. This will create their organization email address, which can then be used to provision other app accounts.
To add a provisioning step for your IdP, select the + icon below the workflow trigger and then filter the list of steps by your IdP.
If your IdP is Okta or JumpCloud, you can add further steps to add the new starter to a group and then associate the user with particular apps. Associating a user with an app in Okta or JumpCloud prompts the IdP to provision their user account and allows the user to log in to the app via single-sign-on.
Access policies should not be used to add users to your Identity Provider.
Provision users via an access plan
You can define access policies to identify "birthright" apps for individuals in your organization, based on their team. Birthright access policies make it easy to grant access to:
- Apps that are required by everyone in your organization, such as your employee benefits system or internal messaging platform.
- Apps that are always required by members of particular teams. For example, access to a finance system might be essential for members of the accounts team, but not routinely required by anyone else.
If you have configured one or more birthright access policies, you can use an onboarding workflow to identify each new starter's birthright apps and provision their access. Select the + icon at the bottom of the workflow diagram (or select the node between two existing steps) and add the following steps:
- Add the Generate access plan workflow step to identify the new starter's birthright apps based on their team and create an access request. By default, the request records the new starter's line manager as the assigner of the apps, but you can change this as required.
You can also choose to skip the approval process for all apps in the access plan. This is useful if you have created a single access policy for both requestable and birthright apps, but you only want to apply the approval process when access is requested from the App catalog or the app profile. - If you want to customize the access plan, add the Raise access plan workflow step. You can use this to override the planned access level or skip the approval process for apps that are already included in the access plan. You can also use this step to add apps to the access plan that would not otherwise be included (such as apps that only have a requestable access policy).
- Select Add application to choose apps to add to the access plan or to override the access level and/or approval process for apps already included in the plan. Only apps with at least one access policy and access level are listed.
- Select Lookup table to identify apps and access levels using a lookup table. This is useful if you're using an API webhook to trigger the workflow from Jira. The lookup table should list each of the apps that can be included in the request from Jira, with an associated access level. For assistance setting up the lookup table, contact SaaS Manager support and customer success.
- Add the Run access plan workflow step to provision access for each of the apps in the access plan.
When the workflow runs, SaaS Manager creates an access request for each birthright app (based on the new starter's team) together with any other apps that have been added to the plan. Access is then provisioned in accordance with the access policy and selected access level. These determine:
- Whether the access request needs to be approved and by whom.
- The license and role granted to the new app account.
- Whether access is provisioned directly via an integration or whether a task is raised for manual provisioning. (If provisioning is set to "Off", an access request is recorded but no further action is taken.)
- Any additional actions that need to be performed.
For more information about configuring birthright access policies, see Manage access to apps.
Add provisioning steps for specific apps
If you have not configured access policies or you want to provision access to apps that are not managed, you can add workflow steps to provision accounts for apps directly. The provisioning steps that are available depend on the integrations you have configured and each app's capabilities.
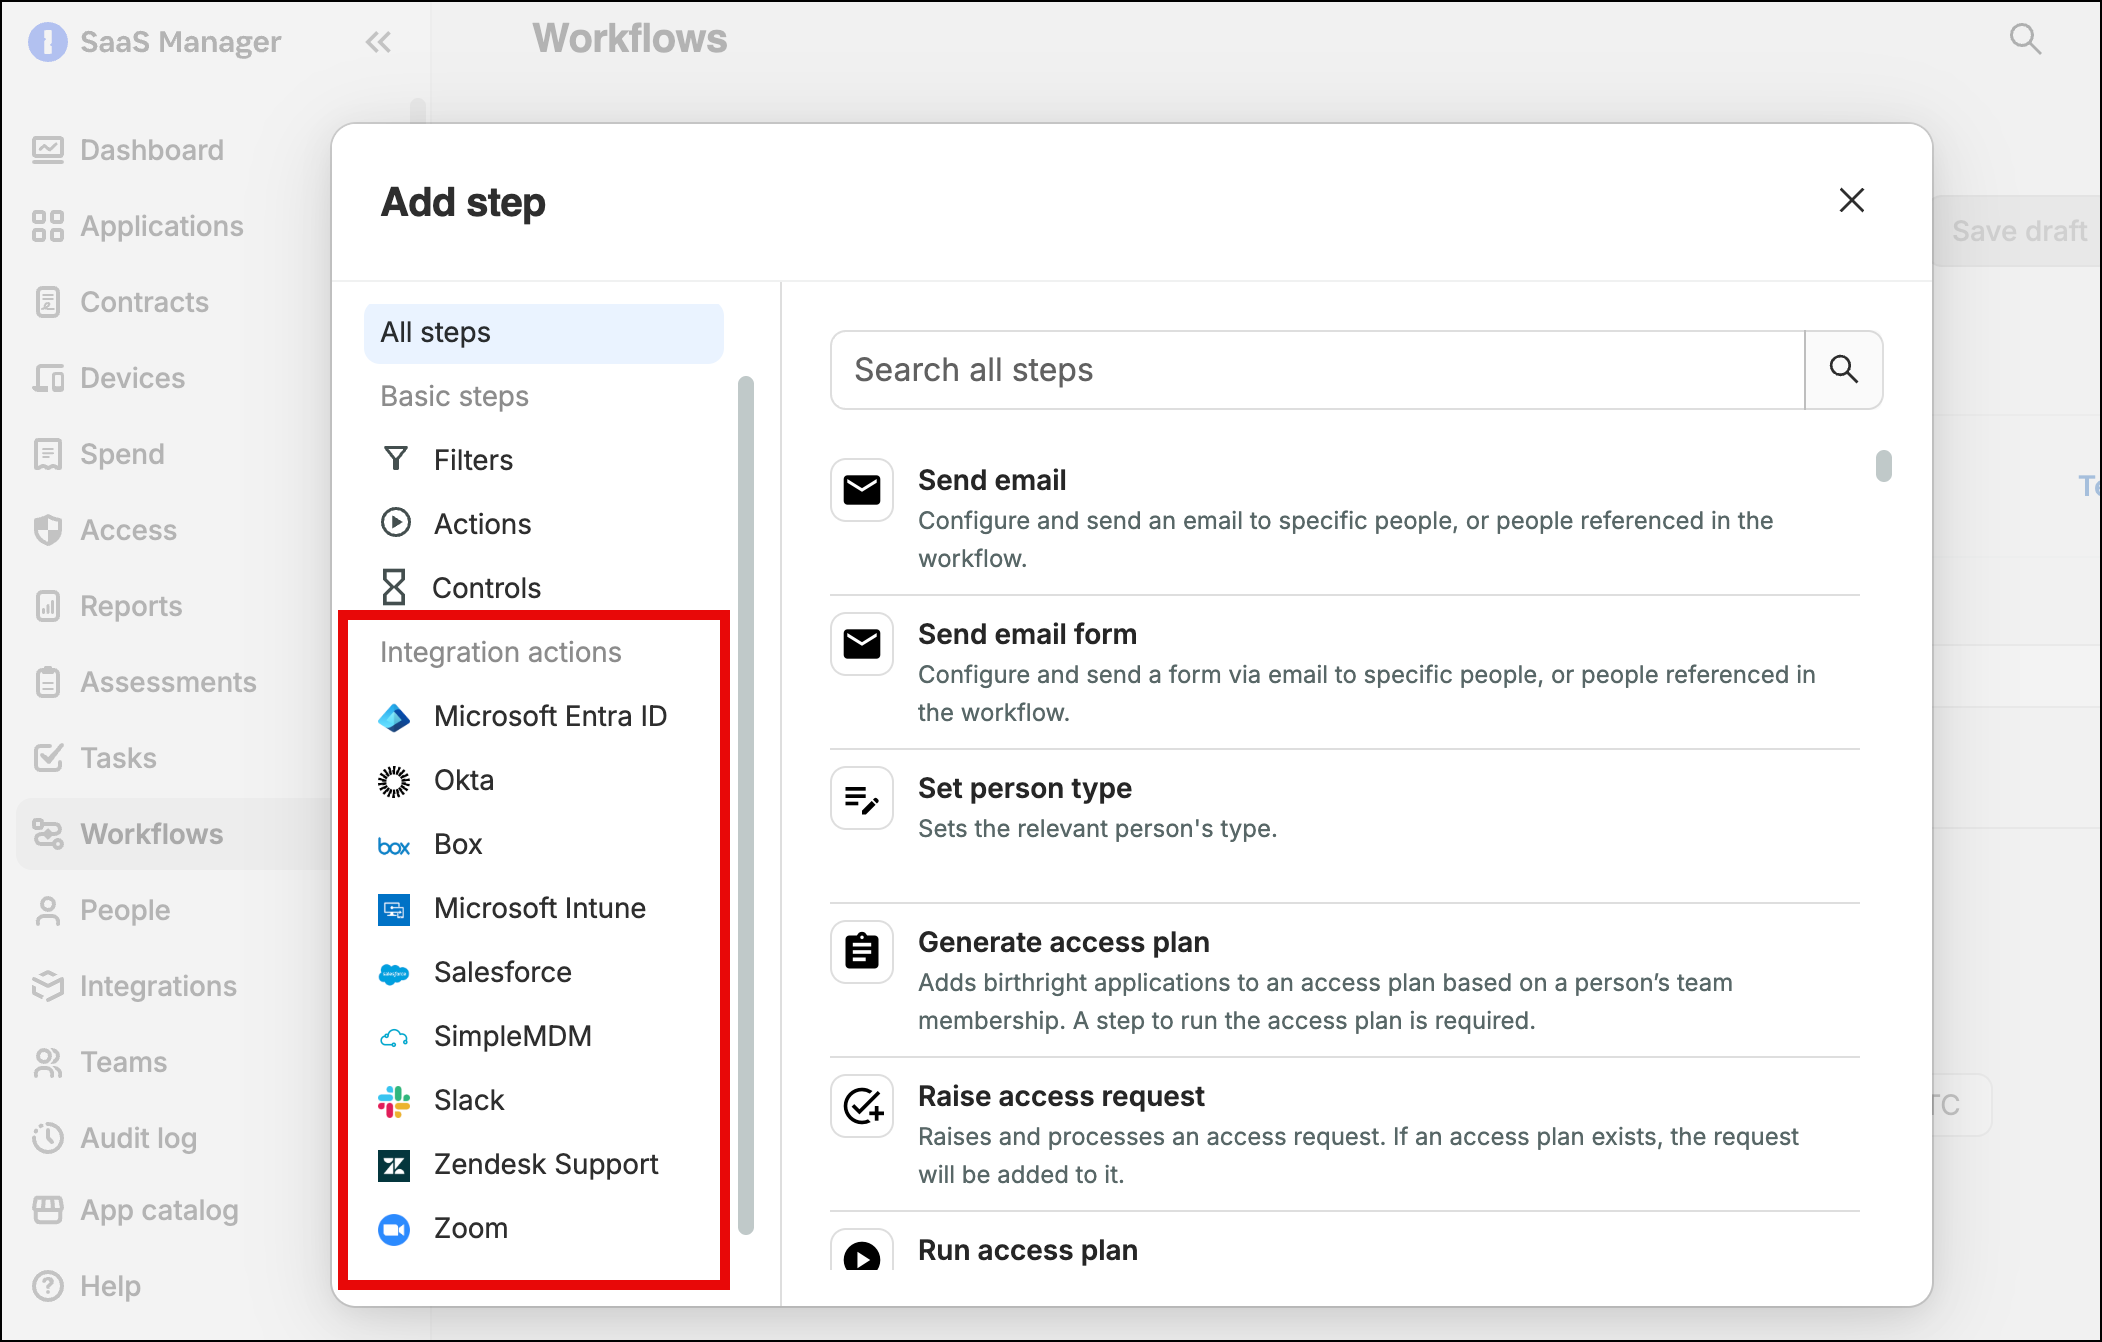
To add a provisioning step, select the + icon at the bottom of the workflow diagram (or select the node between two existing steps) and then filter the list of steps by the relevant app integration.
Depending on the app, the provisioning step may result in:
- The app sending an email invitation containing a link that the user must follow in order to complete the account creation process.
- The app creating an account and sending an email invitation containing a link that the user must follow in order to activate the account and set their password.
- The app creating an account without sending an email. In this case, you can use SaaS Manager to set the account password and then add an email step to send a notification to the user with a link to reveal their password.
For further information, refer to the app-specific guidance in the Integrations section.
Request manual account provisioning
If you want to provision user accounts for apps without access policies that do not support automatic provisioning, you can add workflow steps to ask individuals to create user accounts manually. This can be in the form of a Slack message, Teams message or email notification, or you can assign tasks to individuals with access to SaaS Manager.
To send the request to a user in a particular role for the app (such as the App owner or IT admin), first add a "Set temporary context" step and specify the relevant app. Then, add any steps relating to the selected app.
Delay a step
You may want to delay one or more workflow steps until closer to the individual's start date. For example, if you have configured the "Person joins" trigger to run 10 days before the new starter's start date so that you can prepare hardware, you might want to delay sending a welcome email containing temporary passwords and other useful information until the morning of their start date to ensure the message is at the top of their inbox.
You can delay workflow steps by adding a "Wait" step. You can either specify a period of time or a point in the future relative to the person's start date or the date on which the workflow was triggered. When specifying a defined date, you can choose whether to use the new starter's time zone or UTC.
Enable automatic onboarding
Once you have configured your onboarding steps, you can test the process by running the workflow manually for a specific person. At the top of the workflow editing page, expand the menu, select Run now and choose a person from the list.
When you are ready, enable the workflow. The workflow will run each time the trigger criteria are met (for example, each time there is a person with a start date two days in the future).
You can see whether your onboarding workflow has been triggered from the workflow runs page and check the status of new starters from the People directory. For more information, see View the status of automated onboarding and offboarding.
Comments
0 comments
Please sign in to leave a comment.