For the Jira family of products where your organization is hosting the software, e.g. Jira Server or Jira Data Center.
This applies to Jira, Jira Service Management and Jira Software where your organization is hosting Jira. It does not apply to Jira products running in Atlassian Cloud. In this case, please see the Atlassian Cloud integration for 1Password SaaS Manager instead.
Configure Jira
Generate an RSA public/private key pair
Run the following openssl commands in a terminal window. You can do this anywhere in your file system, but note that this is where the files will be created.
Generate a 1024-bit private key:
openssl genrsa -out jira_privatekey.pem 1024
If you're using openssl v3 then you may need to do:
openssl genrsa -traditional -out jira_privatekey.pem 1024Alternatively try:
ssh-keygen -t rsa -b 1024 -m PEM -f myFile.pem -N ""To check what version you're using use openssl version
Create an X509 certificate. You will be prompted for various bits of information. Fill this in as best you can, although the specific details are not particularly important.
openssl req -newkey rsa:1024 -x509 -key jira_privatekey.pem -out jira_publickey.cer -days 365
Extract the public key from the certificate to the jira_publickey.pem file:
openssl x509 -pubkey -noout -in jira_publickey.cer > jira_publickey.pem
Create an application link
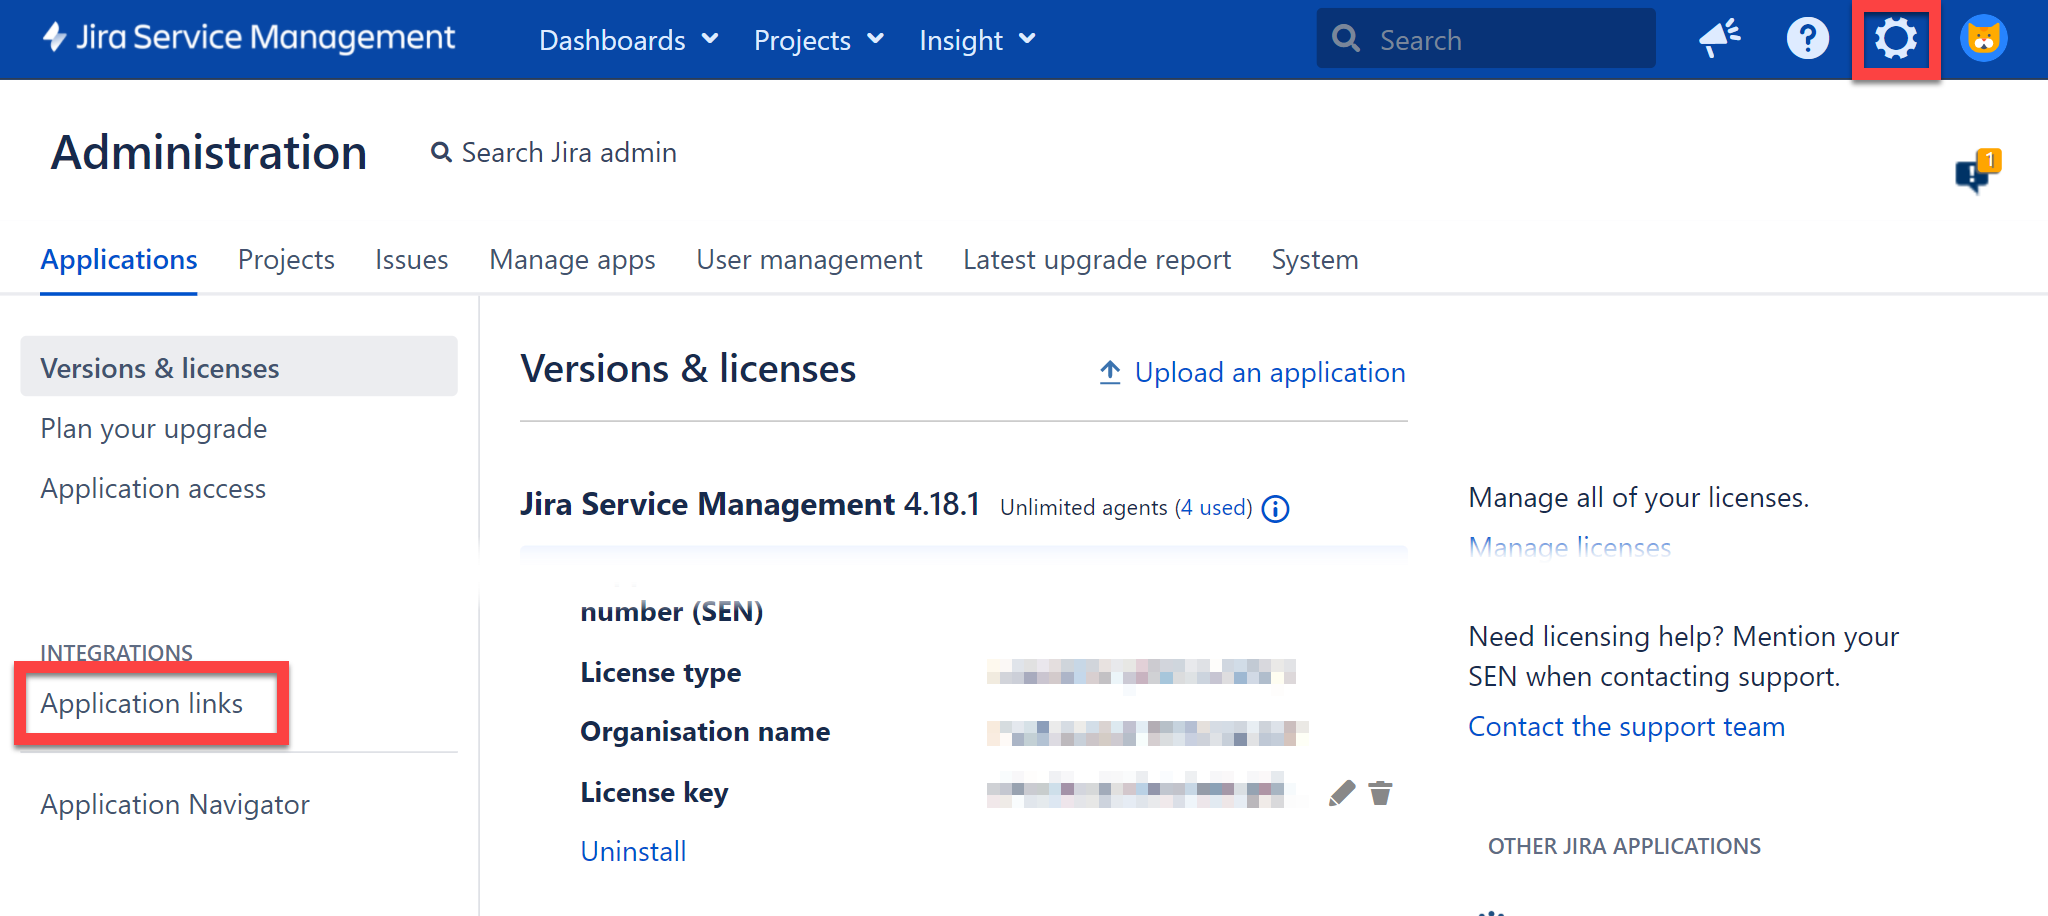
In Jira, navigate to Jira settings (cog icon) > Applications > Application links.

-
Jira Data Center
Click Create link and then choose Atlassian product
Enter the URL
https://trelica.app, and then click Create new link.If your data is hosted in our EU cloud then please substitute
https://trelica.appforhttps://trelica.euin the input.
Click Continue
Ignore the message 'No response was received from the URL' and click Continue again.

-
Jira Server
In the Enter the URL of the application you want to link field, enter the URL
https://trelica.app, and then click Create new link.If your data is hosted in our EU cloud then please substitute
https://trelica.appforhttps://trelica.euin the input.
Ignore the warning about the Application URL redirecting, click Use this URL and click Continue.

Final steps creating the application link
On the first screen of the Link applications dialog, enter SaaS Manager as the Application Name. You can ignore the other fields. Make sure that Create incoming link is unchecked.
Click Continue. A message will appear confirming that the link has been created successfully.
Edit the application link
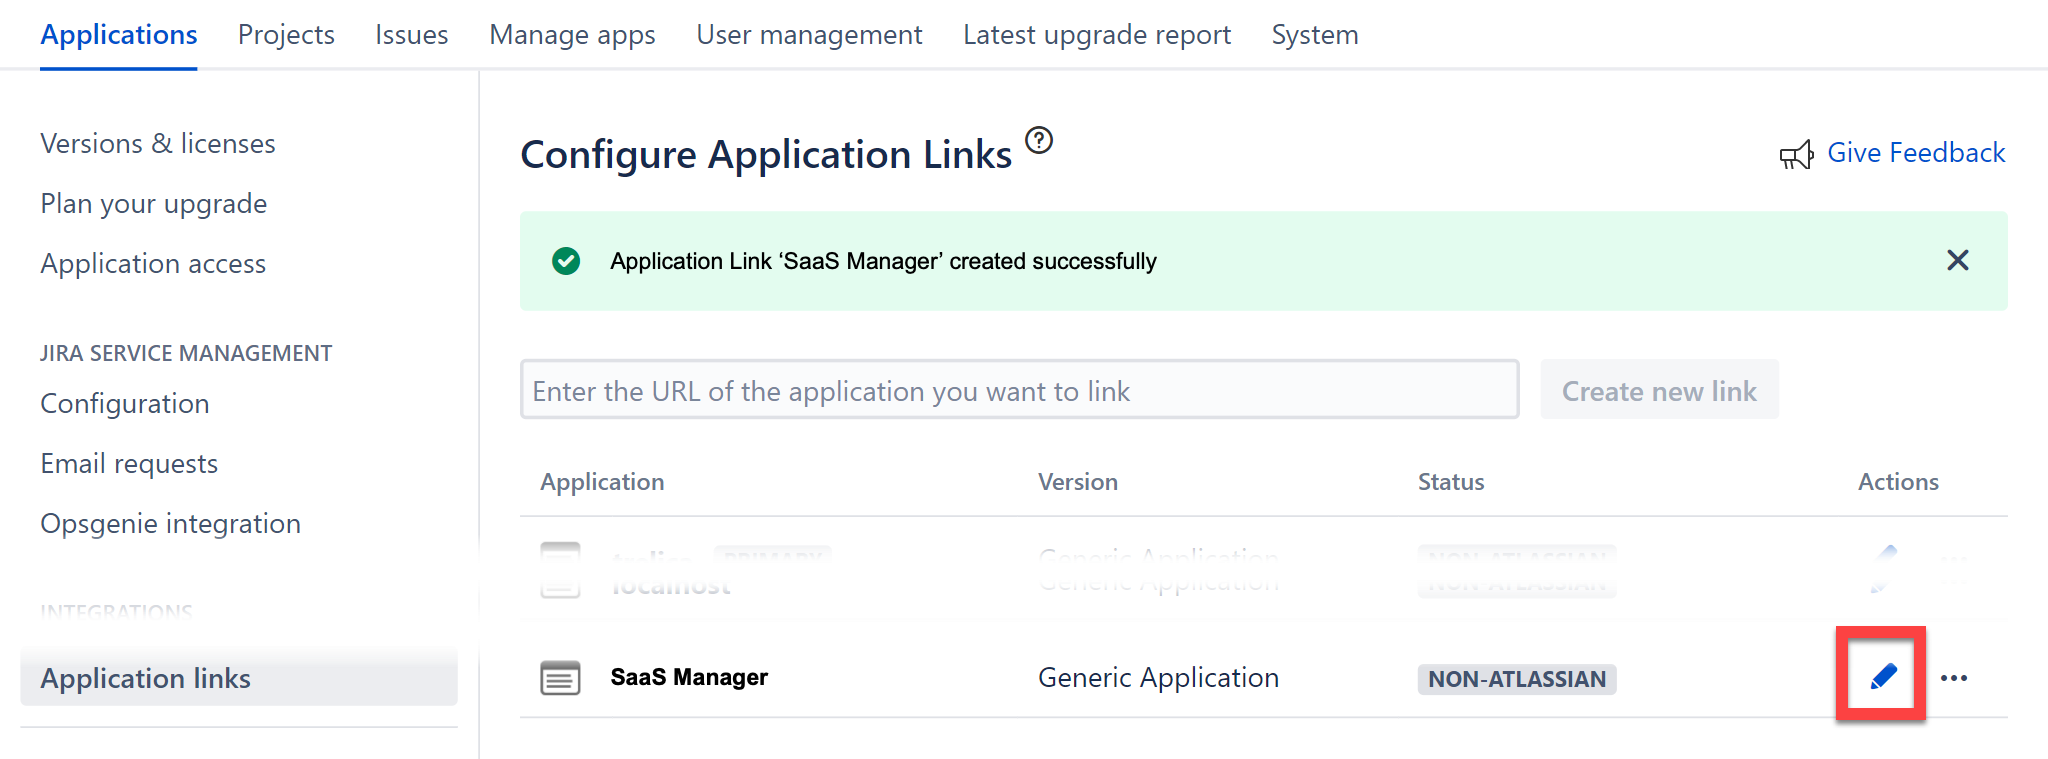
Find the new link in the list, and click the Edit (pencil) icon to edit the link:

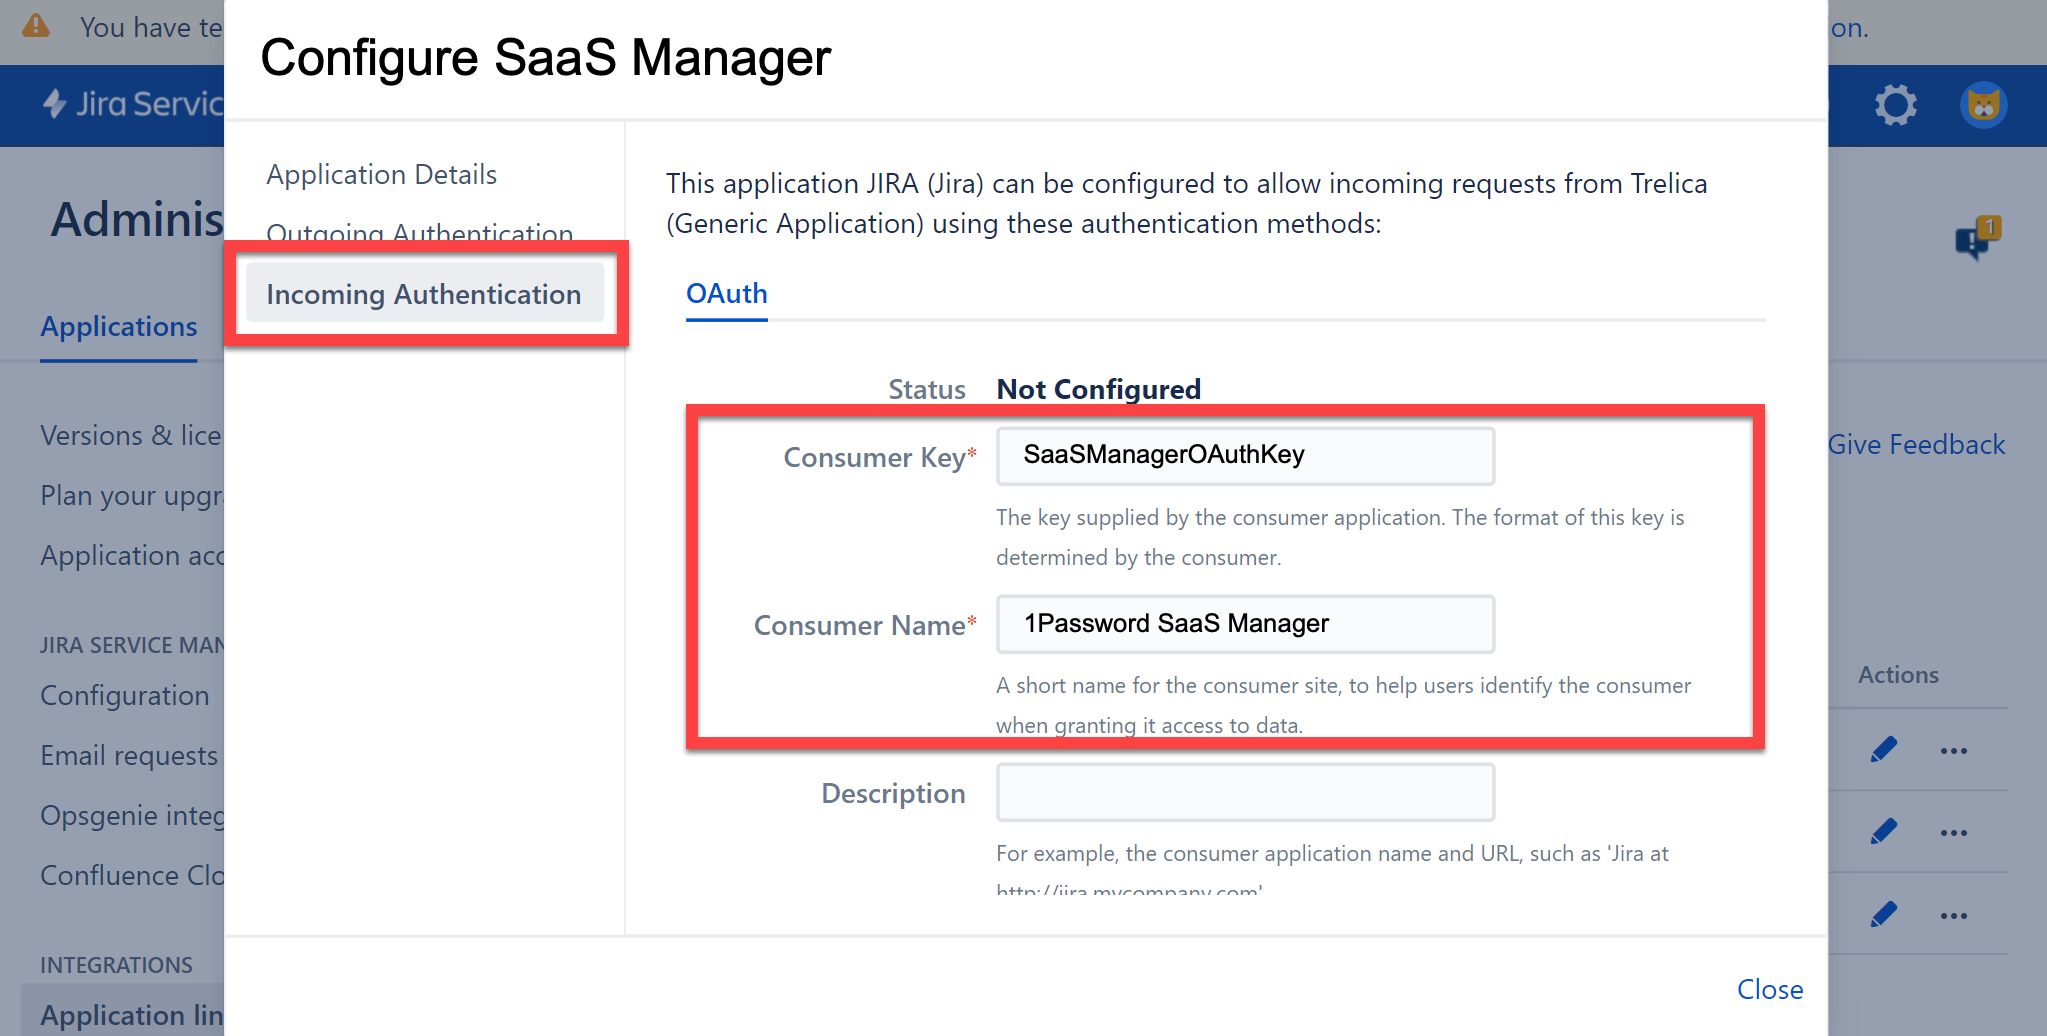
Select the Incoming Authentication tab.
Enter SaaSManagerOAuthKey as the Consumer Key and SaaS Manager as the Consumer Name:

Scroll down to the Public Key field. Paste in the contents of the jira_publickey.pem file that you created earlier. You should include the whole of the file 'as-is', including the header and footer lines (-----BEGIN PUBLIC KEY----- and -----END PUBLIC KEY-----).
Also enter in the Consumer Callback URL as:
https://trelica.app/IntegrationsApi/Integrations/JiraServer/OAuth1Callback
If your data is hosted in our EU cloud then please substitute https://trelica.app for https://trelica.eu in the Consumer Callback URL.

Finally scroll down further to and click the Save button:

Configuring SaaS Manager
Make sure you connect to the Jira (Self-Managed) integration (not Atlassian Cloud).
Enter the base URL for your installation, the Customer Key and also the contents of the private key PEM file that you created earlier.
Creating Jira Service Management tasks
The SaaS Manager workflow system can synchronize SaaS Manager tasks with Jira Service Management.
If you're running a self-managed version of Jira Service Management, then you must install a small Jira plugin in order for SaaS Manager to receive notifications when a Jira Issue is marked as complete.
To do this go to Manage apps in the administration menu:

Now choose Manage apps in the side-menu, and click Upload app:

Cut and paste this URL into the From this URL field in the dialog that opens:
https://vendeqappfiles.blob.core.windows.net/public/files/Trelica-1.0.2.jar

Click Upload and you should see a message confirming that the plugin is installed.
Re-indexing
If you install the plugin after you've synchronized tasks from SaaS Manager you may need to re-index your data. Please go to Administration > System > ADVANCED > Indexing in Jira and click Re-index. We recommend using the Background re-index option.
Fixing WebHook issues
If you receive a message that the webhook cannot be created, it's likely because there's an existing SaaS Manager webhook that's somehow become disconnected from the SaaS Manager integration.
To fix this, go to the Settings cog and choose System:

Scroll down to find Advanced > WebHooks on the left hand side menu:

You can then view and Delete the existing webhook.

Now refresh the integration in SaaS Manager.

Comments
0 comments
Please sign in to leave a comment.