Creating an external connection to NetSuite requires some initial configuration in NetSuite. This article explains the necessary steps in order to connect 1Password SaaS Manager to NetSuite.
Enable Token Based Authentication in NetSuite
Log in to NetSuite.
Go to Setup > Company > Enable Features.
Under the SuiteCloud sub-tab:
- In the SuiteTalk (Web Services) field group, ensure that REST Web Services is checked.
- In the Manage Authentication field group, ensure that Token Based Authentication is checked.
- If you want to return purchase order documents, ensure that Server SuiteScript is checked.
Click Save.
Create a role and account for the SaaS Manager integration
Create a SaaS Manager role
Go to Setup > Users/Roles > User Management > Manage Roles > New. (or search for new role in the global search).
Give the role a descriptive name, such as SaaS Manager Integration Role.
Under the Authentication field group, make sure Web Services Only Role is unchecked, as this does not work with OAuth1a.
Now go to the Permissions sub-tab and select the following permissions:
| Section | Permissions | Level | Reason |
|---|---|---|---|
| Transactions | Audit Trail | View | Used to get the last login date for NetSuite users. Optional, but recommended. |
| Bills | View | Required to access Bill AP transaction data. | |
| Enter Vendor Credits | View | Access to AP transaction data relating to refunds from a vendor. Optional. | |
| Expense Report | View | Employee expense reports. Optional. | |
| Find Transaction | View | Required to access transaction data. | |
| Purchase Order | View | Access to Purchase Order transactions. Required if you enable the “Purchase orders” feature when connecting from SaaS Manager. | |
| Make Journal Entry | View | Access to Journal Entries. Required if you enable the “Journals” feature when connecting from SaaS Manager. | |
| Reports | Account Detail | View | Required to list account codes. |
| Accounts Payable | View | Required to access AP transaction data. | |
| Amortization Reports | View | Required to access deferred expense data (e.g. prepayments). | |
| Expenses | View | Access to employee expense reports. Optional. | |
| SuiteAnalytics Workbook | View | Required to run SuiteQL queries to access data. | |
| Transaction Detail | View | Required to access transaction data. | |
| Purchase Order Reports | View | Access to Purchase Order transactions. Required if you enable the “Purchase orders” feature when connecting from SaaS Manager. | |
| Lists | Accounts | View | Required to list account codes. |
| Amortization Schedules | View | Required to access deferred expense data (e.g. prepayments). | |
| Items | View | Required to access list data. | |
| Currency | View | Required to access currency lists (may not be available in some NetSuite editions). | |
| Departments | View | Required to return data about the department linked to a transaction, or (if the “Employees” feature is enabled when connecting from SaaS Manager) for employee department data. | |
| Employees | View | Required to access basic NetSuite user data. Employees (beyond NetSuite users) will only be fetched if the “Employee” feature is enabled when connecting from SaaS Manager. | |
| Employee Record | View | Required to access basic NetSuite user data. Employees (beyond NetSuite users) will only be fetched if the “Employee” feature is enabled when connecting from SaaS Manager. | |
| Expense Categories | View | Access to categories for employee expense reports. Optional. | |
| Subsidiaries | View | Access to basic details about a subsidiary when returning transaction data. Optional, but recommended. | |
| Vendors | View | Required to access basic details about a vendor when returning transaction data. | |
| Documents and Files | View | Access to Purchase order documents. Required if you enable the “Purchase orders” feature when connecting from SaaS Manager. | |
| Setup | REST Web Services | Full | Required to access the NetSuite REST API. |
| User Access Tokens | Full | Required for connecting using Token Based Authentication. | |
| Log in using Access Tokens | Full | Required for connecting using Token Based Authentication. | |
| Access Token Management | Full | Required for connecting using Token Based Authentication. | |
| View Login Audit Trail | Full | Used to get the last login date for NetSuite users. Optional, but recommended. | |
| Bulk Manage Roles | View | Access to NetSuite user role data. Optional, but recommended. |
Click Save.
NetSuite lets you restrict access to subsidiaries and accounts. Unless you have a specific reason to restrict the data you are requesting, please ensure that:
Subsidiary Restrictions > Accessible Subsidiaries - set to All Under Accounting Books,
Accounting Books > Selected Accounting Books - set to All
Create a SaaS Manager employee record
You can associate the newly created SaaS Manager role with an existing employee account, but our general recommendation is to use dedicated integrations account.
Dedicated accounts are created by adding an Employee and then allowing them to log in to NetSuite which consumes a NetSuite seat.
If you already have some form of integration account we recommend reusing this, and associating the SaaS Manager role with it. When it comes to connect you will log in with the integration account, but will grant the access to the SaaS Manager specific role. This allows you to use a single paid integration account but with different role profiles for the different applications you connect to NetSuite.
Go to Lists > Employees > Employees > New (or search for page:employees in the global search).
Give the Employee a descriptive name and ID, (e.g. SaaSManagerAPI).
Under the Access sub-tab, assign the newly created SaaS Manager role.
Click Save.
Create a new Integration Record
Go to Setup > Integration > Manage Integrations > New (or search for page:integrations in the global search)
| Field | Value |
|---|---|
| Name | SaaS Manager |
| Description | SaaS Manager Spend Data Integration |
| State | Enabled |
| Concurrency Limit | 4 (suggested, or a value under the Max Concurrency Limit) |
Now go to the Authentication sub-tab,
Find the Token-based Authentication field group and fill in the following fields:
| Field | Value |
|---|---|
| Token-based Authentication | Checked |
| TBA Authorization Flow | Checked |
| Callback URL |
or
|
https://eu.trelica.com and not https://app.trelica.com in the Callback URL.Make sure that nothing is checked or entered in the OAuth2.0 and User Credentials field groups.
Click Save. On the confirmation screen, copy the following that you will need to authenticate:
- Consumer Key (or Client ID)
- Consumer Secret (or Client Secret)
Find your NetSuite Account ID
Go to Setup > Integration > Webservice Preferences
Copy your Account ID and keep a note of it as you will need to enter it into SaaS Manager.
Connect SaaS Manager to NetSuite
If you received an email asking you to set up the integration, then just click on the link, otherwise login to SaaS Manager and go to Integrations to get started.
In the Search box, type in NetSuite.
Select the NetSuite logo to get started, and on the next screen click Connect:
Now enter the Account ID, Consumer Key and Consumer Secret that you generated in NetSuite.
-) rather than an underscore (_) for the Account ID, e.g. 1234567-SB1._) and not a minus sign. 
Click Connect.
You will then need to login to NetSuite.
Once logged in, you will be asked to confirm that SaaS Manager is allowed to access your NetSuite account.
Click Continue.
You will be taken back to SaaS Manager and SaaS Manager will start to request data from NetSuite. This may take some time but happens in the background, so you can freely navigate away from the page and come back later to check on progress.
User data
As well as spend transaction data, SaaS Manager returns data about NetSuite users.
This includes data from the audit log about when the user last logged in to NetSuite, what roles they have, and what license is assigned to them
When you connect you can also choose to return information about all employees too (i.e. those who do not have NetSuite access).
Journal entries
Typically we recommend not including Journal entries unless you know that data is stored in journals that isn't stored elsewhere.
The reason we recommend against including it as a matter of course is that you typically get a lot of noise relating to cost allocations or amortization of prepayments.
One example where including journal entries is helpful would be expense claim data from external systems which is sometimes imported directly as Journal entries.
Amortisation schedules and expense accounts
When you select account codes in SaaS Manager (such as an expense account for Software Subscriptions), SaaS Manager queries NetSuite for transactions where the expense account matches your selection. However, there is an important limitation when Bills use NetSuite's automated amortisation schedules.
What is amortisation?
When a company pays for a subscription or service that spans multiple months (such as an annual software license), accounting standards require the expense to be spread across the months that benefit from the service. In NetSuite, this is typically handled by:
- Recording the initial bill against a Prepaid Expenses account (a balance sheet account)
- Creating monthly journal entries that move a portion of the cost from Prepaid Expenses to the actual expense account (e.g. Software Subscriptions)
The limitation with automated amortisation schedules
When bills are entered in NetSuite using automated amortisation schedules, the expense account field on the bill is set to the Prepaid/Deferral account, not the ultimate expense account. The actual expense account is only determined later when NetSuite generates the amortisation journal entries.
Bills entered with automated amortisation schedules will not appear when you filter by the ultimate expense account (e.g. Software Subscriptions). They will only appear if you include the Prepaid Expenses account in your selected account codes.
This is a limitation of the data that NetSuite exposes via its SuiteQL interface. The NetSuite user interface may show the expected expense account on the bill, but this information is not available in the underlying transaction data that SaaS Manager can query.
Technical detail
When a bill uses an automated amortisation schedule:
- The
transactionline.accountfield contains the Prepaid/Deferral account - The
transactionline.expenseaccountfield also contains the Prepaid/Deferral account - The
amortizationscheduleandamortizationtemplaterecords do not contain the target expense account - The expense account is determined by NetSuite's internal configuration when generating amortisation journals
While the amortisation journals do contain the correct expense account, there is no structured foreign key linking them back to the original bill—the only connection is via free-text in the journal line memo, which is not reliable for automated matching.
Workarounds
If you need to capture bills that use automated amortisation schedules, you have the following options:
| Option | Description | Trade-off |
|---|---|---|
| Include Prepaid account | Add the Prepaid Expenses account to your selected account codes in SaaS Manager. | You may find non-software expenses are included. These can be excluded from the SaaS Manager Spend transactions page, using rules for common patterns. |
| Change bill entry process | Enter bills with the expense account set directly on the bill line, using manual amortisation date fields instead of automated schedules. | Requires a process change in your accounting team's workflow. |
Bills entered with manual amortisation dates (rather than automated schedules) typically do have the expense account set correctly on the bill line, and will appear when filtering by that expense account. This was a common approach in older NetSuite configurations.
Purchase Order document support
Pre-requisite permissions and features
If you are enabling Purchase Order document support having previously configured the SaaS Manager NetSuite connector, then you may need to enable additional features or permissions. This section describes what you need to check.
Check role permissions
- Go to Setup > Users/Roles > User Management > Manage Roles.
- Click through to the SaaS Manager role.
- Go to the Permissions sub-tab. Under the 'Lists' section ensure that Documents and Files (View) is checked.
- Click Save.
Check Server SuiteScript is enabled
- Go to Setup > Company > Enable Features.
- Under the SuiteCloud sub-tab ensure that Server SuiteScript is checked.
- Click Save and confirm the Terms of Service.
Configuring Purchase Order document support
Upload and deploy the Restlet
- Download and save the SaaS Manager restlet to your computer. You will upload it shortly.
https://vendeqappfiles.blob.core.windows.net/public/netsuite/Trelica_RL_GetFilesFromPO.js - Go to Netsuite and navigate to Customization > Scripting > Scripts.
- Click New Script.
- Hover over the Script file and click the + icon that appears.
- Under the Select File field, click and upload the file you just downloaded to your computer.
- Do not alter the File Name field. The file must have a .js suffix.
- Click Save. You will be taken back to the Upload Script File.
- Click Create Script Record.
- In the Script record page, enter
SaaS Managerin the Name field. - Click Save. This will create the script record.
- Click Deploy Script. You will be taken to the Script Deployment page.
- In the Audience tab, make sure the
SaaS Manager Integration Roleis selected. - Set the Status to Released.
- Click Save
- Copy the External URL to your clipboard.
Configuring in SaaS Manager
- Go to the Netsuite connection in SaaS Manager and click Settings.
- Select the Purchase Order documents feature:
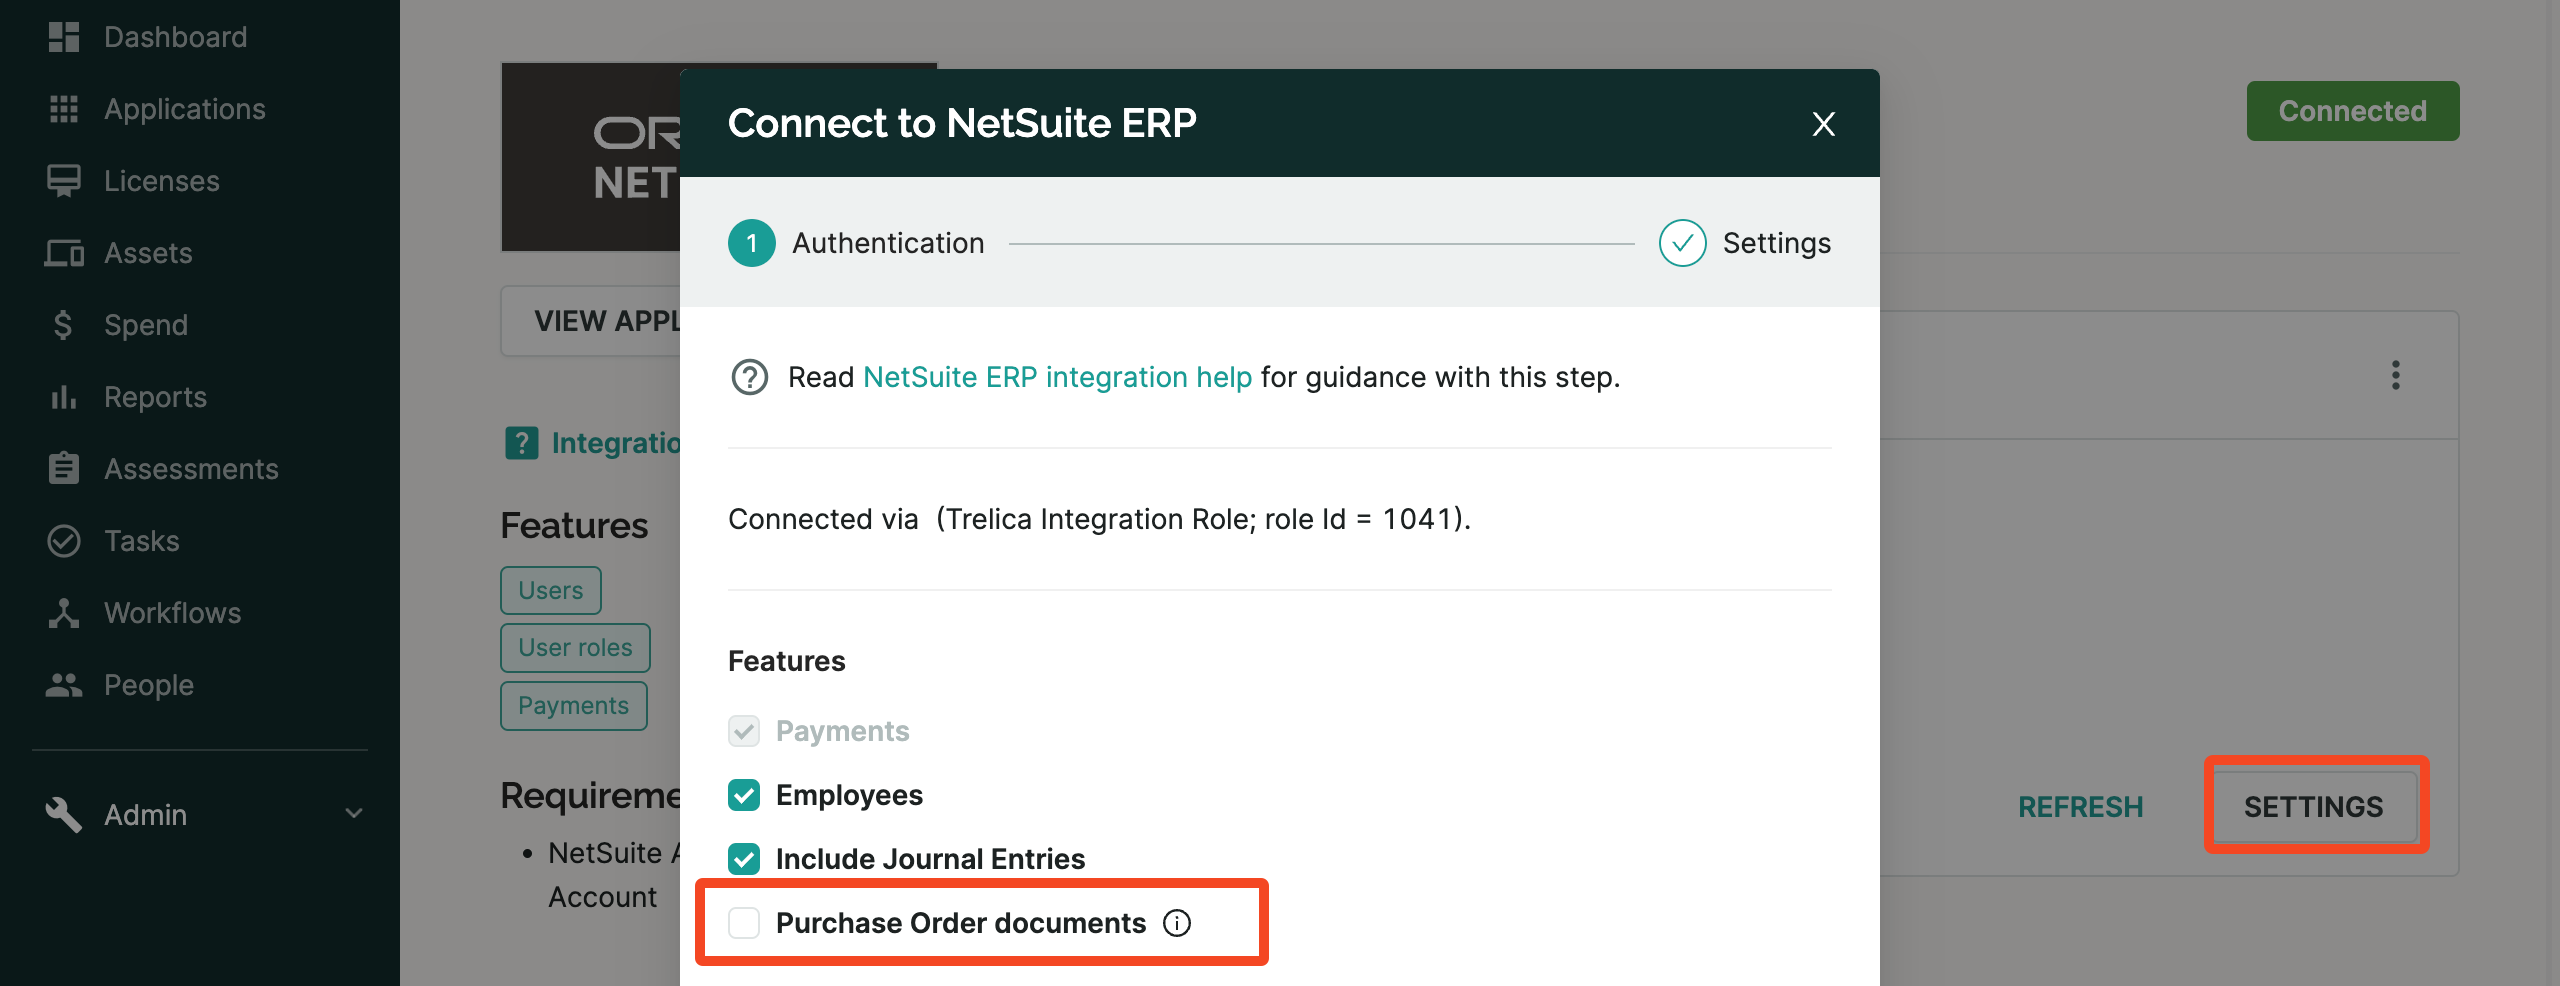
- Scroll down and paste the URL into the Restlet URL field in SaaS Manager.
- Re-enter your Consumer Secret.
- Click Reconnect.
FAQ
What do I do if I've forgotten my NetSuite Consumer Key and Consumer Secret?
You can regenerate them by editing the integration record:
https://docs.oracle.com/en/cloud/saas/netsuite/ns-online-help/section_4395597766.html
Comments
0 comments
Please sign in to leave a comment.