How does 1Password SaaS Manager work with Salesforce?
1Password SaaS Manager helps IT teams keep on top of what SaaS software has been bought, how much money is being spent on it, how well it's being used and whether everything is compliant from a security and privacy point of view.
SaaS Manager can connect directly to different SaaS tools (like Salesforce) to extract up-to-date information about which of your users are using Salesforce, and how regularly they are logging in. This will help you improve engagement, deprovision unused seats, and prepare for your license renewal.
To integrate with Salesforce you will need to be using a Salesforce edition that gives you access to the Salesforce API. Typically this is one of the following:
- Enterprise Edition
- Unlimited Edition
- Developer Edition
- Performance Edition
Finding your Salesforce URL
To connect to the API you need to be using a custom Salesforce URL. You can configure this, or check your URL by clicking on the Settings cog icon, and choosing Setup in the menu:

Then go to My Domain in the Company Settings menu. This will either let you configure a domain (using a 4 step wizard), or see your current domain. You will need to enter the domain into SaaS Manager later so make a note of it.

Installing the AppExchange package
SaaS Manager needs to access a Salesforce OAuth client. You can configure this by installing a Salesforce AppExchange package. Click on this link to initiate the installation:
https://login.salesforce.com/packaging/installPackage.apexp?p0=04t4J000001cwIF
You will see a screen prompting you to install the SaaS Manager Connection App.
- Choose Install for Admins Only.
- Click to acknowledge that you are installing a Non-Salesforce Application.
- Click Install.

Once installation is complete you will see a confirmation screen. Click Done:

Viewing the installed package in Salesforce
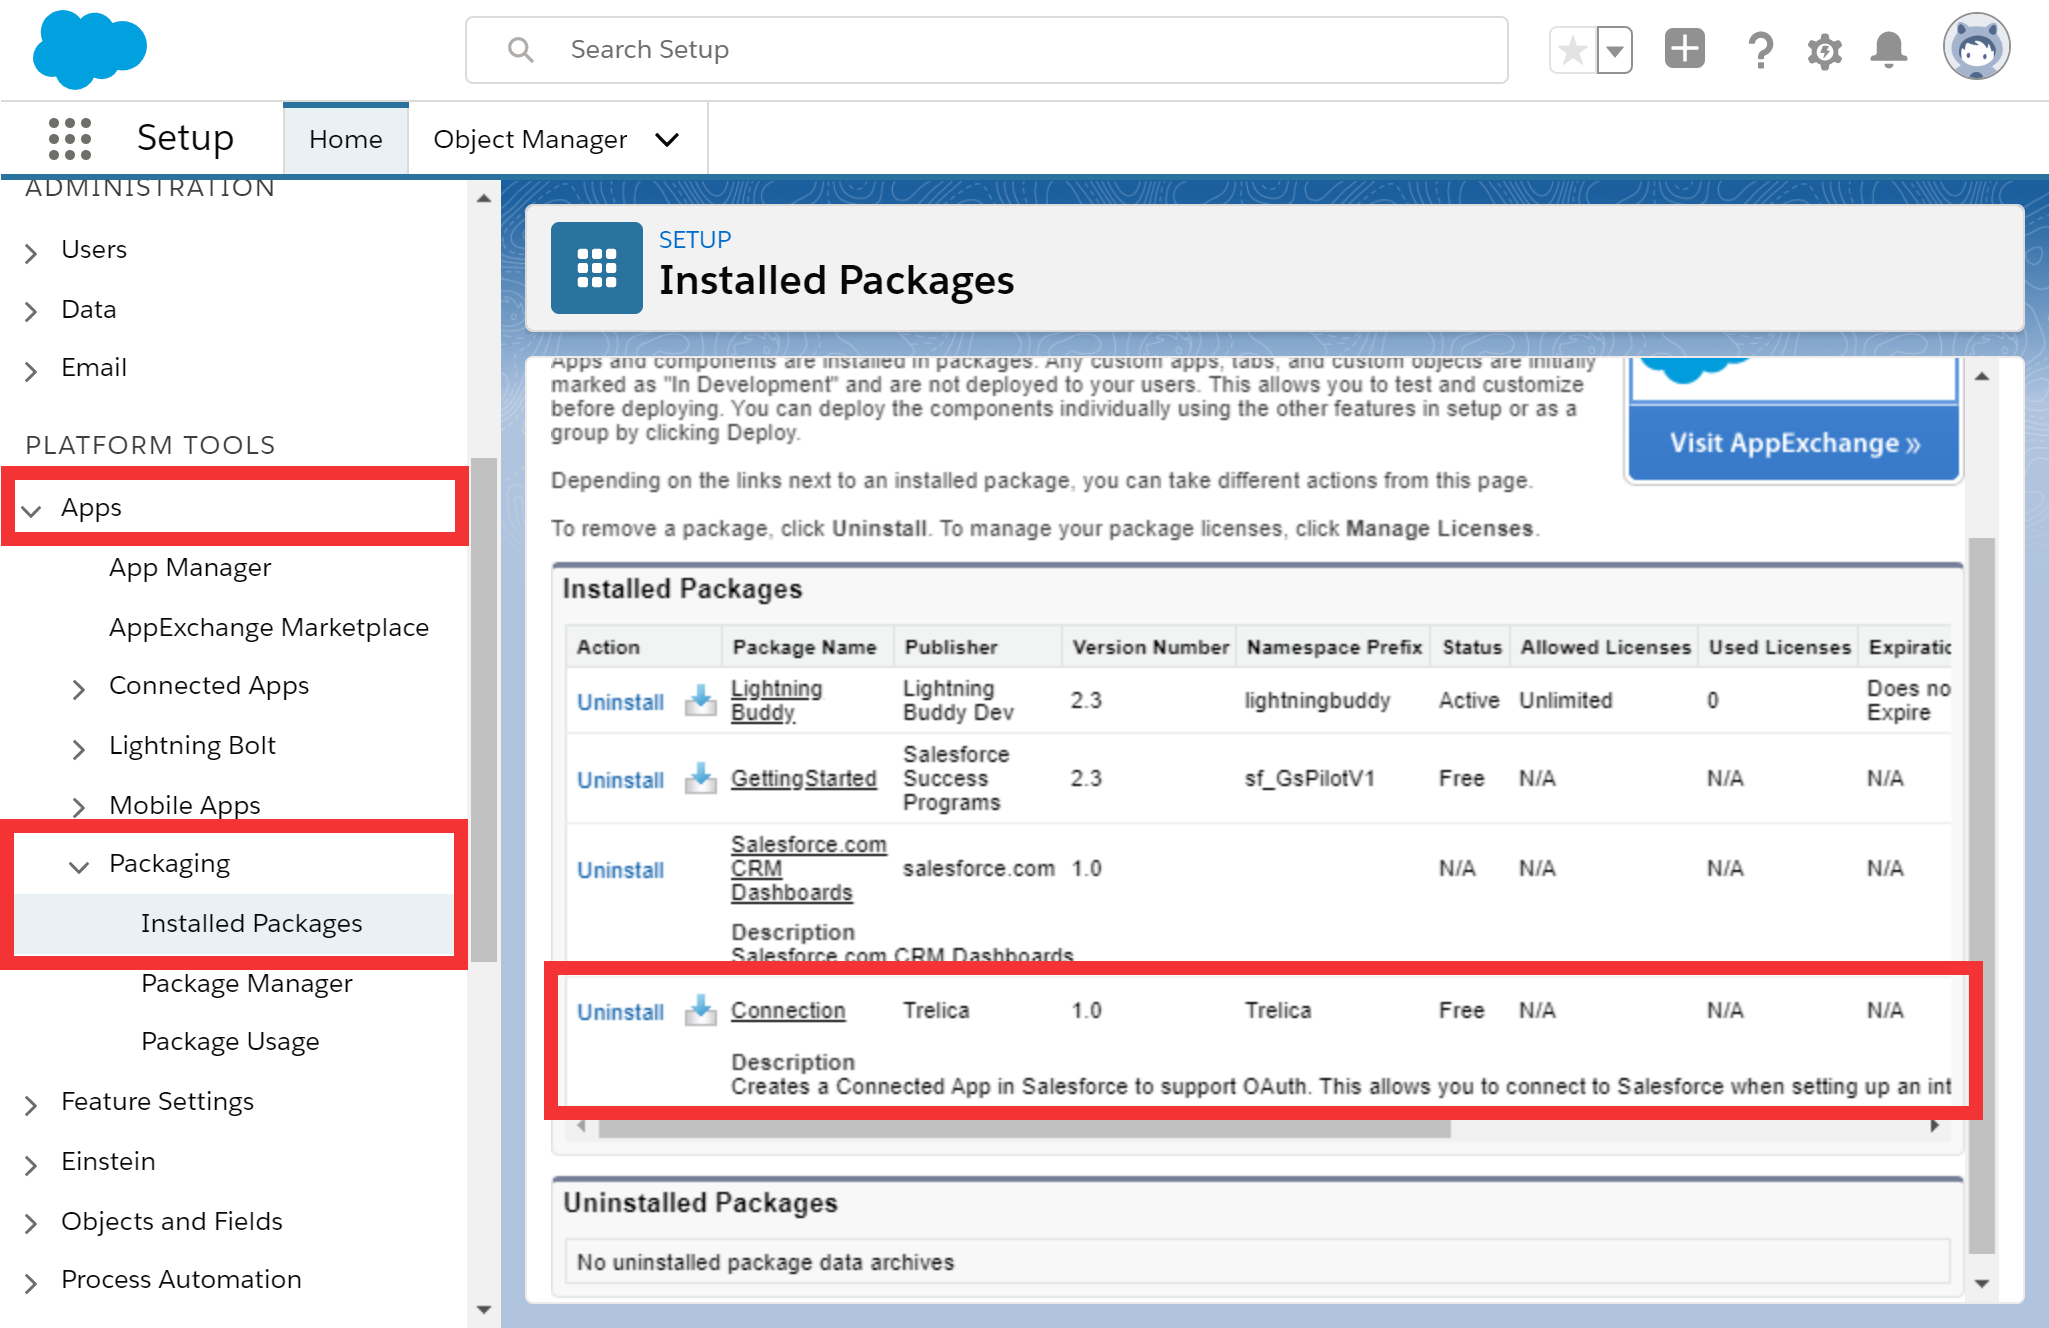
You can see and manage the newly installed package by going to Platform Tools > Apps > Packaging > Installed Packages:

Configuring 1Password SaaS Manager
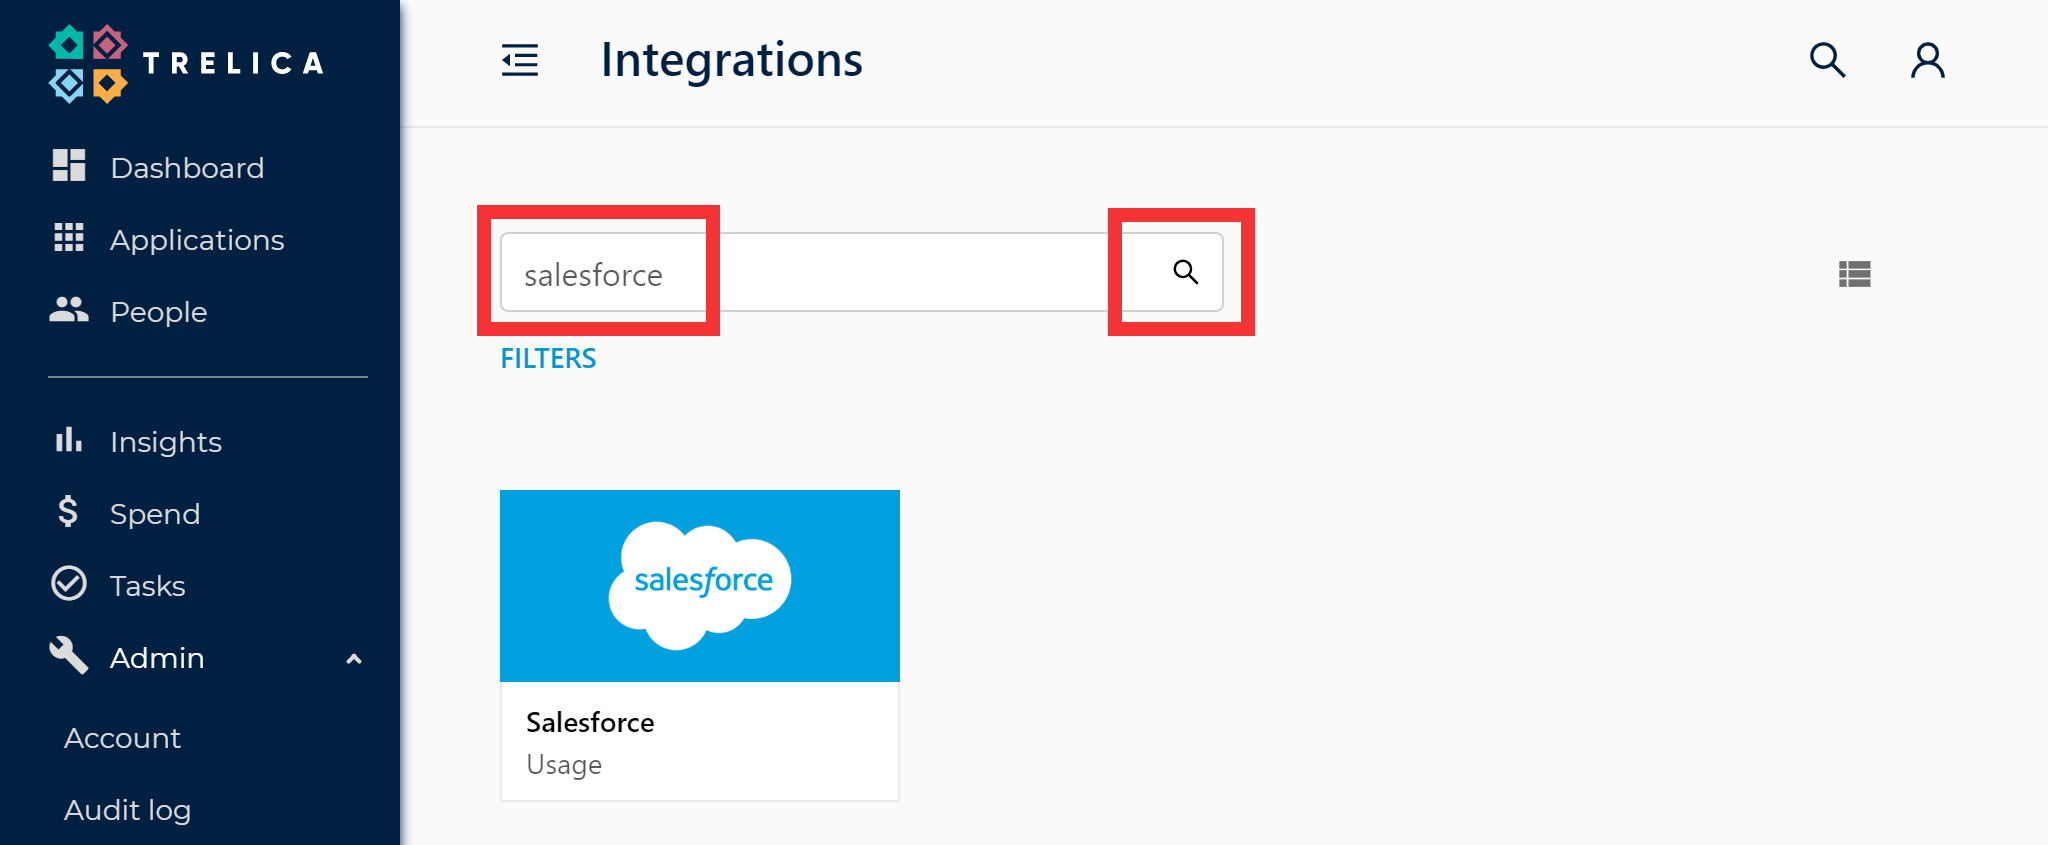
If you received an email asking you to set up the integration, then just click on the link, otherwise login to SaaS Manager and go to Admin > Integrations to get started.
You must be an administrator of your Salesforce site in order to connect with SaaS Manager.
As an administrator, you may have received an invitation from someone in your IT team asking you to connect Salesforce to SaaS Manager.
In the Search... box, just type in Salesforce:

Then click on the Salesforce logo to get started.
Connecting to Salesforce
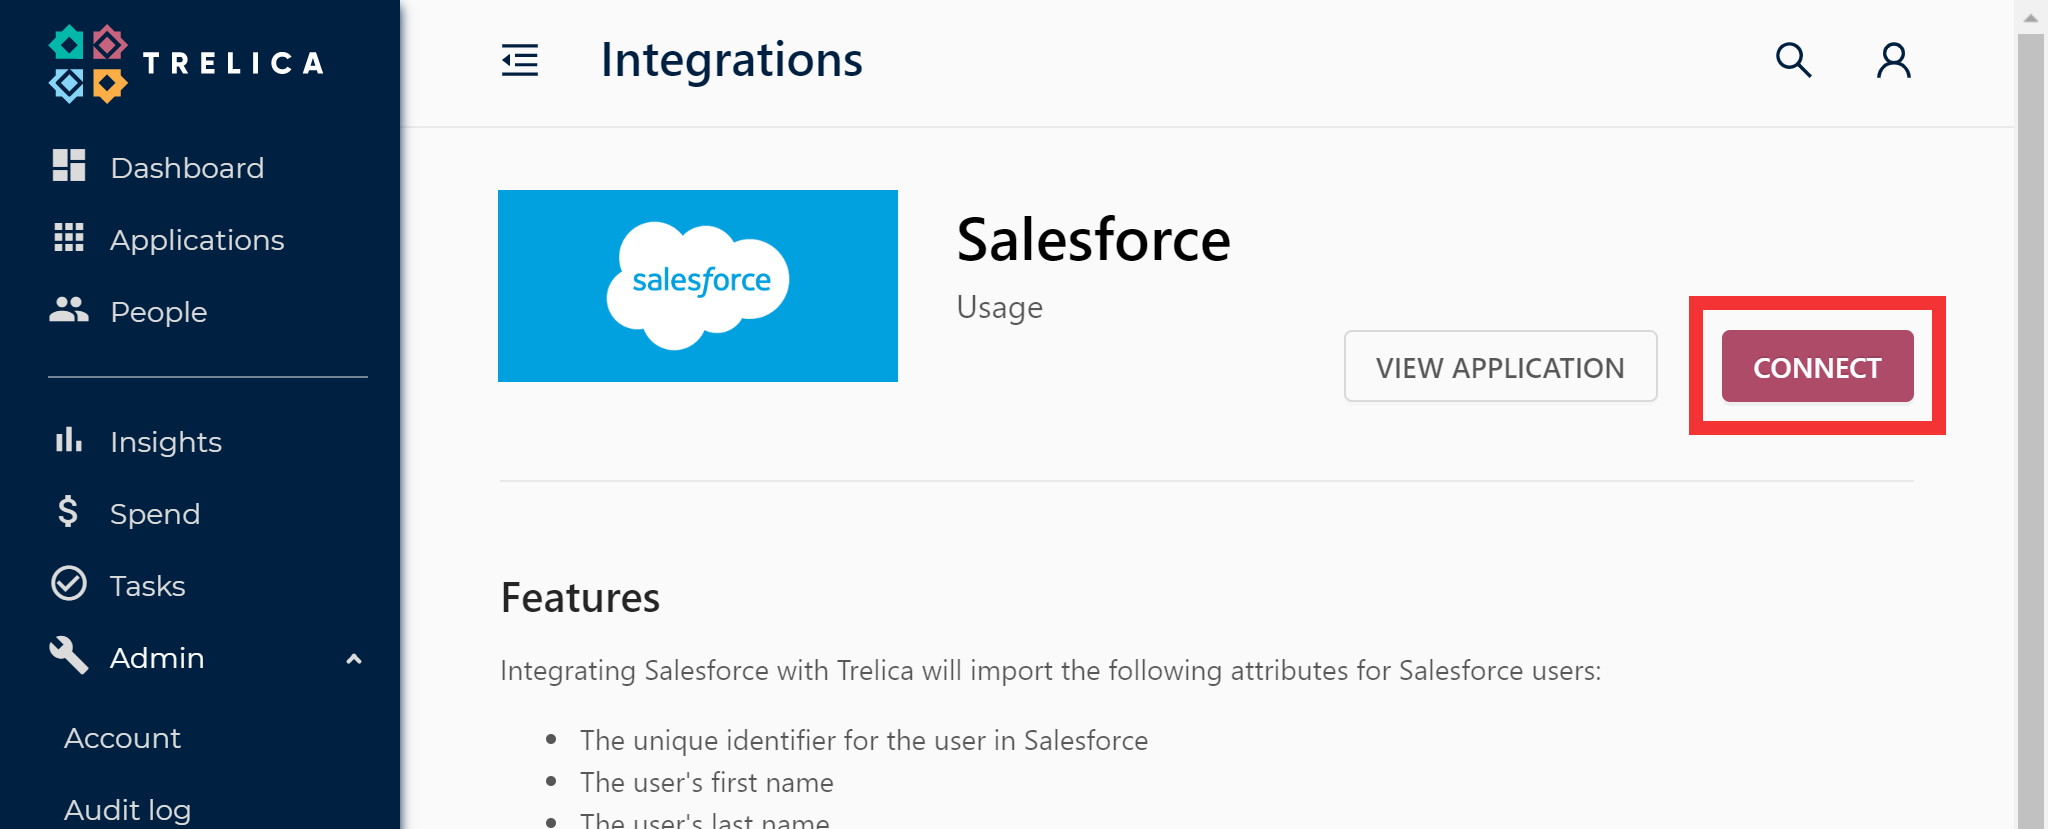
Click the Connect button at the top-right:

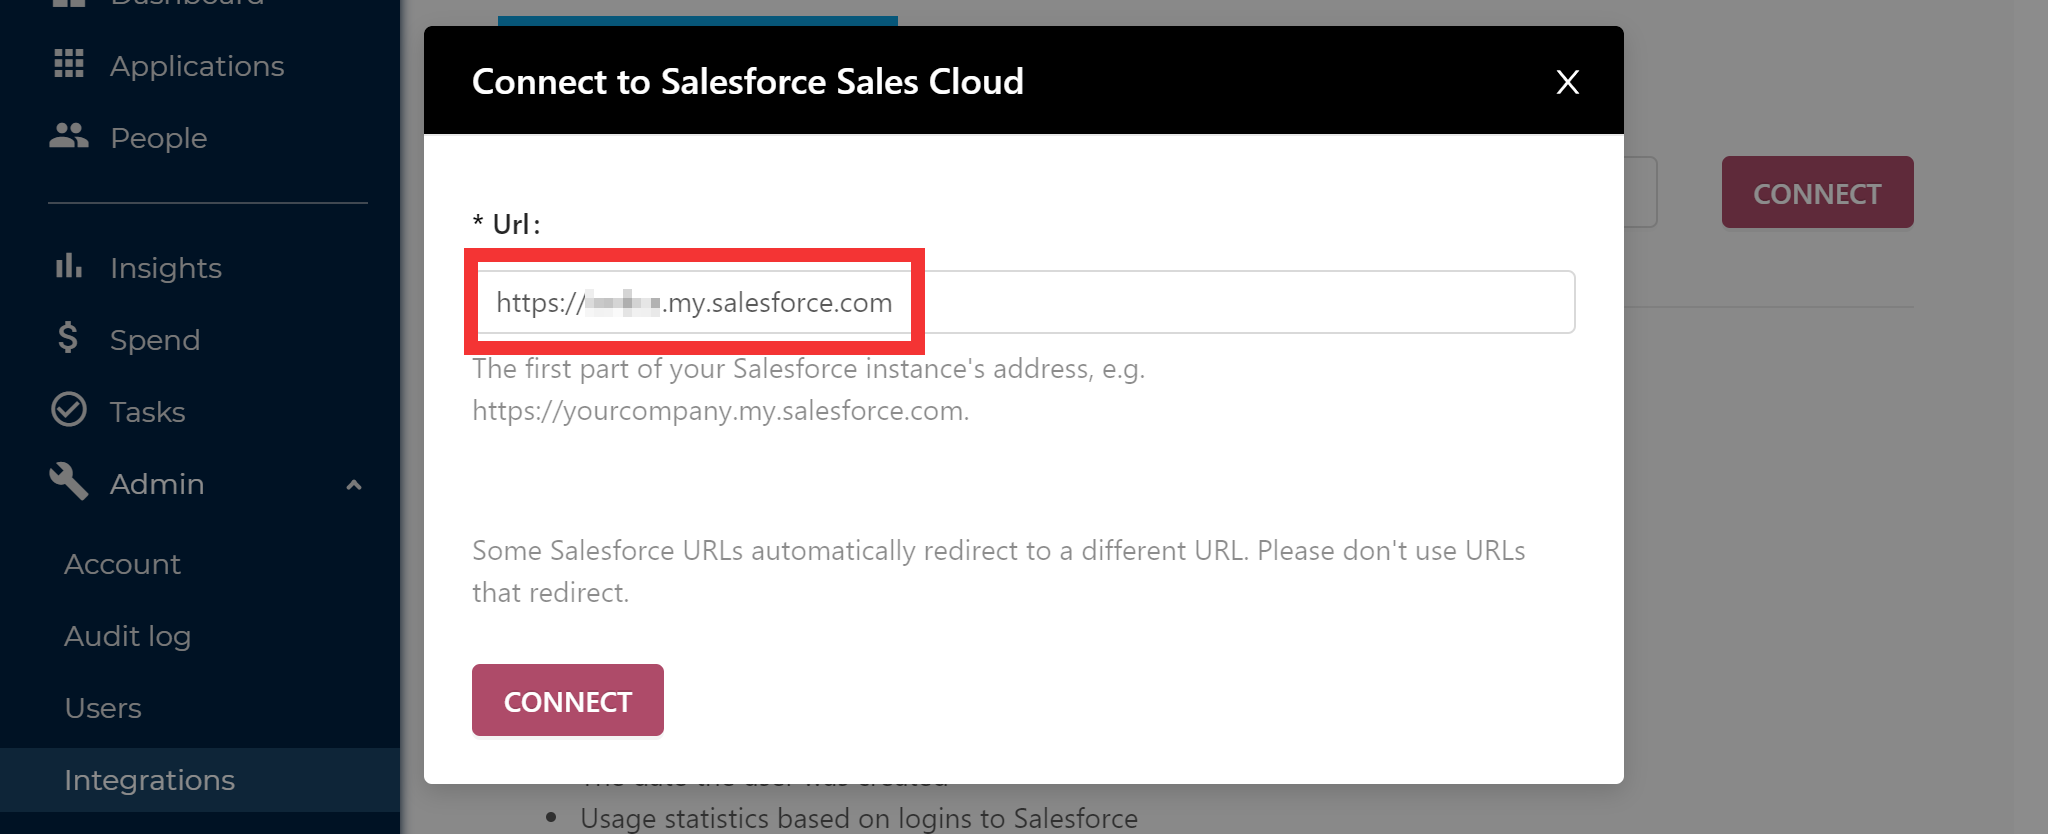
You will now be asked to enter the URL for your Salesforce instance. This is the URL you noted in the step Finding your Salesforce URL above.

Click Connect again and you will then be asked to login to Salesforce and shown a message explaining that SaaS Manager wants to connect to your organization's Salesforce site.

If you access multiple Salesforce instances, Salesforce will prompt you to choose the correct Salesforce instance.
Click Allow and you will be taken back to Trelica.
After a short pause, SaaS Manager will start to synchronize with Salesforce and you'll see a green tick when everything is done.

Although this shouldn't take long, you don't have to wait for this to happen - once you're back in SaaS Manager feel free to go off and do other things.
If you click on the View application button then you can go through to the Salesforce profile page and see more information:

At this point you may wish to review the user list or fill in more information about the number of seats you have, when you renew your Salesforce license.
Creating a user with limited privileges
If you're connecting the integration with a user intended solely to integrate Salesforce with SaaS Manager, to follow the principle of least privilege as 1Password SaaS Manager recommends, you can create a user with the following privileges:
- Go to ADMINISTRATION > Users > Profiles
- Click New Profile
- Clone Existing Profile
Minimum Access - Salesforce(User License:Salesforce) - Name the profile
1Password SaaS Manager API Profile - Tick the following settings:
- Connected App Access
- SaaS Manager
- Administrative Permissions
- API Enabled
- Manage Package Licenses
- Manage Profiles and Permission Sets
- View All Profiles
- View All Users
- View Setup and Configuration
- View Roles and Role Hierarchy
- Connected App Access
- Click Save
- Go to ADMINISTRATION > Users > Users
- Create a new user and assign the
1Password SaaS Manager API Profile
FAQ
‘insufficient access rights on cross-reference id’ error when creating or deactivating a user
This is likely caused by an Apex automation creating or updating a custom object record when a user gets created or deactivated. The SaaS Manager integration user doesn't have access to this object. Please consult with your Salesforce administrator to ensure the SaaS Manager user has appropriate permissions and reach out to saasmanager@1password.com if you need further help.
See https://help.salesforce.com/s/articleView?id=000385619&type=1
Manually creating a Connected App
If you can't install the package from AppExchange you can manually create the SaaS Manager Connected App. Please contact 1Password SaaS Manager support before starting this process.
- Search for App Manager and click New Connected App

-
Enter the following values:
Connected App Name 1Password SaaS Manager API Name 1password SaaS Manager Contract Email saasmanager@1password.com Logo Image URL https://brand.1password.com/share/zpjexDZRgpM43TjobjSa/folders/103 (choose one directly) Icon URL https://brand.1password.com/share/zpjexDZRgpM43TjobjSa/folders/103 (choose one directly) Enable OAuth Settings Checked Callback URL https://app.trelica.com/IntegrationsApi/Integrations/Salesforce/AuthCallback
https://eu.trelica.com/IntegrationsApi/Integrations/Salesforce/AuthCallback(Add on separate lines - it's fine to enter both URLs)OAuth scopes Access unique user identifiers (openid)
Manage user data via APls (api)
Perform requests at any time (refresh_token, offline_access) - Click Save.
- On the new page click Manage Consumer Details to
- You will be asked to reauthenticate.
- On the new page copy the Consumer Key and Consumer Secret and paste them into SaaS Manager when prompted.
Comments
0 comments
Please sign in to leave a comment.