How does 1Password SaaS Manager work with Marketo?
1Password SaaS Manager helps IT teams keep on top of what SaaS software has been bought, how much money is being spent on it, how well it's being used and whether everything is compliant from a security and privacy point of view.
TrelSaaS Managerica can connect directly to different SaaS tools (like Marketo) to extract up-to-date information about which of your users are using Marketo, and how regularly they are logging in. This will help you improve engagement, deprovision unused seats, and prepare for your license renewal.
You must be an administrator of your Marketo site in order to connect with SaaS Manager.
As an administrator, you may have received an invitation from someone in your IT team asking you to connect Marketo to SaaS Manager.
Configuring Marketo
There are several steps to configuring API access to Marketo. These involve setting up a new role, creating an API specific user assigned to this role, and configuring a LaunchPoint service. This document will take you through this process.
Creating a Marketo API role
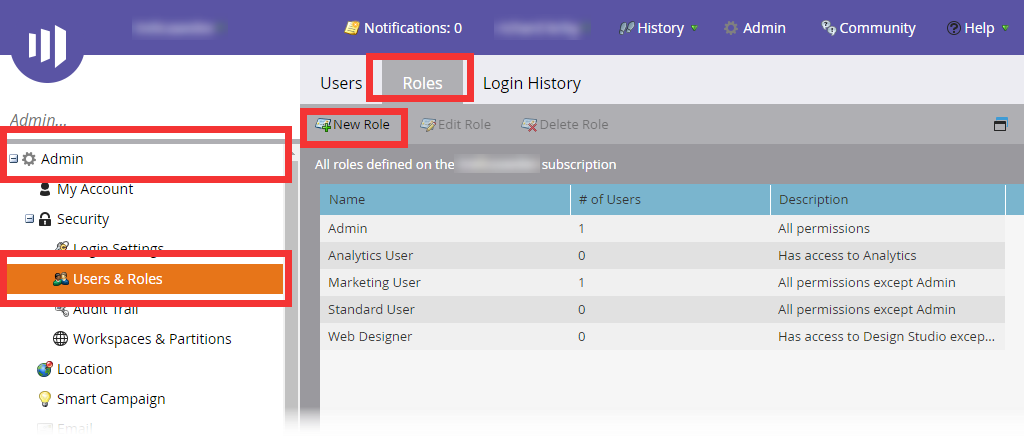
Go to Admin > Users & Roles > Roles and click New Role

Give your new role a name (e.g. 1Password SaaS Manager Usage Integration) and a meaningful description (e.g. Grants access to user access management).
In the Permissions list, select both:
- Access Admin > Access Users
- Access API > Access User Management API
Click CREATE.
Creating a Marketo API user
Now go to the Users tab and choose Invite New User:

In Step 1: Info, enter:
- an Email (this address doesn't need to exist), e.g saasmanager_api@example.com.
- a dummy First Name and Last Name.
Then click NEXT.
In Step 2: Permissions:
- Choose the role you created earlier, probably called 1Password SaaS Manager Usage Integration.
- Make sure you check the API Only checkbox
Then click NEXT.
The Step 3 relates to sending a message is not required for API users. Just click SEND to continue (nothing will be sent).
Creating a LaunchPoint service
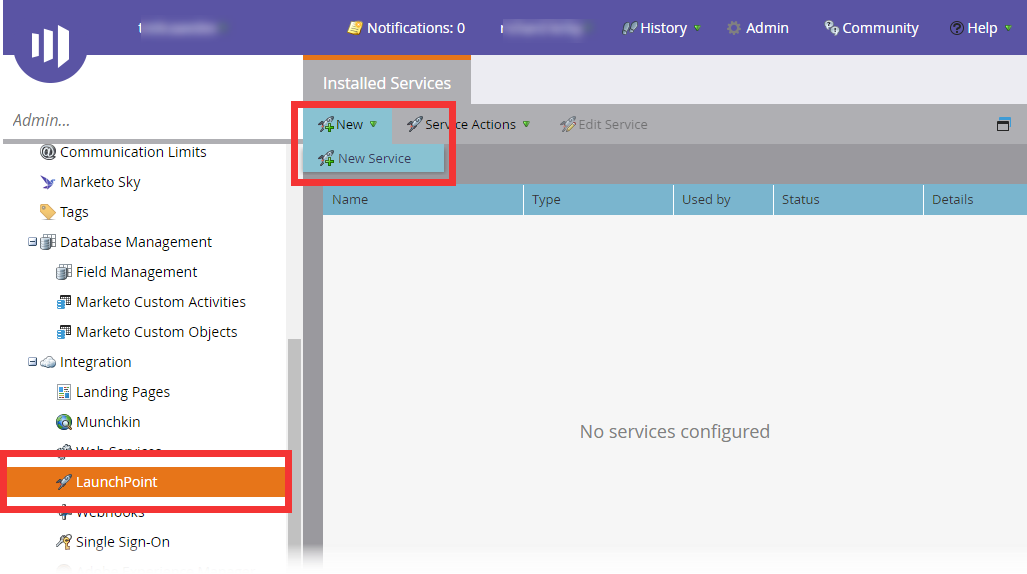
Now go to the Admin > Integration > LaunchPoint menu option.
Choose the New menu, and then New Service:

Enter or select the following values in the form:
| Field | Value |
|---|---|
| Display Name | 1Password SaaS Manager Usage Integration |
| Service | Custom |
| Description | Service used by SaaS Manager to access user data |
| API Only User |
saasmanager_api@example.com (or whatever address you gave your user in the previous step) |
Click CREATE
You will see your newly created service in the list. Click View Details for the new service:
You will need to enter the Client Id and Client Secret into SaaS Manager shortly. Either keep the browser tab open, or copy and paste them into a text editor:
Close the dialog, and open up the Web Services menu (also in Admin > Integration).
Scroll to the bottom of the page to the REST API section. Make a note of the Endpoint URL. It will likely be of the form https://xxxxxx.mktorest.com.
Connecting to Marketo from 1Password SaaS Manager
If you received an email asking you to set up the integration, then just click on the link, otherwise log in to SaaS Manager and go to Admin > Integrations to get started.
In the Search... box, just type in Marketo:
Then click on the Marketo logo to get started.
Click the Connect button.
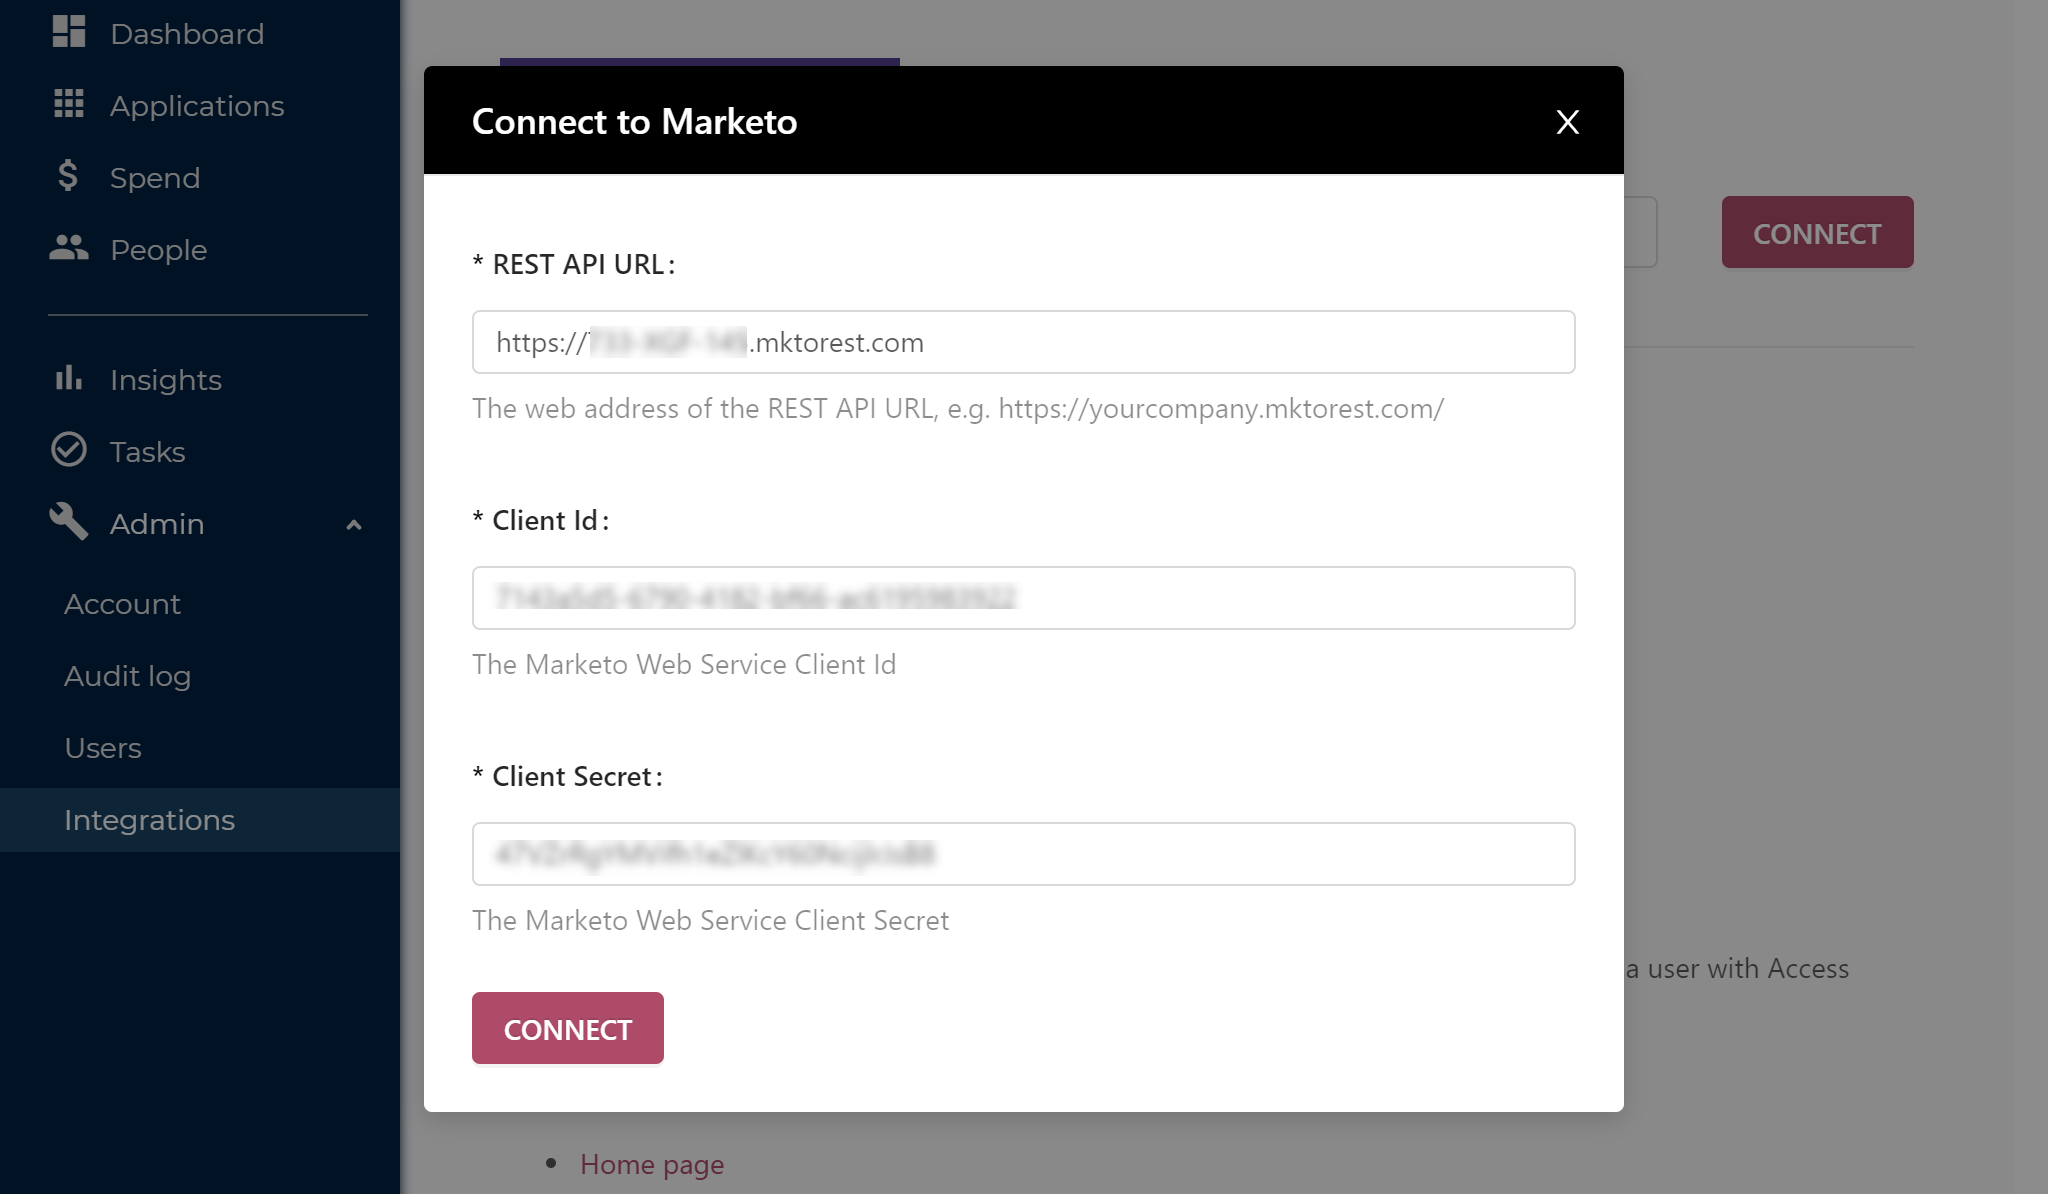
You will now have to enter the details you noted down whilst configuring Marketo. First of all enter your REST API URL (probably something like https://yourcompany.mktorest.com).
The Client Id and Client Secret were those shown when you viewed the details of your newly created Marketo LaunchPoint service.

Click CONNECT.
After a short pause, SaaS Manager will start to synchronize with Marketo and you'll see a green tick when everything is done.

Although this shouldn't take long, you don't have to wait for this to happen - once you're back in SaaS Manager feel free to go off and do other things.
If you click on the View application button then you can go through to the Marketo profile page and see more information.
At this point you may wish to review the user list or fill in more information about the number of seats you have, when you renew your Marketo license.
Comments
0 comments
Please sign in to leave a comment.