1Password SaaS Manager synchronizes with JumpCloud on a daily basis, but you may want to run workflows as soon as events occur in JumpCloud.
This example shows you how to trigger a workflow in SaaS Manager as soon as someone is suspended in JumpCloud, via a webhook.
The data sent by JumpCloud when a user is suspended does not include the user's email address, which SaaS Manager requires to run offboarding actions for a person. This guide will take you through creating two SaaS Manager workflows (as well as the JumpCloud webhook) that will enable work around this restriction.
The first workflow will receive the webhook data from JumpCloud, make an API call back to JumpCloud, and then pass the returned email value to the second workflow.
The second workflow will receive the email value to identify the person within SaaS Manager, from where you can then initiate offboarding actions for them.
Creating the workflow to receive the JumpCloud event
In SaaS Manager under Workflows, create an API webhook workflow trigger.
Set the Context to None.
For the time being do not tick Verify request, you can add this later, but it makes testing the initial connection harder.
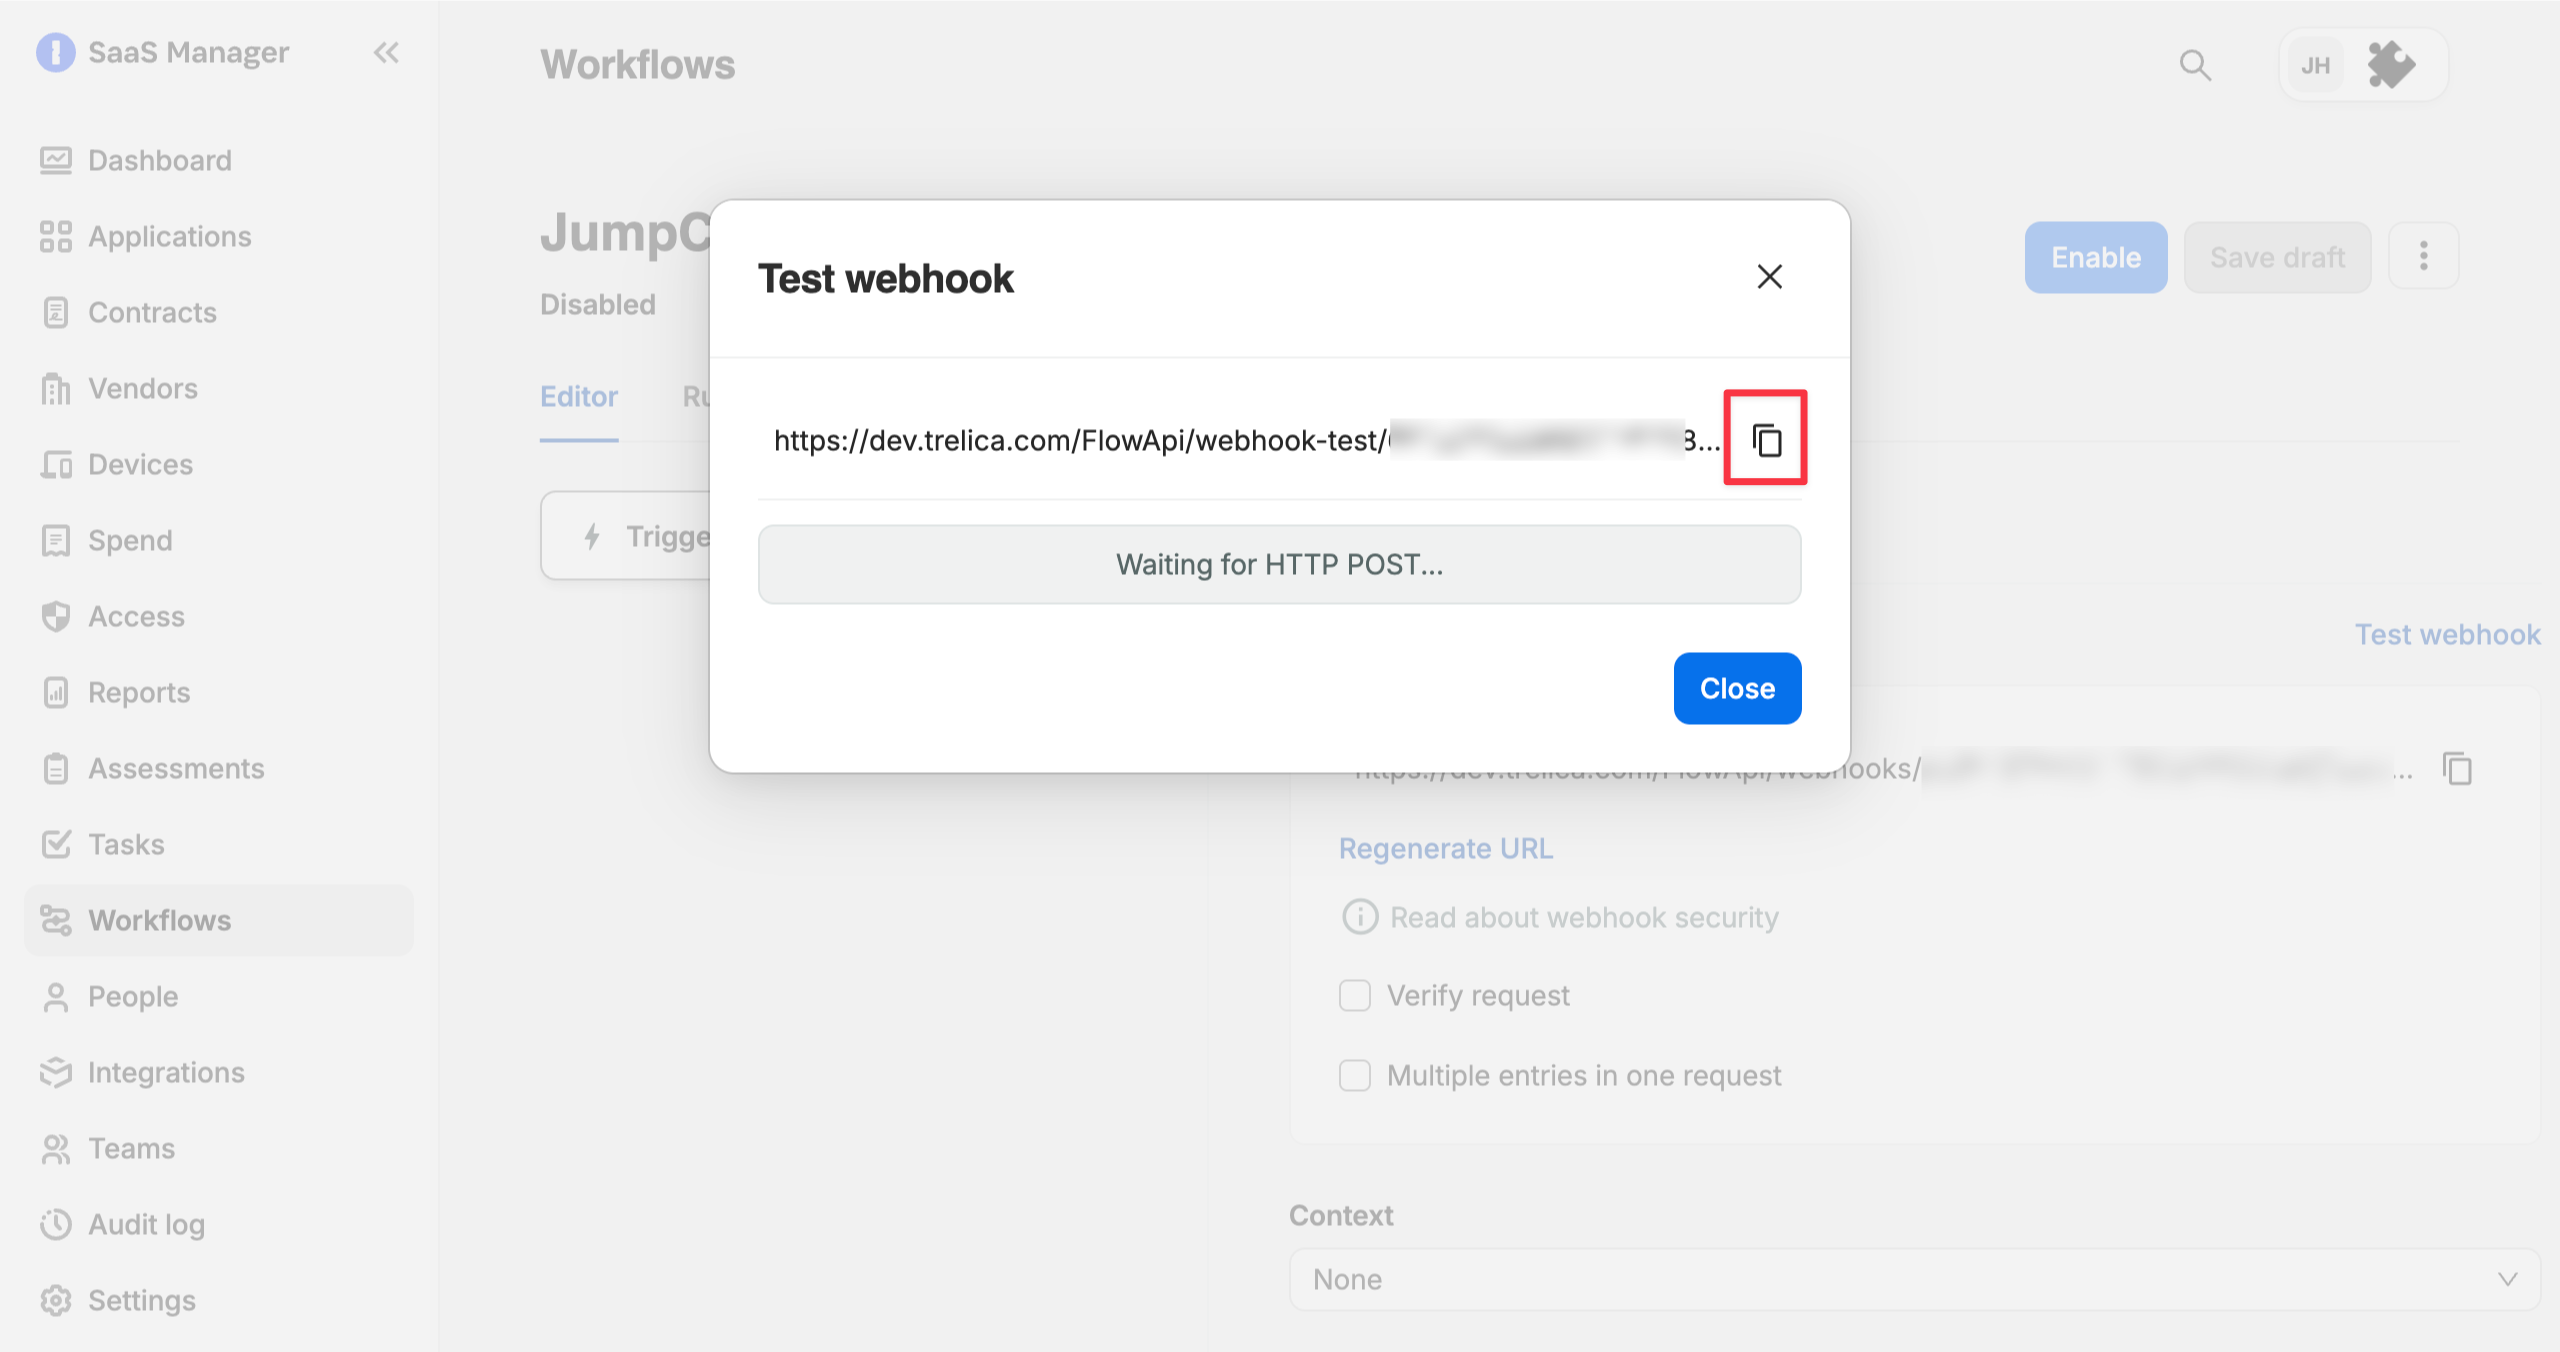
You will need to enter the API webhook trigger's URL in JumpCloud shortly. To begin with, select Test Webhook and copy the URL from the dialog. Leave the dialog open while you configure the JumpCloud webhook.
Configuring the JumpCloud webhook
In JumpCloud Admin Console navigate to Settings > Notification Channels > Webhook and click the +Add button.
Complete the fields:
- Name
- URL (paste in the test API webhook URL from the SaaS Manager workflow)
- Tick Verify SSL enabled
You can then select Test Webhook. Check back in your SaaS Manager workflow; if you left the Test workflow dialog open you should now see the sample API response data displayed.
Once validated copy the live webhook URL from the workflow and paste this into the URL field of the JumpCloud webhook.
We can now add further verification to the webhook request.
In the SaaS Manager workflow check Verify request. Select Secret for the verification method, and enter a header name, for example x-secret. SaaS Manager can generate a secure secret for you. Select Generate, copy the value to the clipboard, then select Use Secret.
Back in JumpCloud expand the Headers section of your webhook. Enter the attribute key you just entered on the workflow (e.g. x-secret), paste the copied secret as the value, and enable the sensitive value toggle.
Save the webhook.
Configuring the JumpCloud alert rule
Still in JumpCloud go to Insights > Alerts > Rules and click +Rule.
Select the Insights tab and click Select against the entry for Rule For Event Based Alert.
On the configuration form:
- Enter a meaningful Name and Description
- Check the condition A user account is suspended
- Enable Send notifications
- In Select notification channels pick the webhook you created
- Click Save
Fetching the suspended user's email
Assuming you are logged in to JumpCloud Admin Console with a user (ideally a service account) that you are happy to make API request with (read-only), click on your avatar and select My API Key. Set the the expiration for a duration that meets your company policies. Select Generate New API Key. Copy the API key value.
If you already actively use the API key for this account, copy it from wherever you have it securely saved to avoid impacting other integrations that might be using it already.
Now return to your SaaS Manager workflow.
As previously mentioned JumpCloud's suspend user event doesn't include the user's email address, so you're going to configure the workflow to retrieve this value.
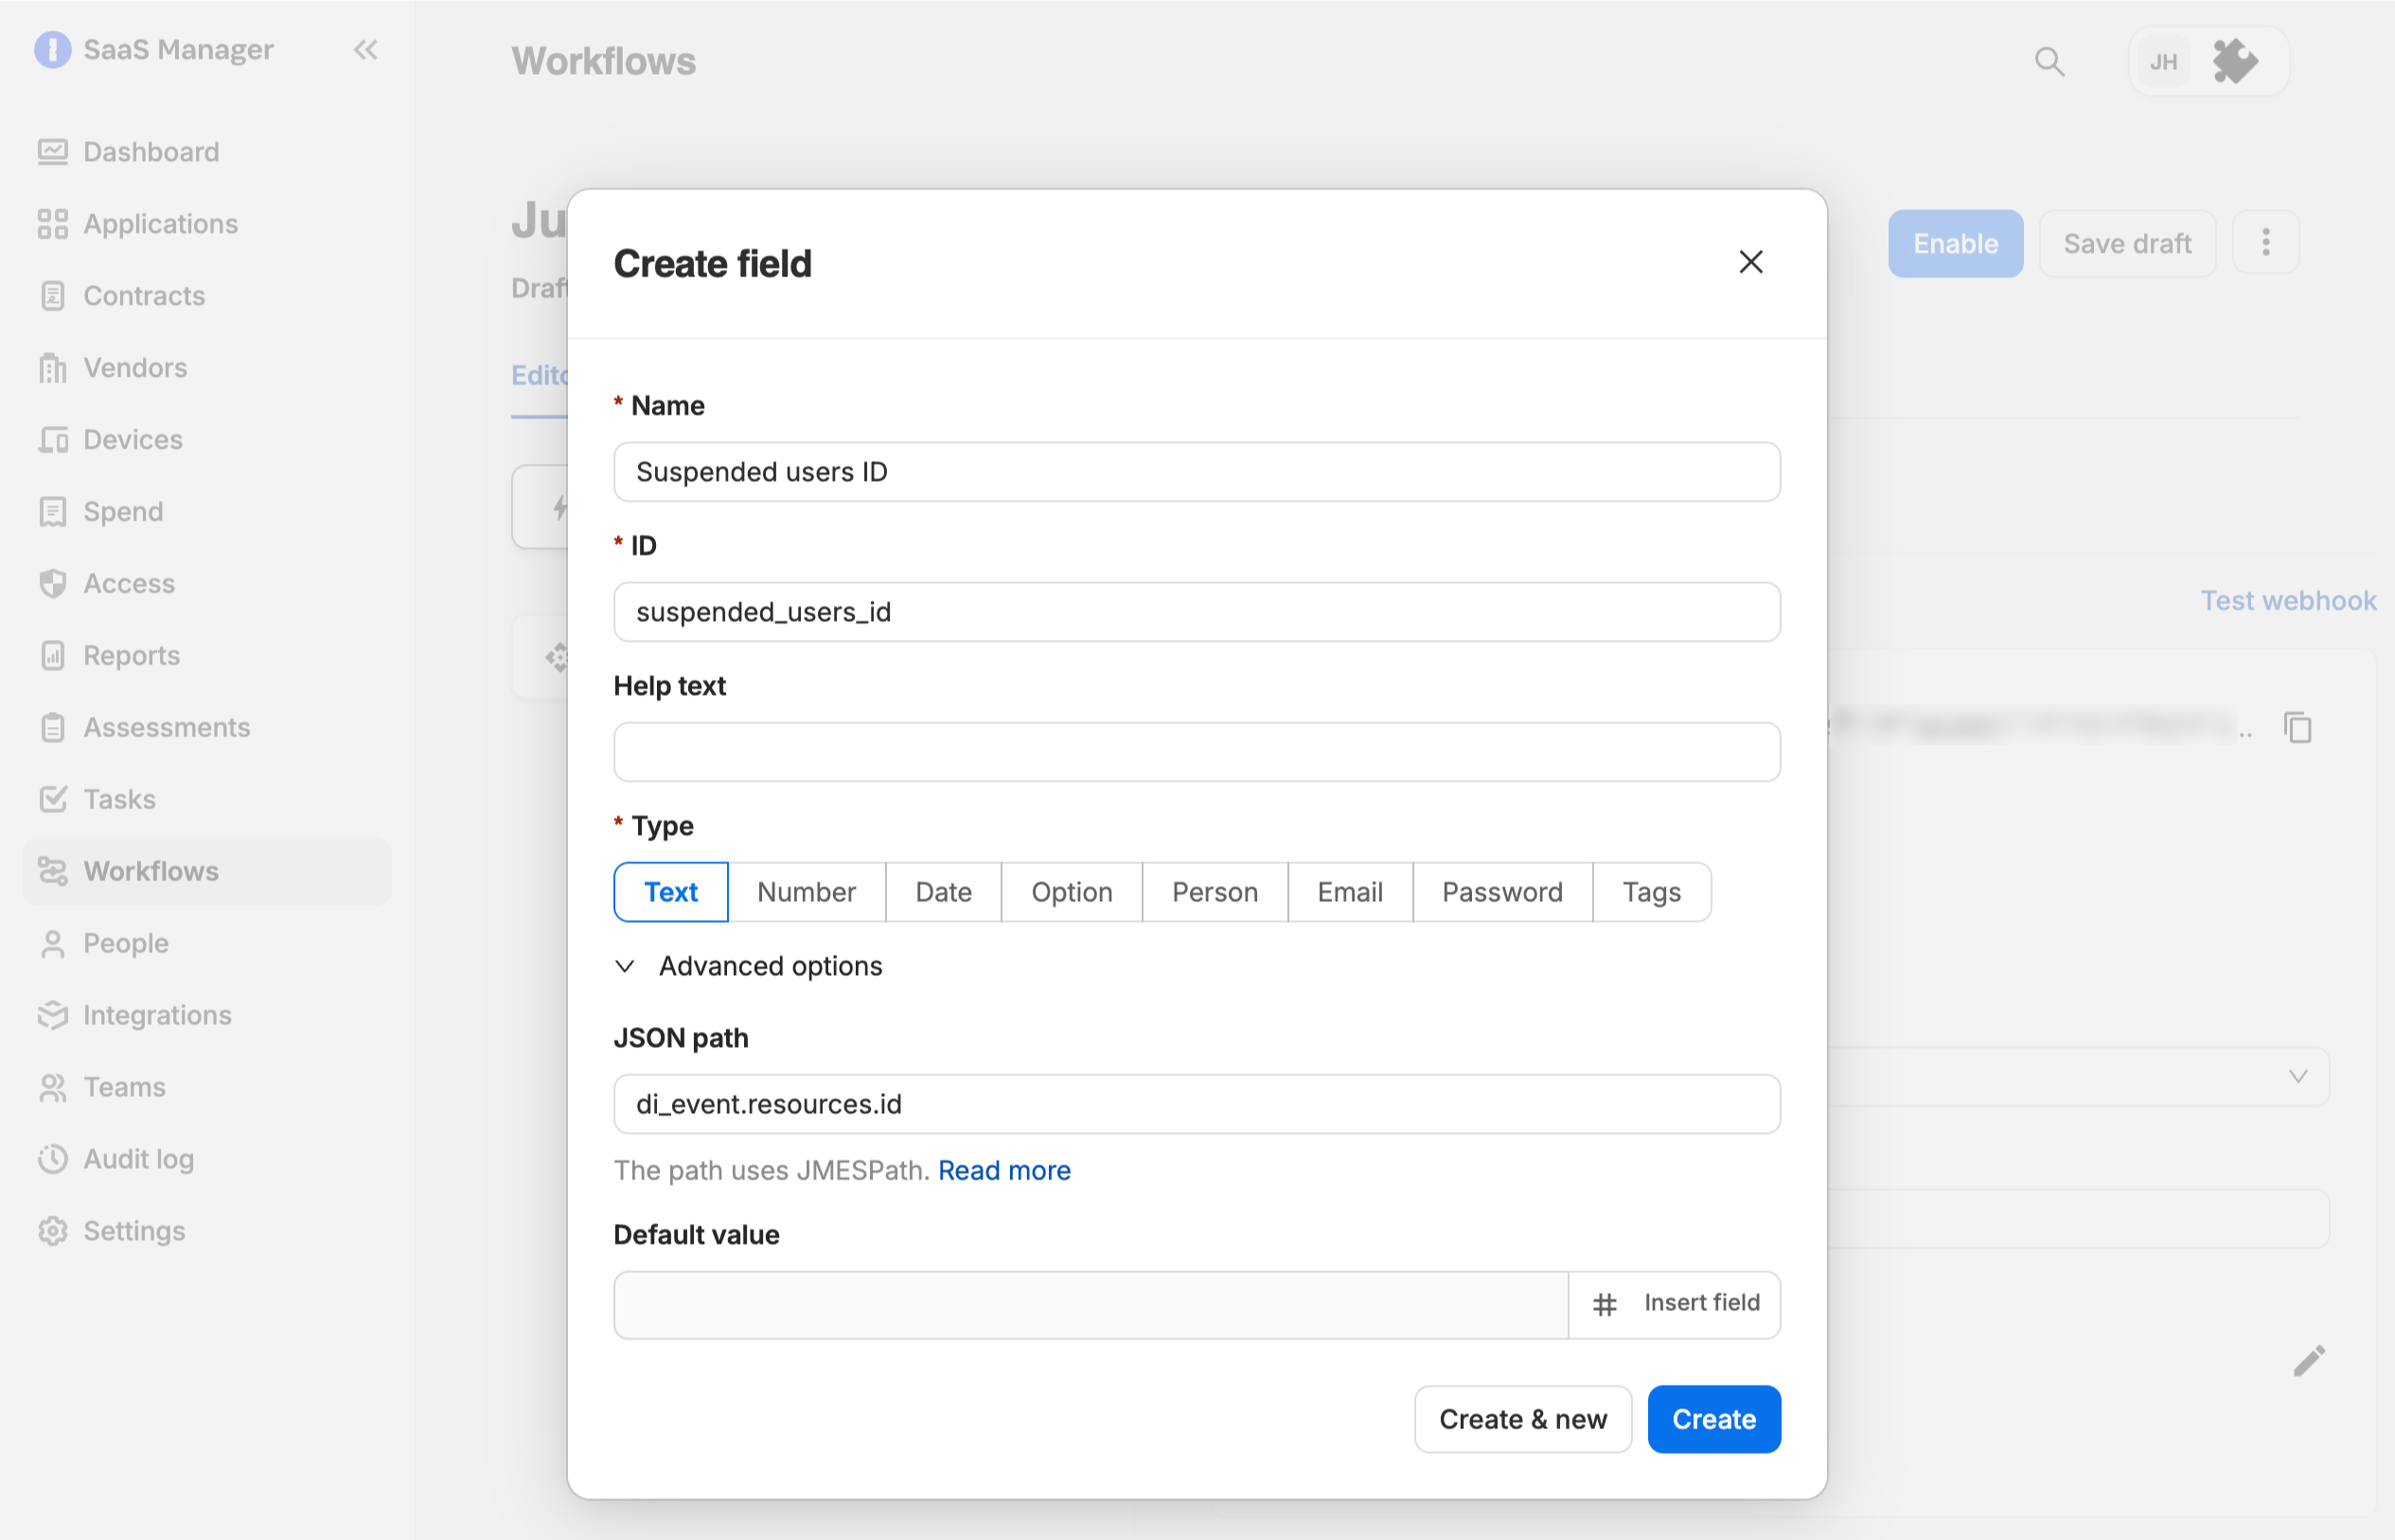
First you need to configure a field on the API Trigger step to store the suspended user’s ID from the webhook response data.
In the Input Fields section of the trigger step configuration add a new field (e.g. “Suspended User ID”) with type text. Expand the Advanced section and set the JSON path as di_event.resource.id.
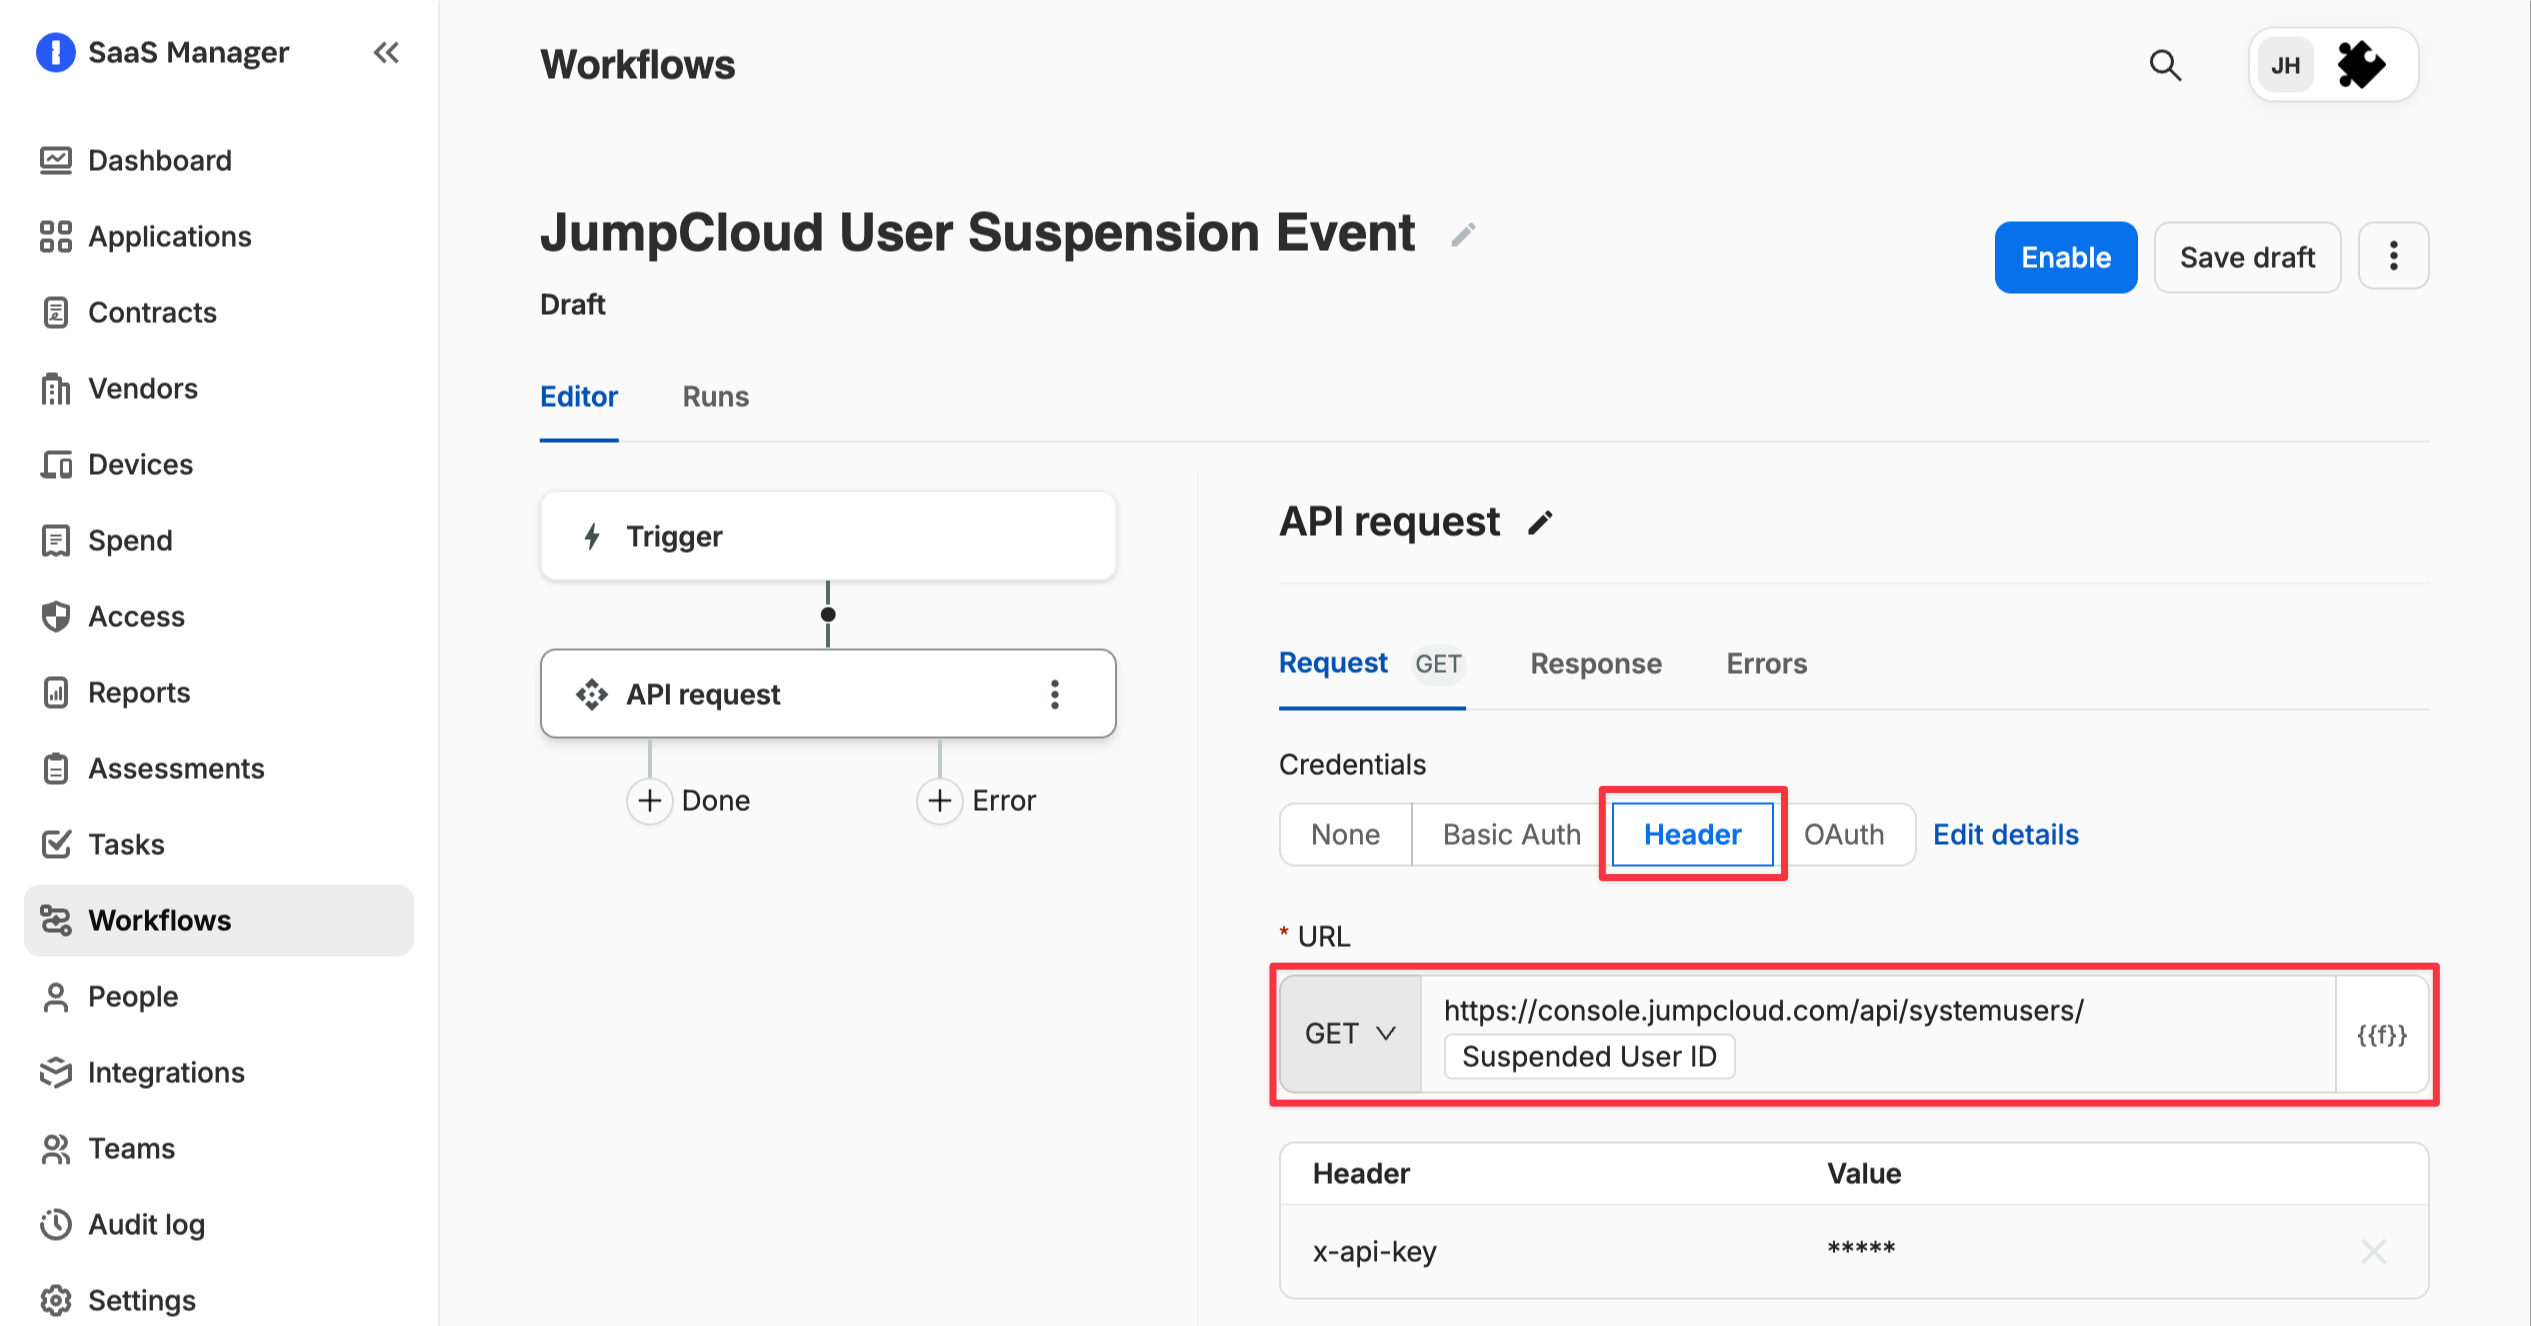
Next add an API Request step to the workflow.
Set the Credentials to Header and enter:
-
Key =
x-api-key - Value = the JumpCloud user API key you just copied.
In the URL pick GET and enter the value https://console.jumpcloud.com/api/systemusers/{suspended_users_id}
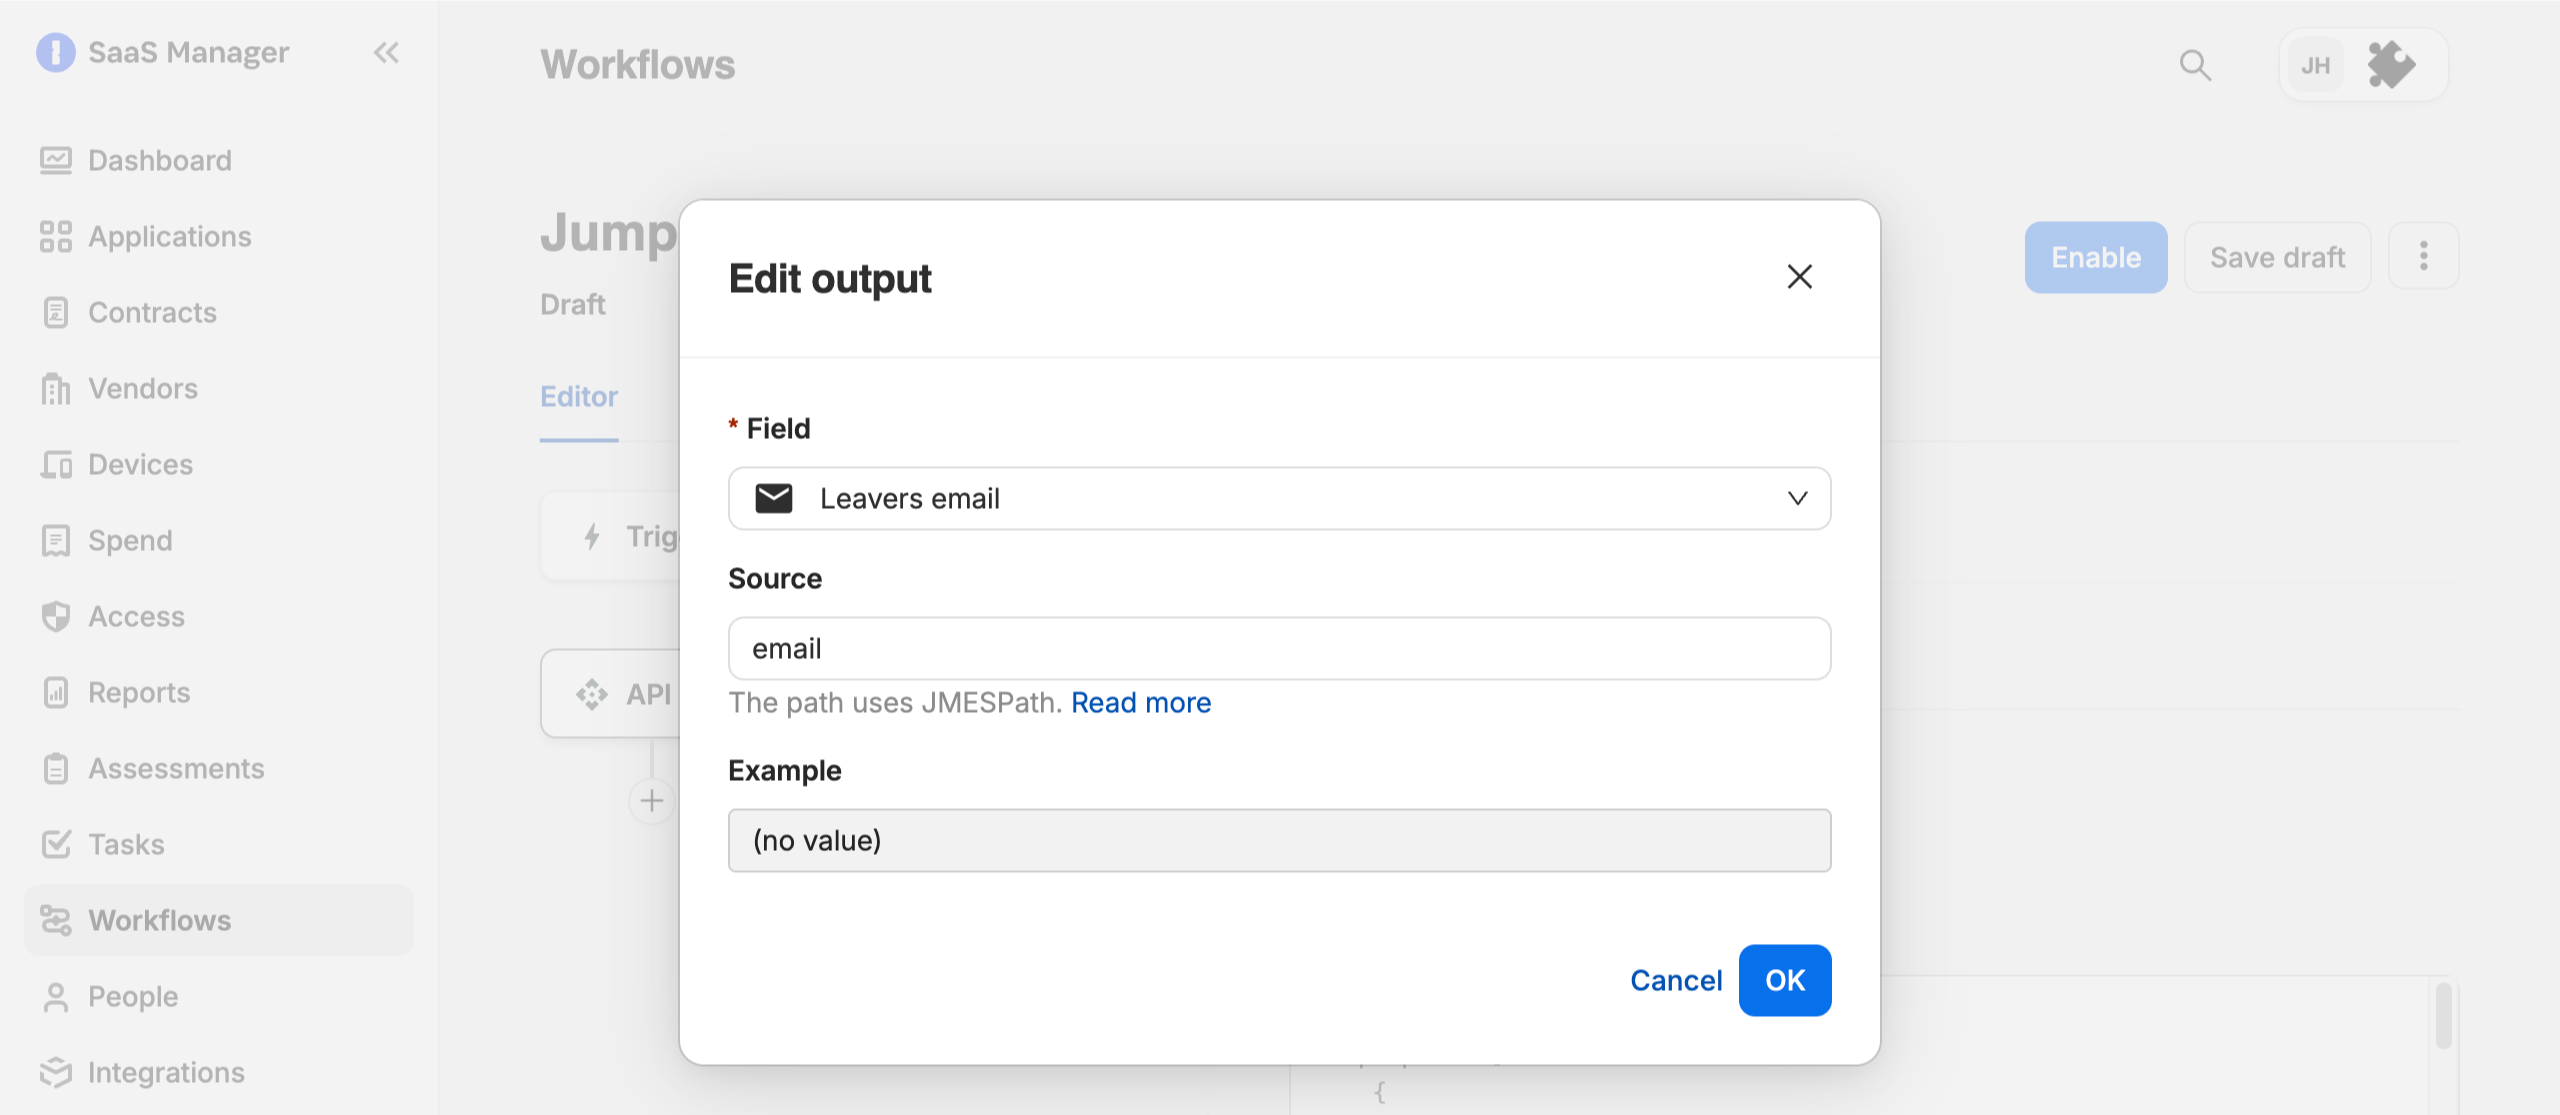
On the Response tab of the API Request step and select Add Output and create a new field.
- Name the field (e.g. Suspended User Email)
- Set the field Type as Email
- Click Create
- Set the Source as
email
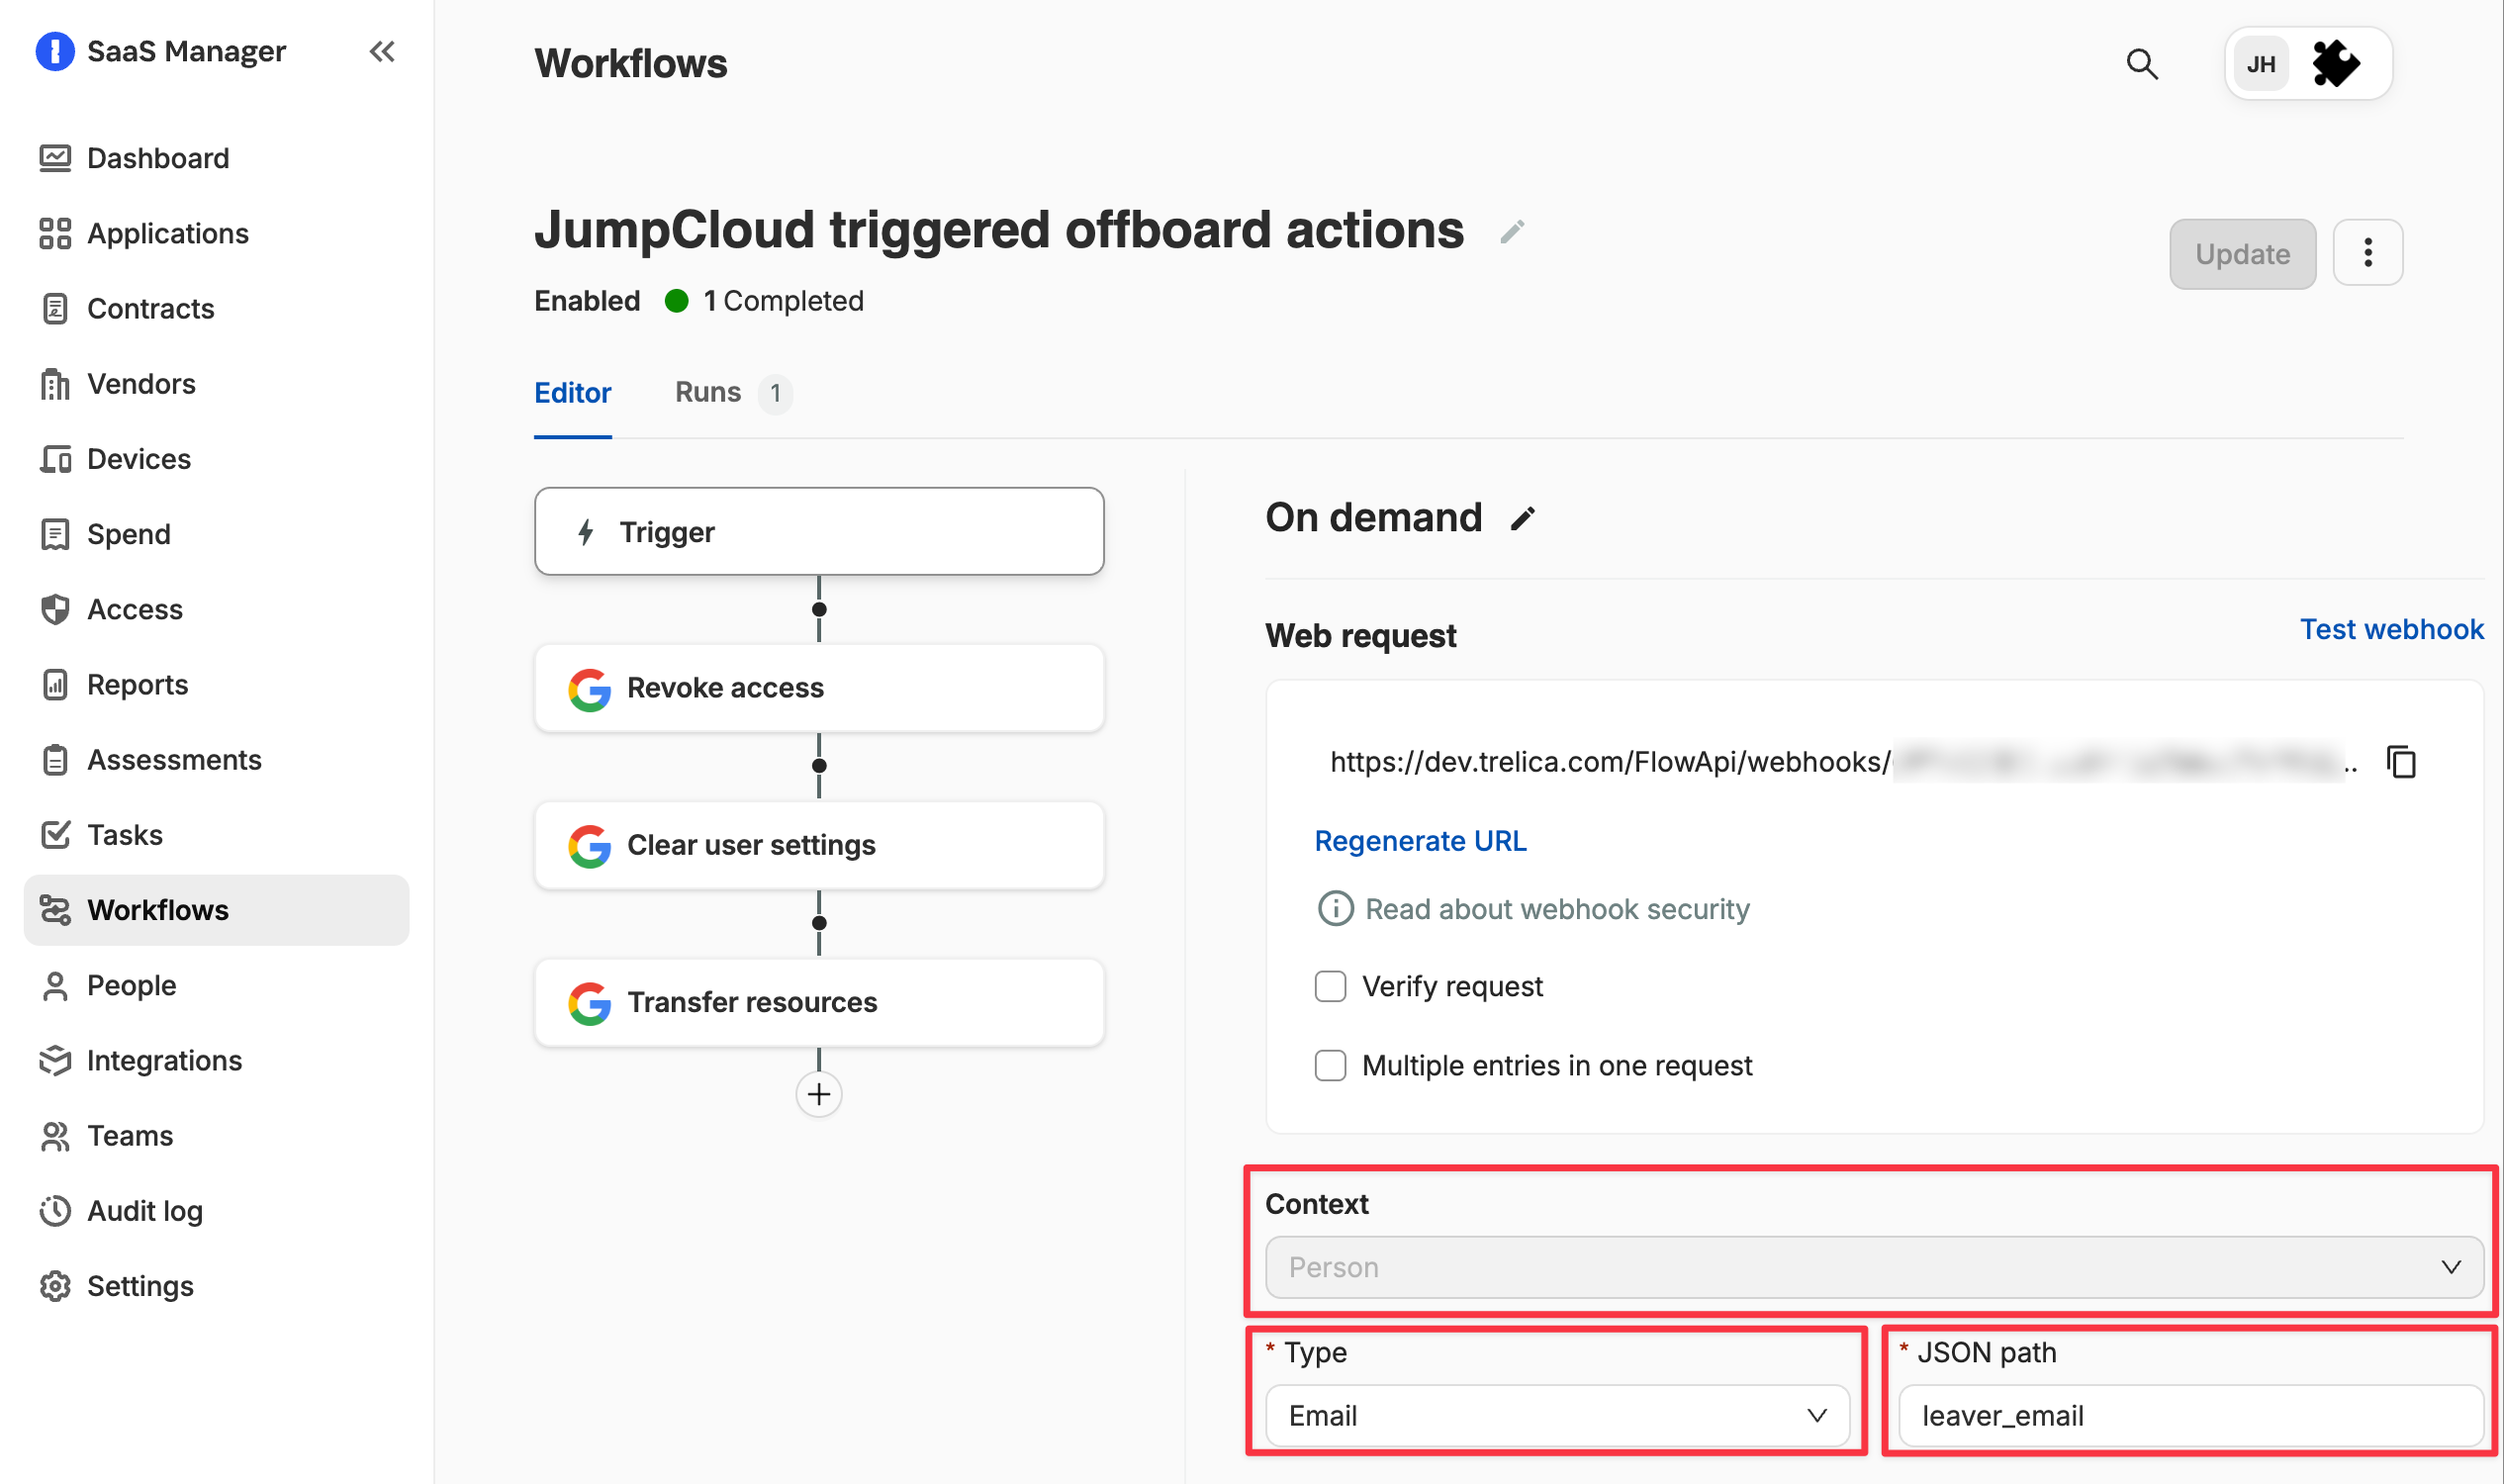
Creating the workflow for offboarding actions
Now you can create the second workflow in SaaS Manager, that will be used to manage the offboarding actions for the suspended employee. It should also use the API Webhook trigger.
- Set the Context to Person
- Set the Type to Email
- Define a name for the JSON path (you’ll use this in the first workflow) - e.g.
leaver_email - Copy the trigger step URL
After the trigger you can define your offboarding flow using the appropriate actions from the workflow builder UI.
Triggering the offboarding actions workflow
Return to the first workflow, and add another API Request step.
- Leave Credentials set to none
- Configure the URL with the POST method, and paste the trigger URL you just copied from your second workflow.
Select JSON as the Body type, and in the body value field you will define the request using the attribute name you defined in the second workflow, and setting the value for that attribute using the merge field from the suspended user's email address.
- Save the workflow

Your workflows are now configured to receive the JumpCloud user account suspension event, fetch the suspended user's email address, and pass that email address to a second workflow that is able to run offboarding actions.
When you are ready to have the workflow run in production make sure to Enable both workflows in SaaS Manager.
Comments
0 comments
Please sign in to leave a comment.