1Password SaaS Manager can import spend data from BigQuery. Configuration will require sufficient administrative rights in Google Cloud Platform (GCP).
The first step involves creating a view in BigQuery. We have a recommended view structure but SaaS Manager can also support custom views.
Once a view is created you will need to create a billing project and service account.
This account is then granted permissions on a view in the BigQuery dataset that you wish to share.
Create a BigQuery view
We recommend you create a view on your spend data with a standard structure which SaaS Manager can process without additional work. If this is not possible, then you can open a request with saasmanager@1password.com for manual view configuration.
The view should be called SaaSManager_spend
| Column name | Type | Notes |
|---|---|---|
| transaction_id | String |
Unique ID for the transaction |
| transaction_date | String |
Transaction date |
| last_modified | DateTime |
Date the transaction was last updated |
| description | String |
Description of the transaction |
| vendor | String |
Vendor name |
| amount | Float |
Amount |
| currency | String |
Currency code (e.g. USD) |
| transaction_ref | String |
Transaction reference (e.g. PO or Invoice number) |
| Optional fields: | ||
| user_email | String |
User who created the expense |
| cost_center | String |
Cost center code |
| service_start_date | Date |
Date the service started |
| service_end_date | Date |
Date the service ended. |
| status | String |
Status e.g. Paid |
Create a billing project and service account
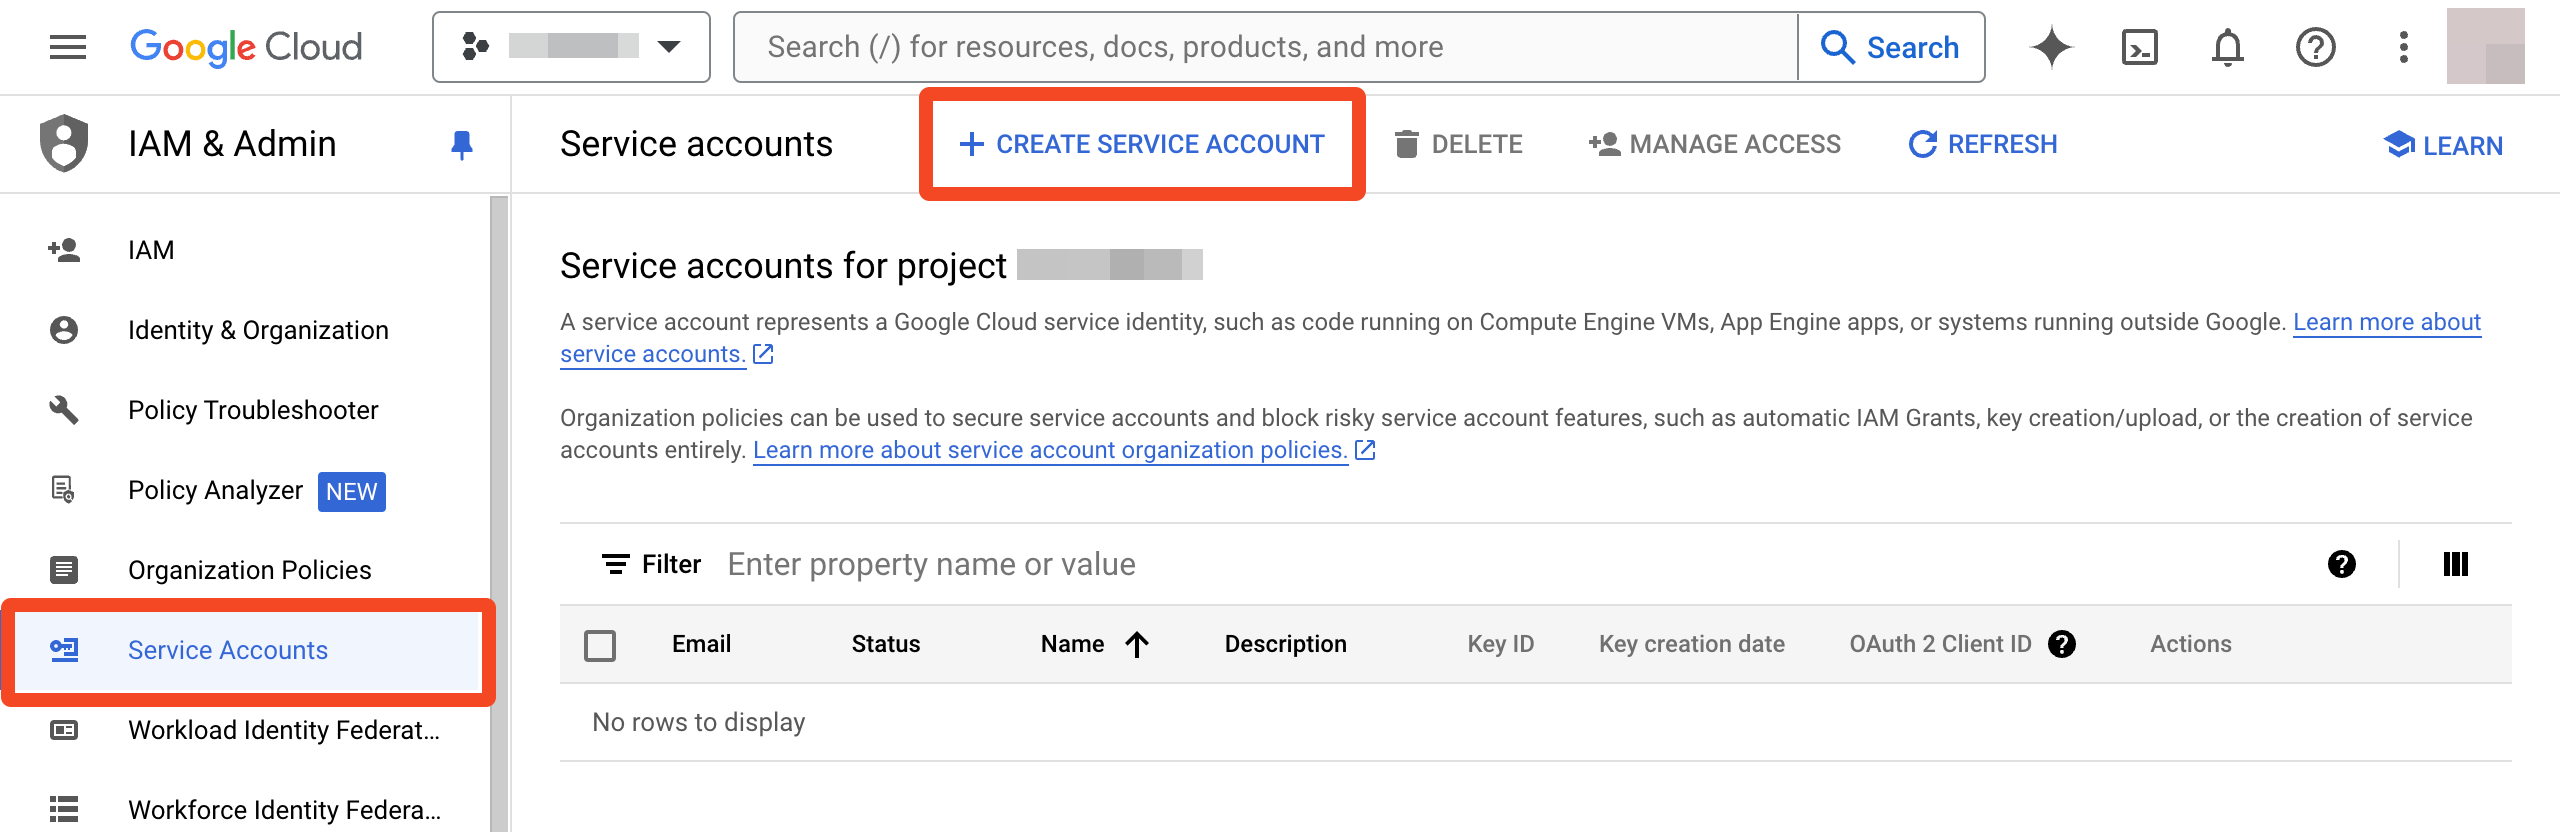
- Log in to Google Cloud Console.
- Create a new project (if required), or select an existing project that you want to add the service account to.
- Click Create service account:
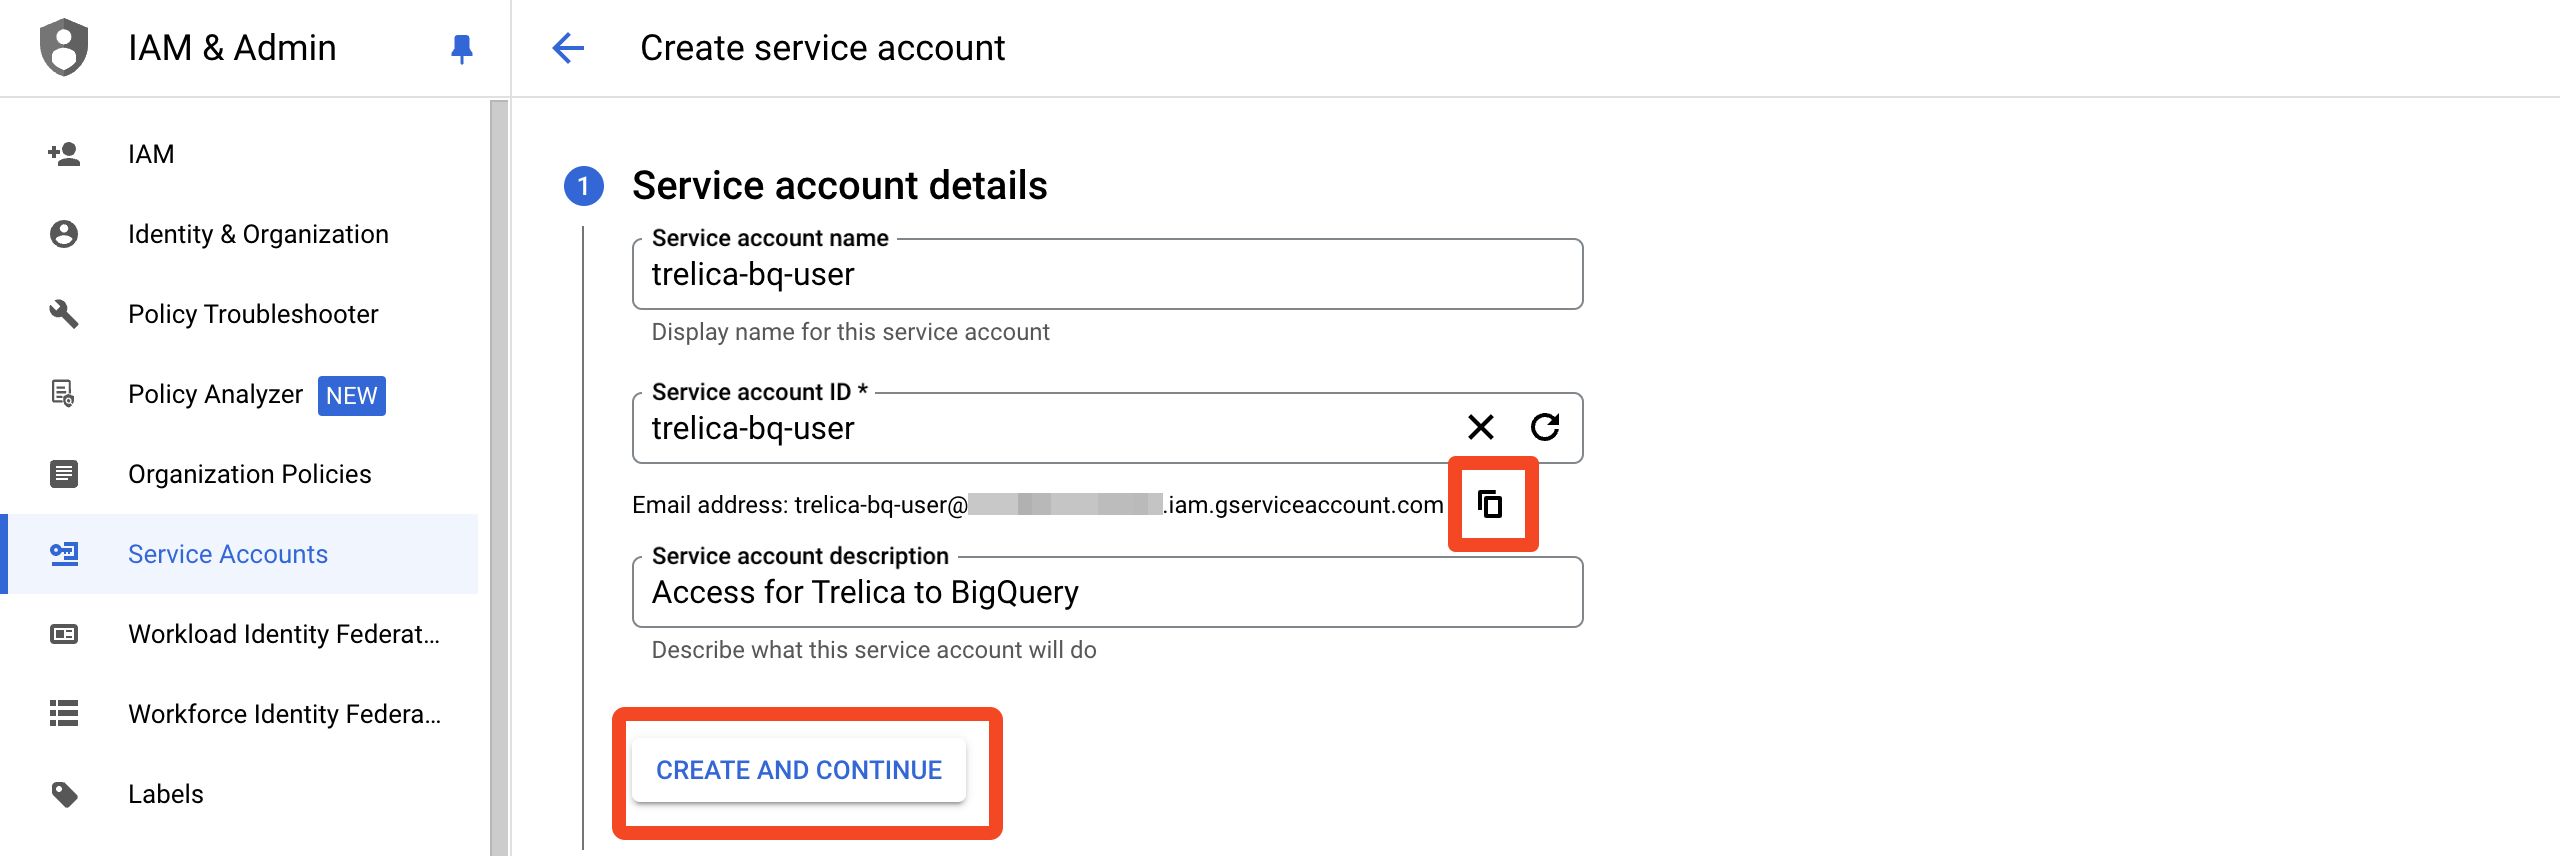
- Enter a Service account name: as you type a unique service account ID will be automatically generated.
- Note the generated Email address (you will need to provide this when connecting SaaS Manager to BigQuery - a copy will be in the JSON key file you will shortly download).
- Click Create and Continue.
- Assign the BigQuery Job User role by either searching or selecting in one of the Quick access lists if available.
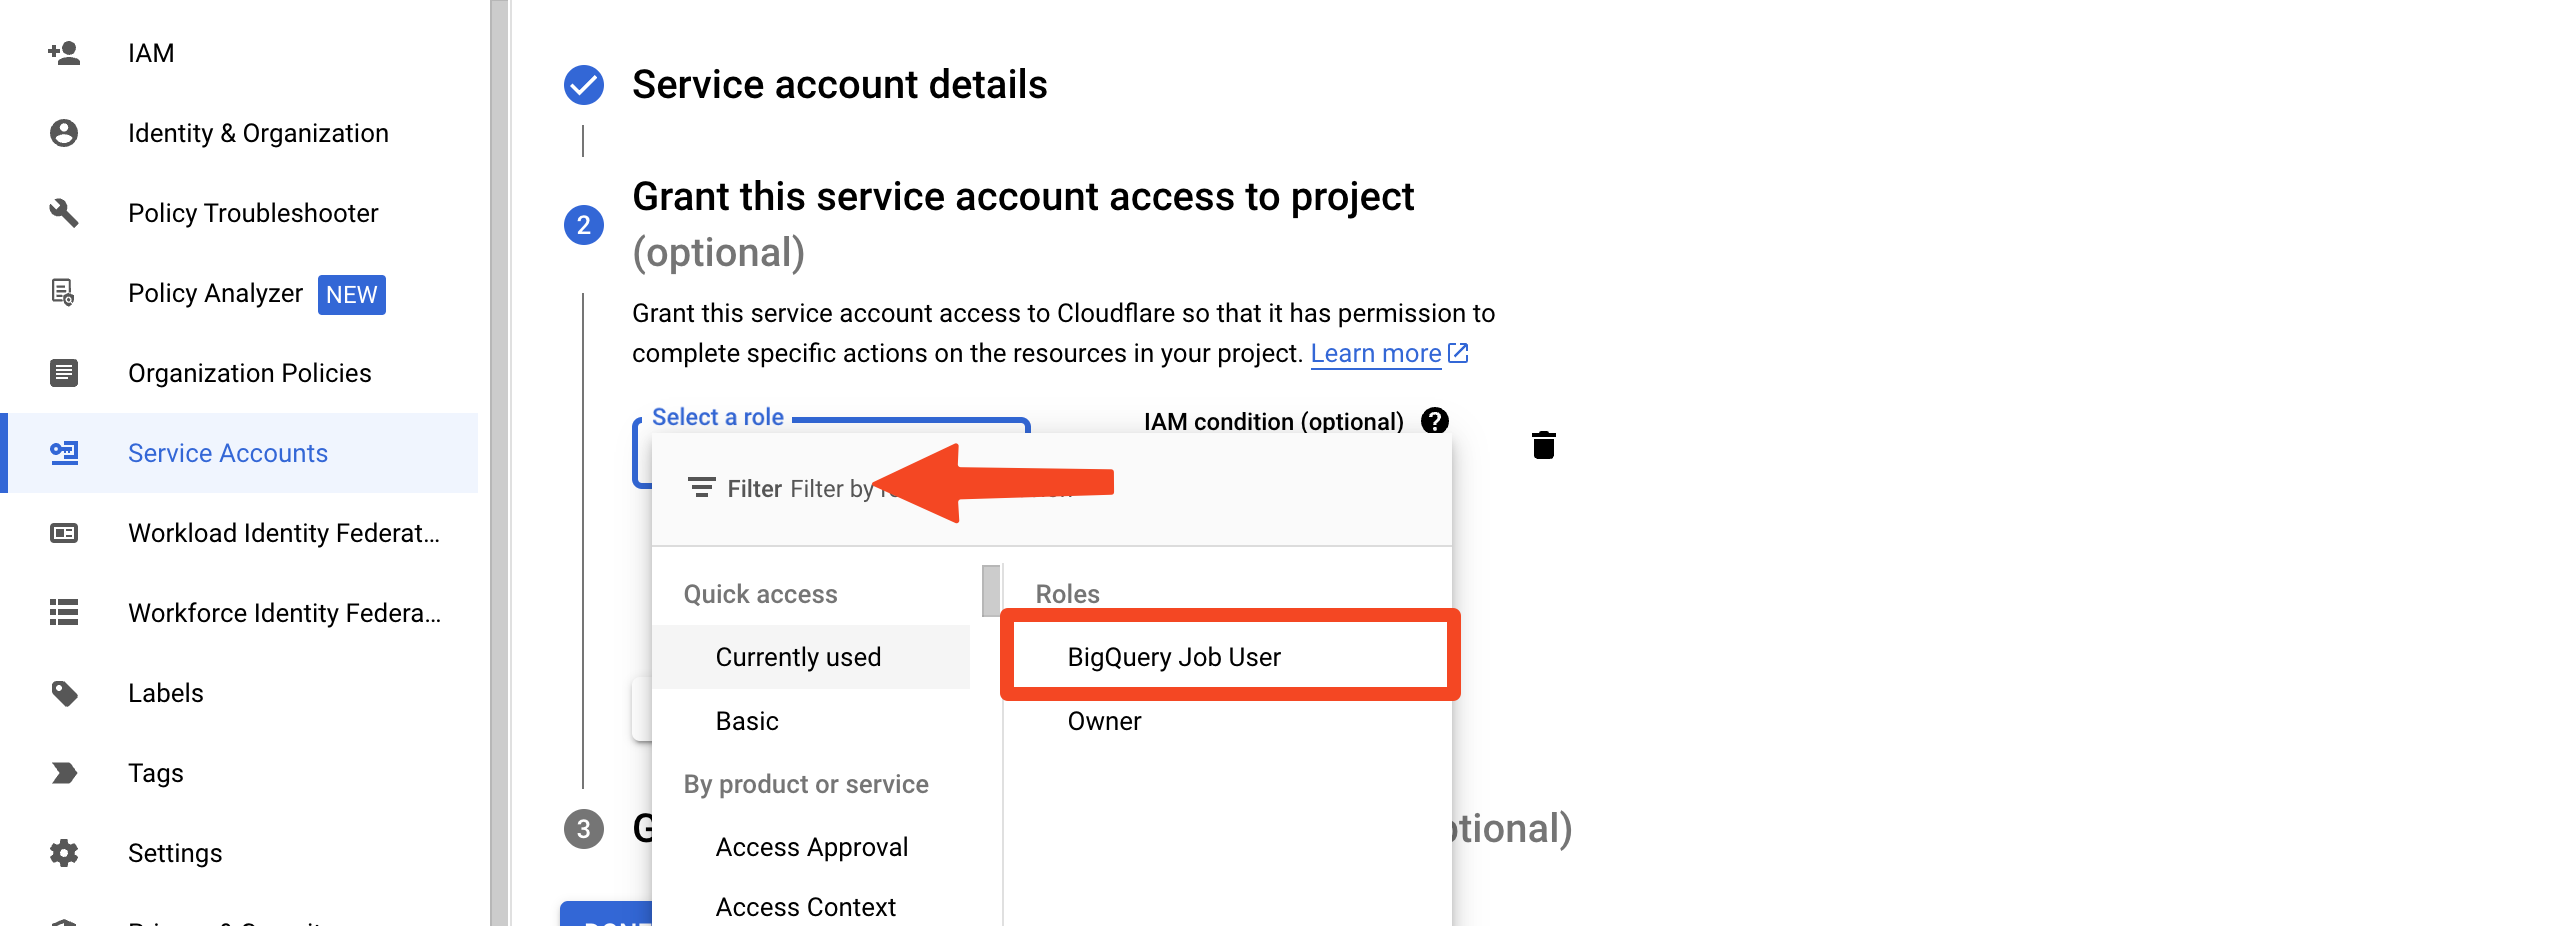
- Click Continue
- Click Done. You do not need to perform the Grant users access to this service account step.
- You will see a list showing your newly created service account. Click on it to view more details.
- Click the Keys tab, then Add Key and Create new key:
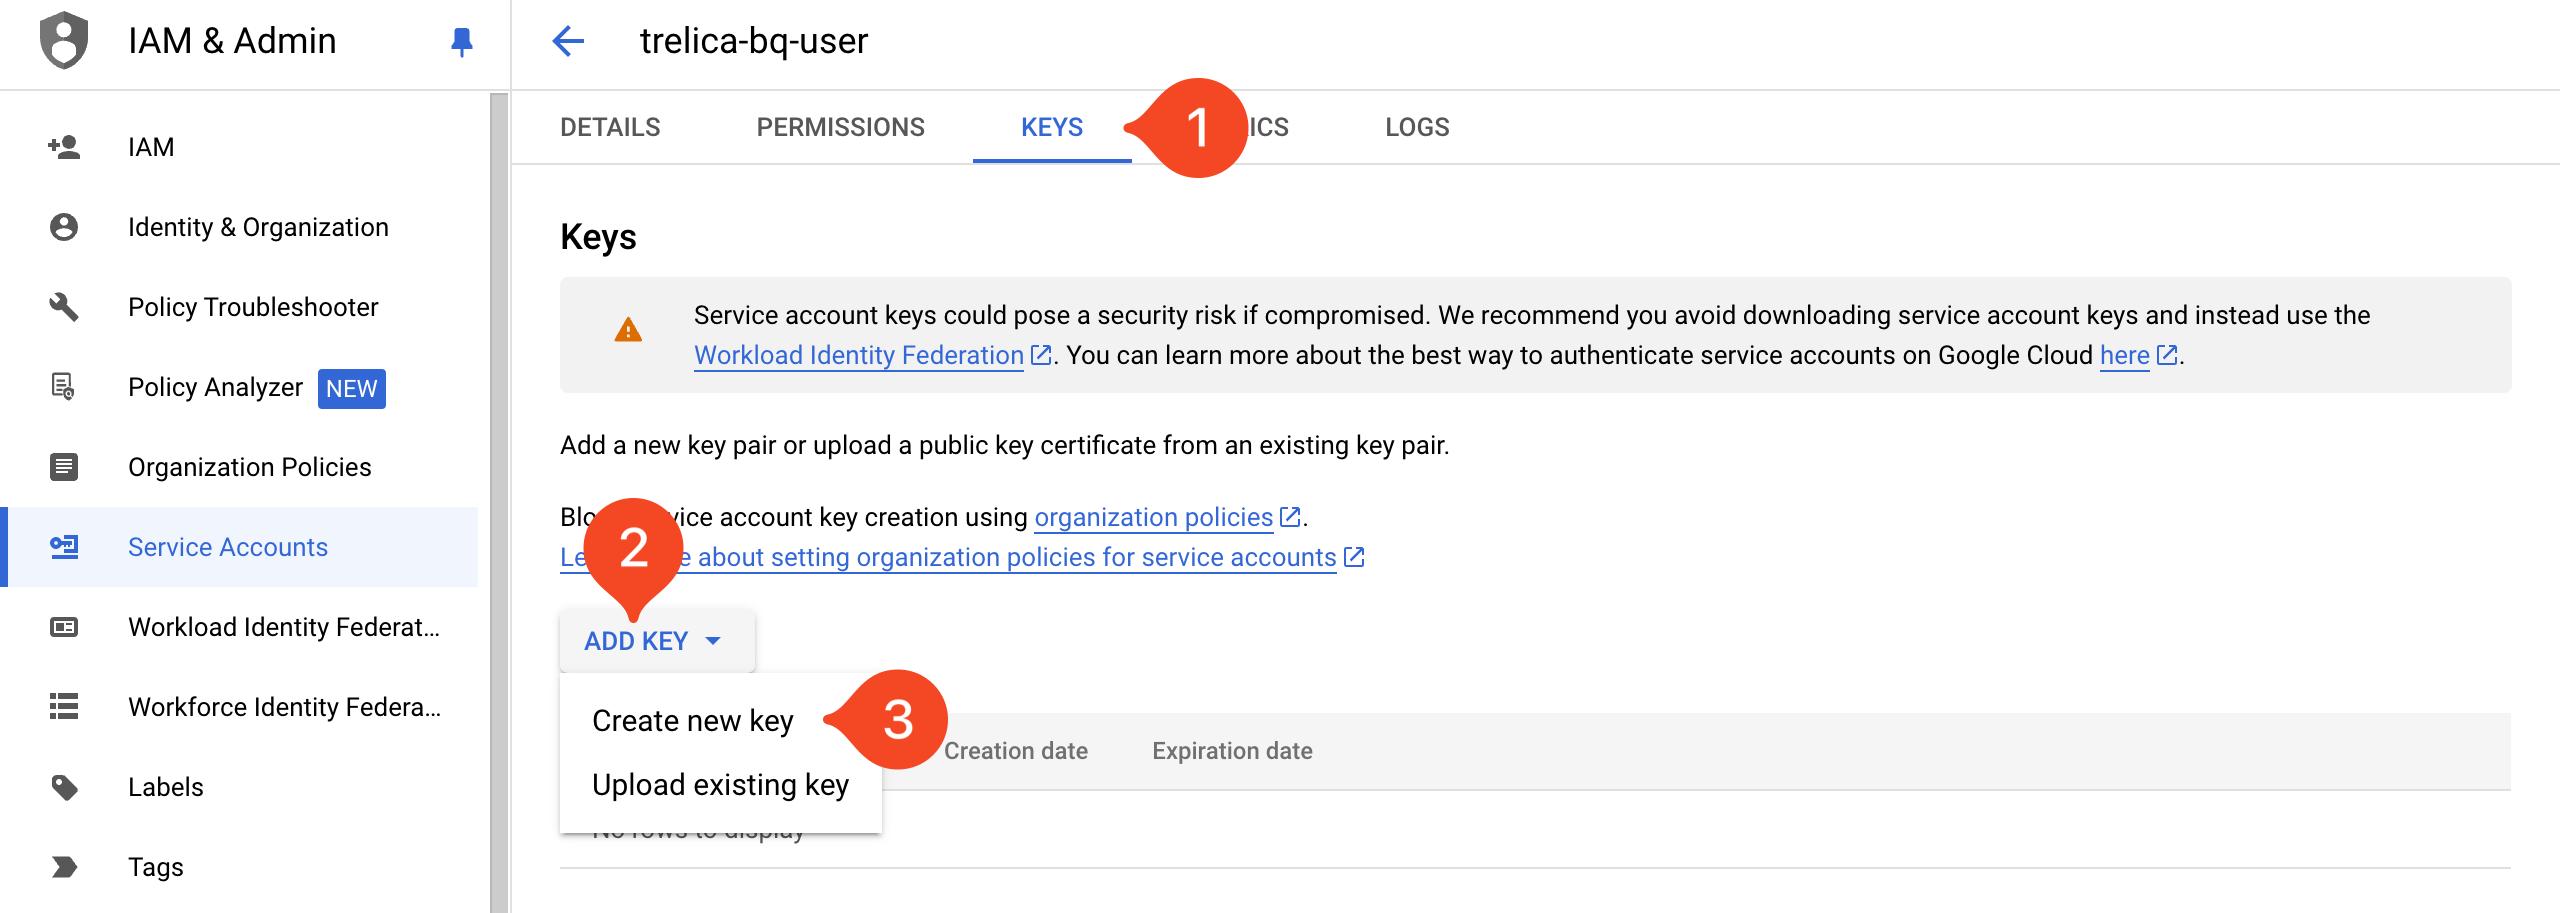
- Choose the JSON key type and click Create.
- A JSON file will be downloaded. Load it into a text editor:
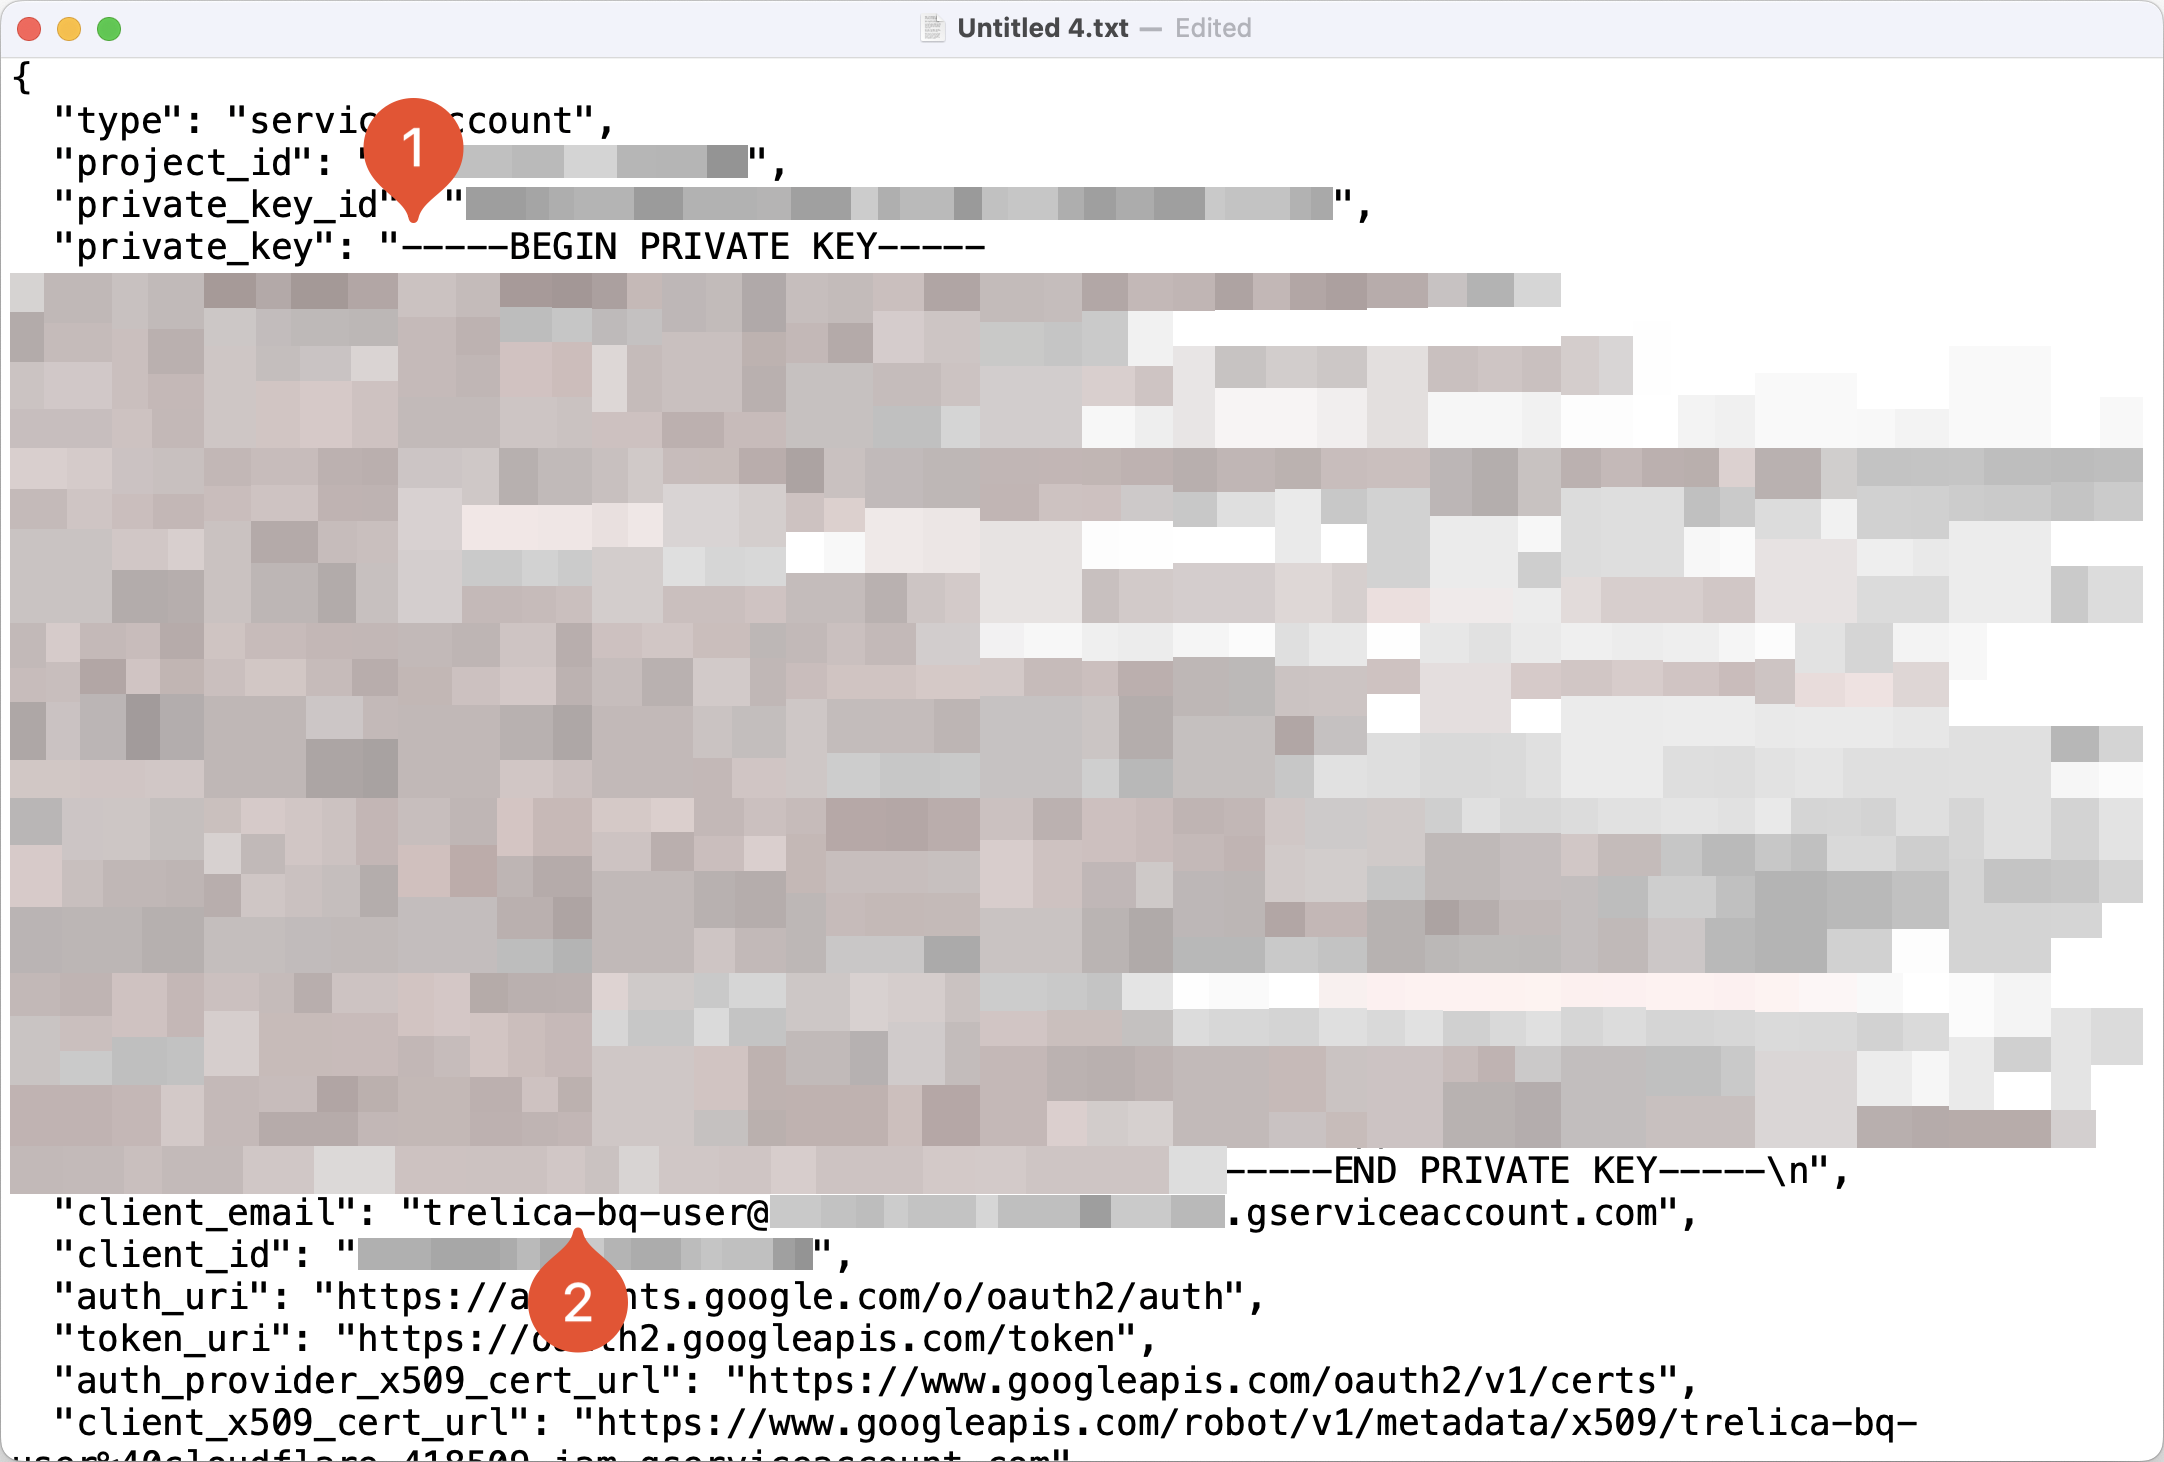
- Copy the private_key value (starting with, and including
-----BEGIN PRIVATE KEY-----through to, and including-----END PRIVATE KEY-----). The newline characters will be encoded with\nbut SaaS Manager can cope with this. - Once you have entered these details into SaaS Manager you should delete the file (i.e. also remove from any trash or recycle bin).
- You can regenerate the key and re-enter it into SaaS Manager at any time if you need to.
Share a BigQuery view
- Switch to BigQuery in Google Cloud Console.
- Create and save a view of your data.
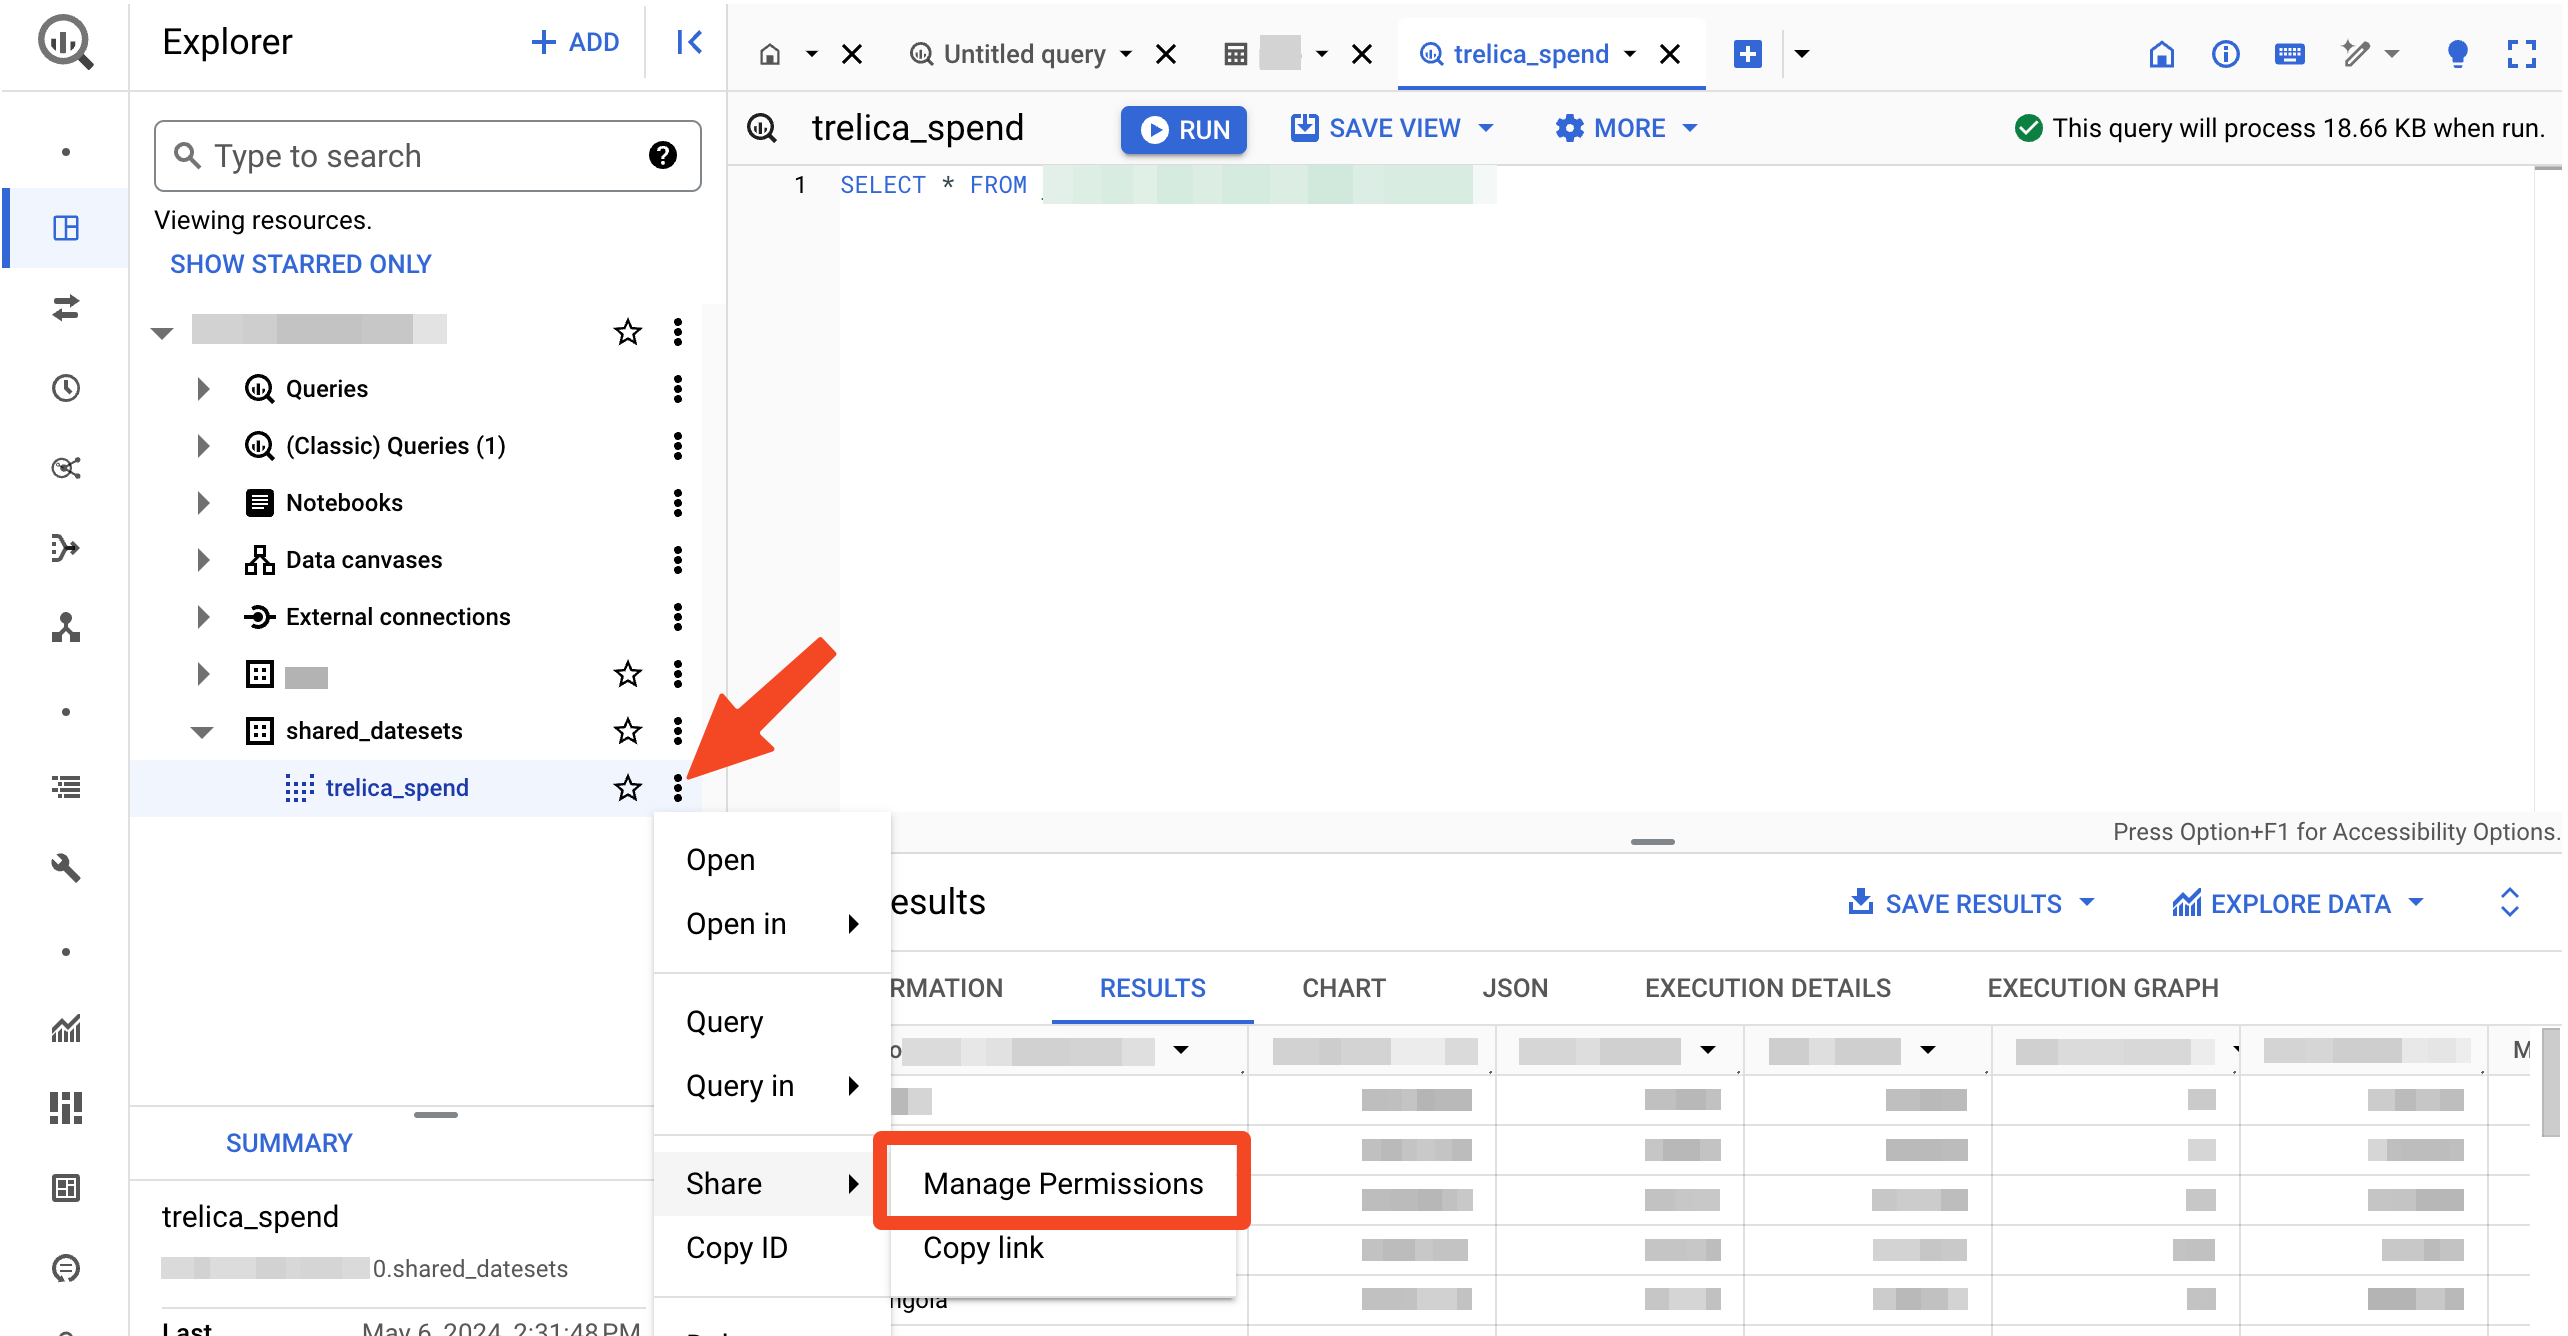
- Click on the view, and choose Share > Manage Permissions:
- Click Add Principal:
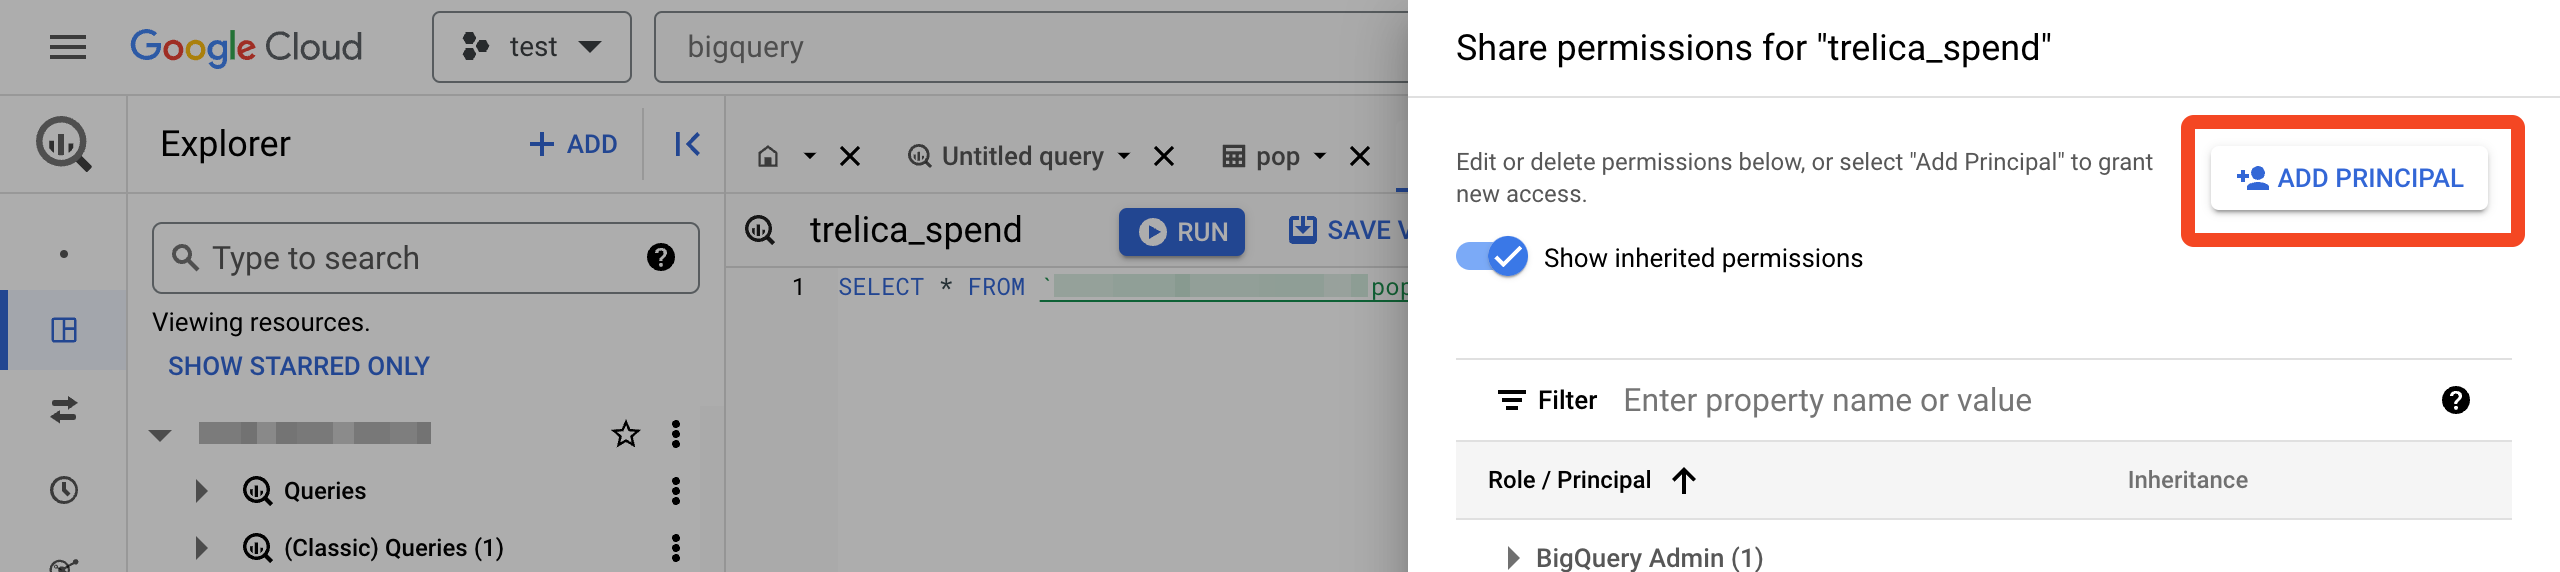
- In New principals, enter the email address for the client you created earlier (along the lines of
SaaSManager-bq-user@your_project.iam.gserviceaccount.com). - Select the BigQuery Data Viewer role.
- Click Save.
- You may need to add the user to any underlying tables as well as the view.
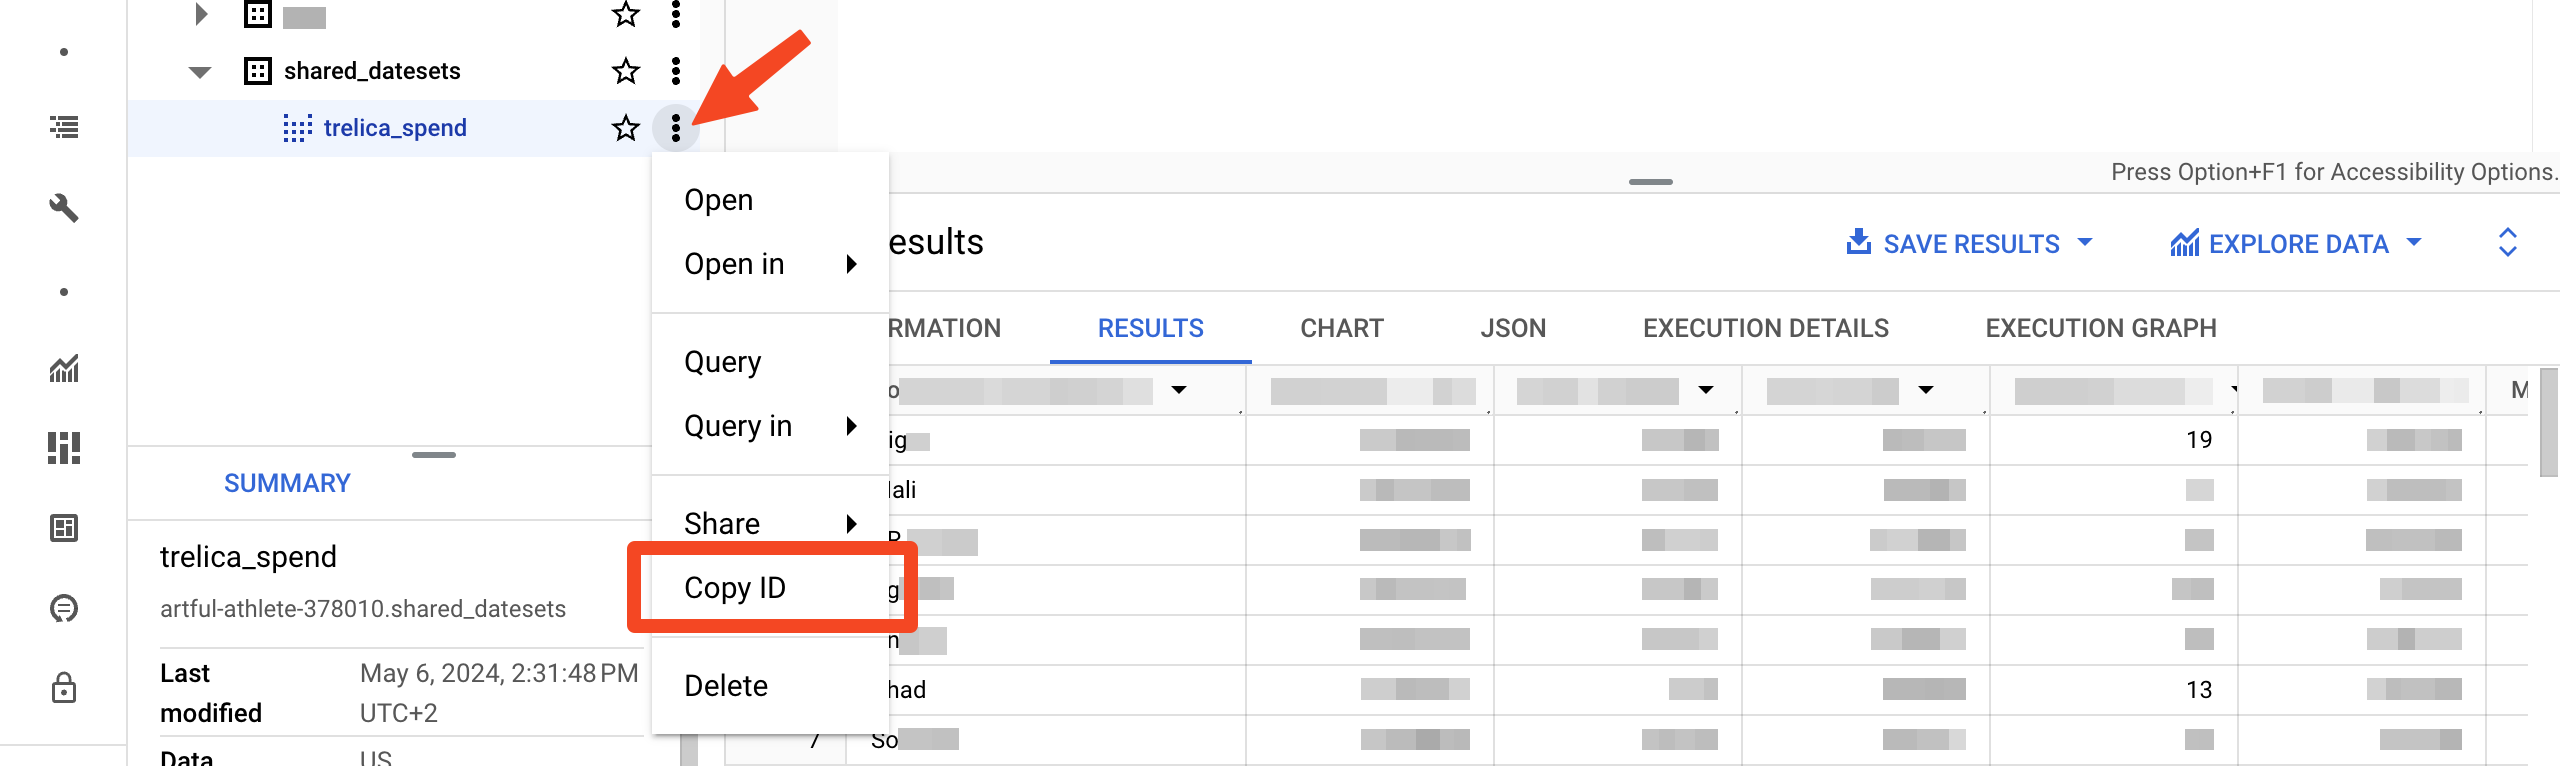
- Finally, take a copy of the View ID by opening up the menu for the view and clicking Copy ID.
View configuration
If you are not using the proscribed SaaS Manager spend data view structure then please contact saasmanager@1password.com to configure mapping a custom view into SaaS Manager.
Connecting SaaS Manager to BigQuery
Login to SaaS Manager and from the Integrations tab, and search for BigQuery.
Click Connect and enter:
- The service account email
- The private key
- The ID of the BigQuery view you created
Comments
0 comments
Please sign in to leave a comment.