Getting started
- Log in to Cloudflare and go to Zero Trust.
- Select Applications and click Add an application:
Creating a new application
- Enter the name for the application (e.g. 1Password SaaS Manager).
- Choose SAML, then click Add application.
You now need to collect some information from SaaS Manager to enter into Cloudflare. In a separate tab, log in to SaaS Manager and go to Settings > Users and scroll down to the Single Sign-On (SSO) section:
- Paste the SaaS Manager SAML Entity ID into the Cloudflare Entity ID field.
- Paste the SaaS Manager SAML Assertion Consumer Service (ACS) URL into the Cloudflare Assertion Consumer Service URL.
- Select Email as the Name ID Format in Cloudflare.
- Copy the SAML Metadata endpoint to the clipboard.
You now need to enter some Cloudflare information into SaaS Manager. Click on the New button in the SAML providers section of the SaaS Manager user settings page.
- Select Url and certificate for the Metadata type.
- Paste the Cloudflare SAML Metadata endpoint value into the SaaS Manager Metadata URL field.
- Click Save in SaaS Manager.
Complete the configuration in Cloudflare
- Set up SAML attribute statements if required - these will pass through the user's name when new users log in to SaaS Manager. The values SaaS Manager expects are
given_nameandfamily_name: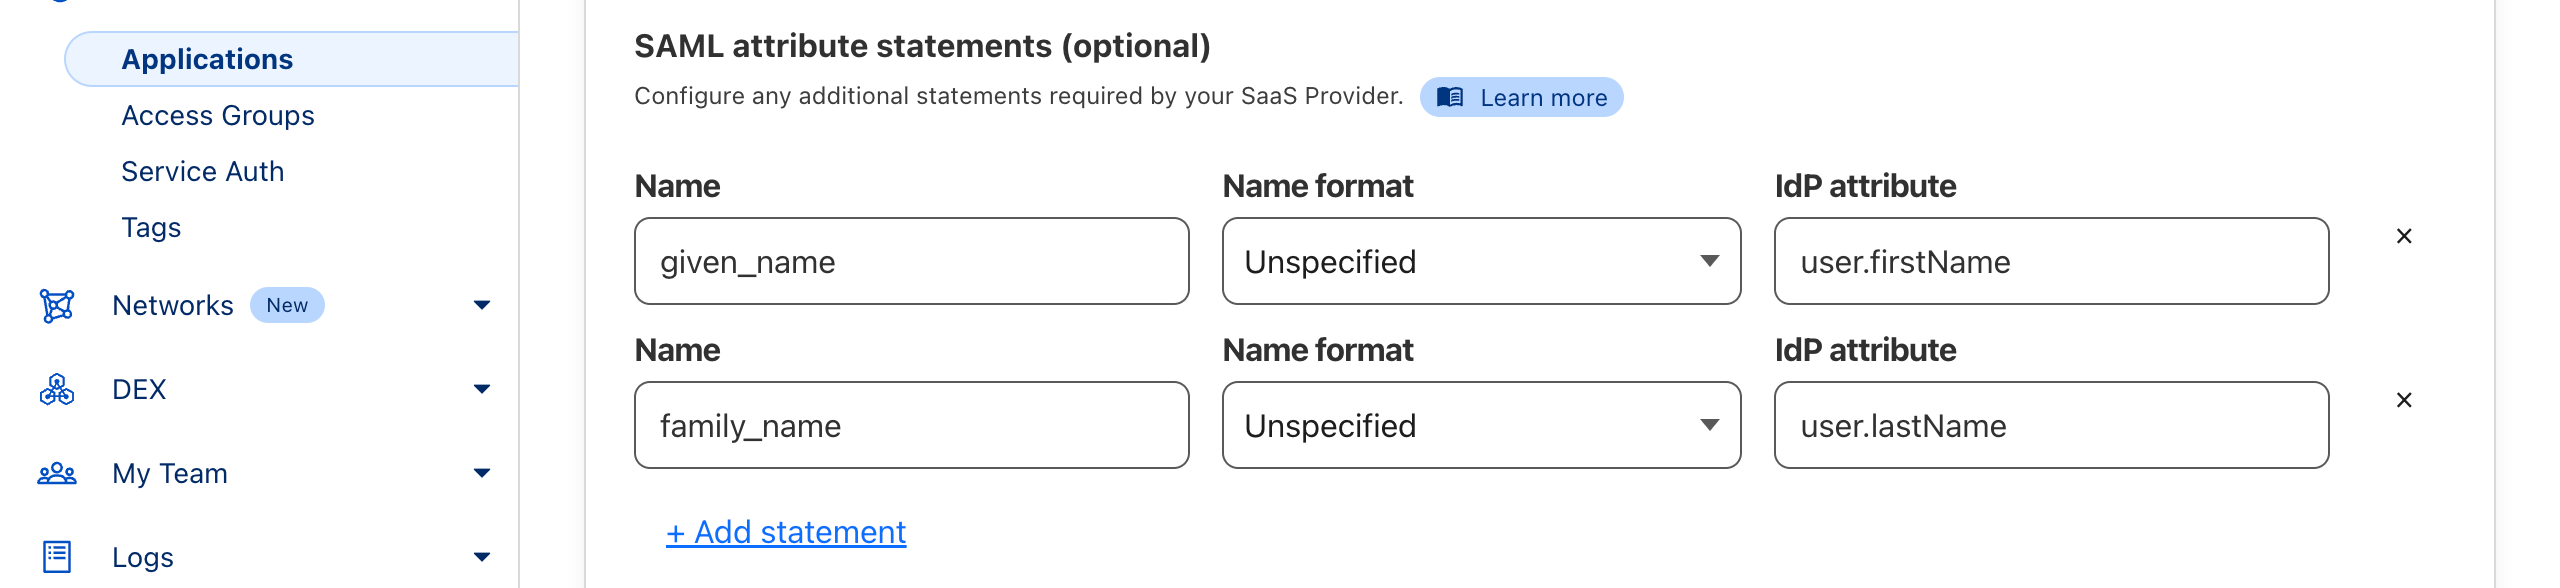
- Complete any other Cloudflare configuration.
- Click Save application at the bottom and then apply the necessary Cloudflare access policy or group.
- Click Done.
Comments
0 comments
Please sign in to leave a comment.