Group workflow actions
1Password SaaS Manager provides three primary steps to manage account group memberships:
- Add account to group
- Remove account from group
- Set account groups
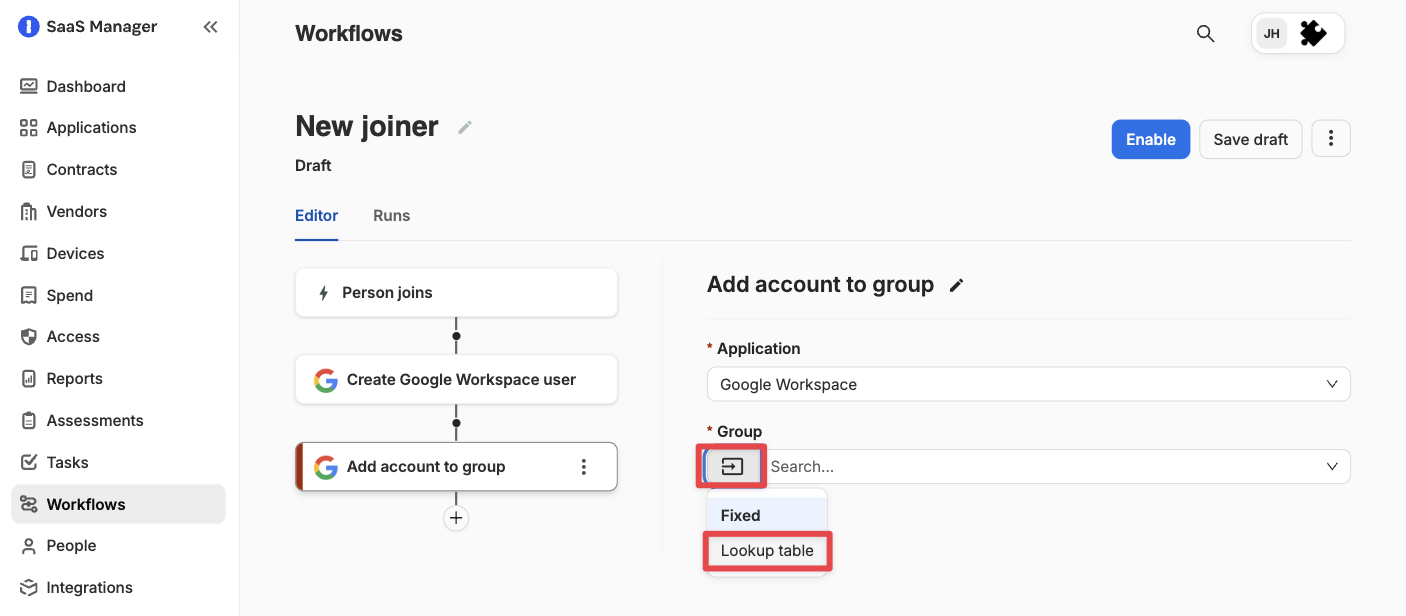
All three steps can use lookup tables to define how to set group memberships for an account, though Add account to group and Remove account from group default to use fixed group membership definition. Select the button to the left of the Group dropdown menu to switch to lookup table mapping.
You can use lookup tables to define group membership entitlements for attributes associated with the person that causes a workflow to run. This can include their location, team, job title, or other values defined when the workflow runs.
The attributes you choose to map to key values in the lookup table will perform the relevant actions in relation to the associated groups. Here's an overview of how each step manages group memberships:
| Step | What it does |
| Add account to group | Adds users to groups matched in the lookup table, but doesn't remove existing memberships. |
| Remove account from group | Removes users from groups marched in the lookup table, but doesn't affect other memberships. |
| Set account groups | Aligns group membership exactly to the lookup table. Adds missing groups, keeps valid groups, and removes groups that aren't defined. |
Because Set account groups removes group memberships from any undefined groups in the lookup table, it's not suitable for situations when you expect manually-applied group membership exceptions that fall outside of the group mapping defined in your lookup table.
Configuring a lookup table
On the workflow step, select the key value in the Group or Group lookup dropdown menu. This is the attribute that will be referenced with the lookup table.
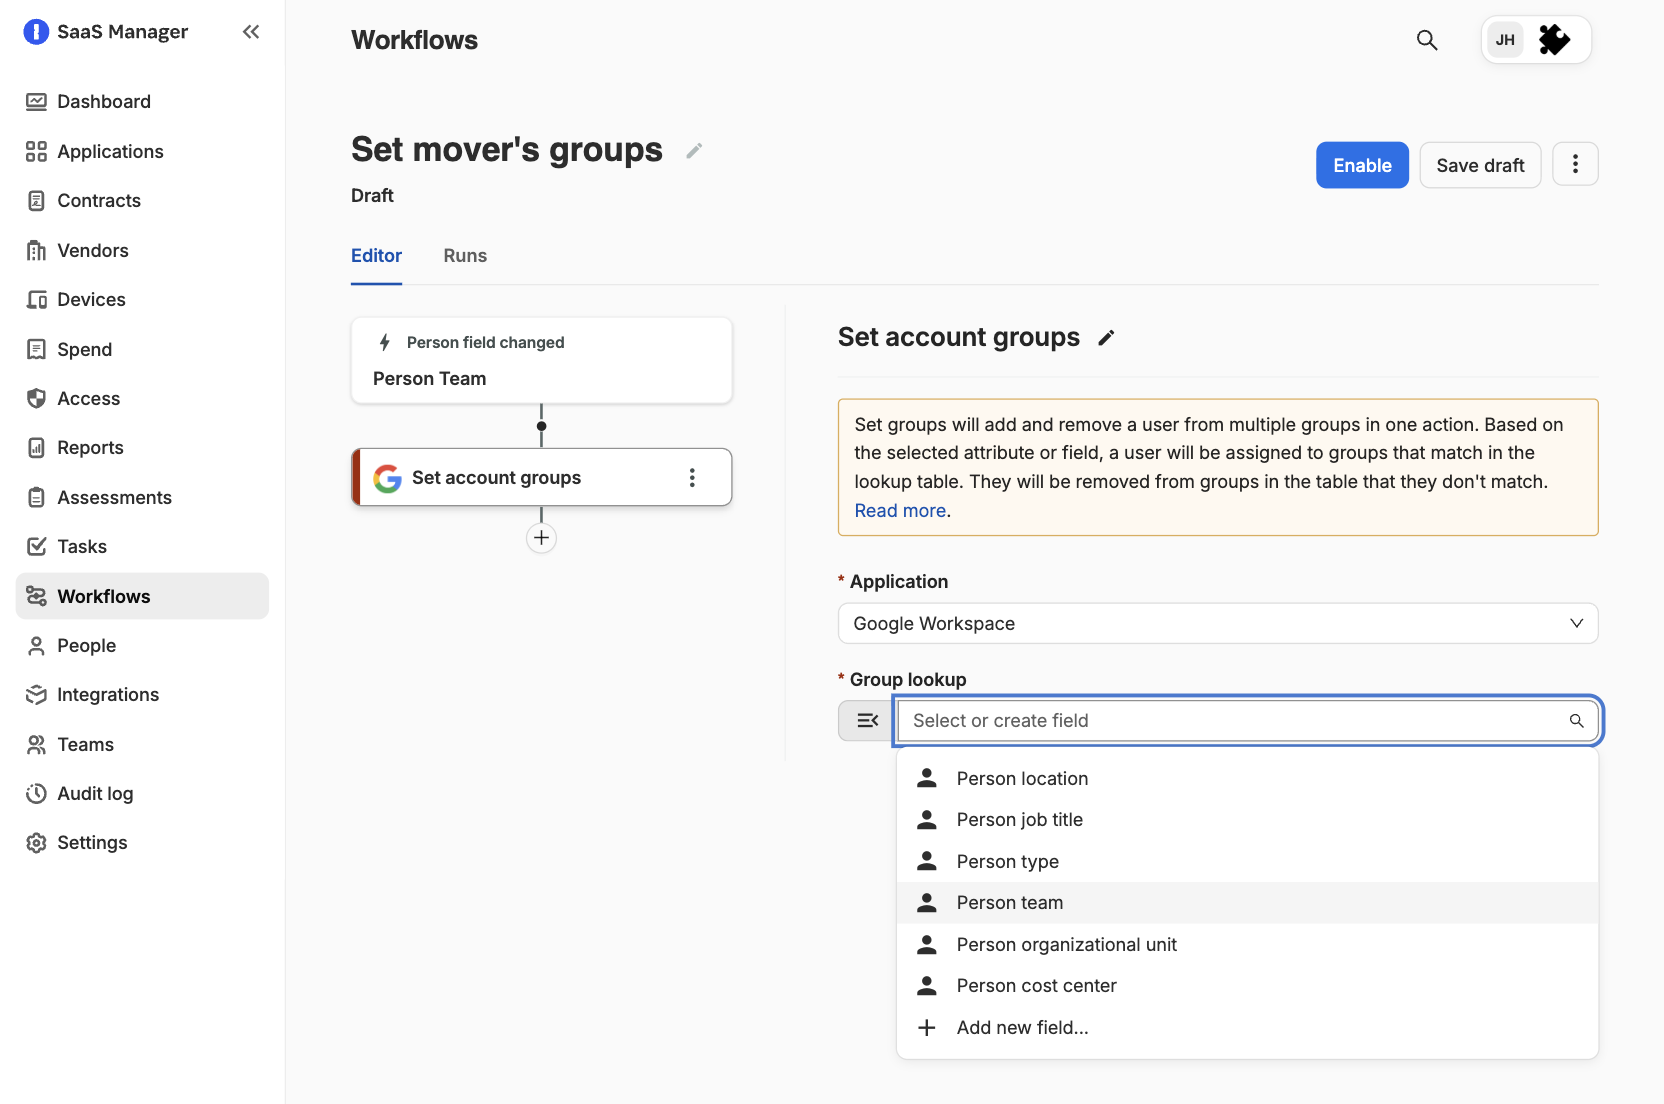
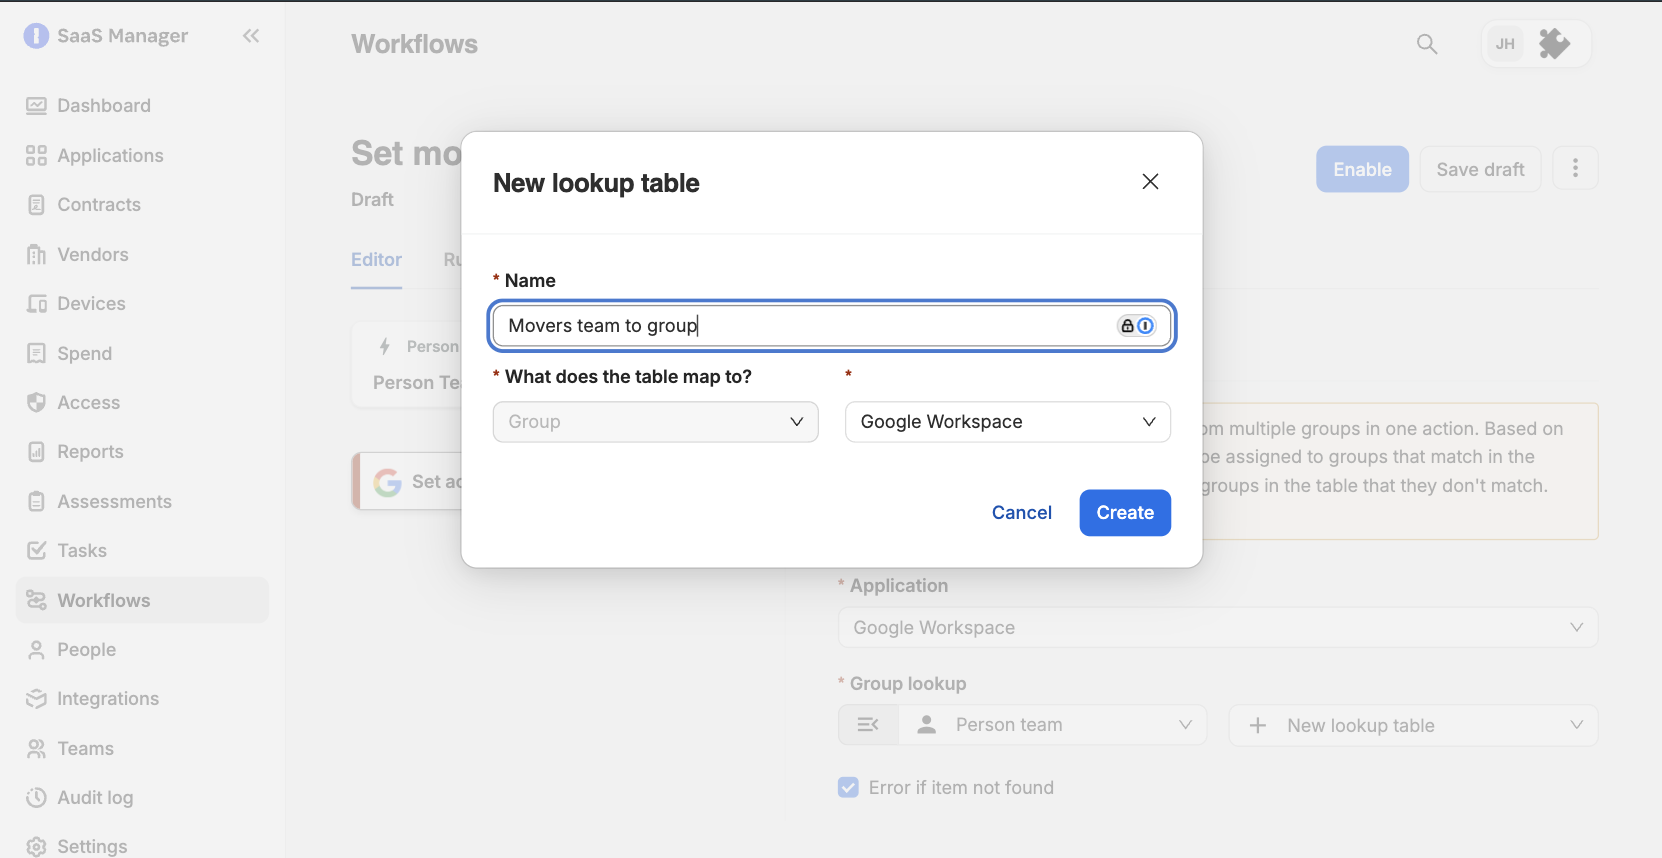
You can then choose to add a new lookup table or pick an existing one.
You can select Edit lookup table to configure the lookup table. This will open in a new tab in your browser.
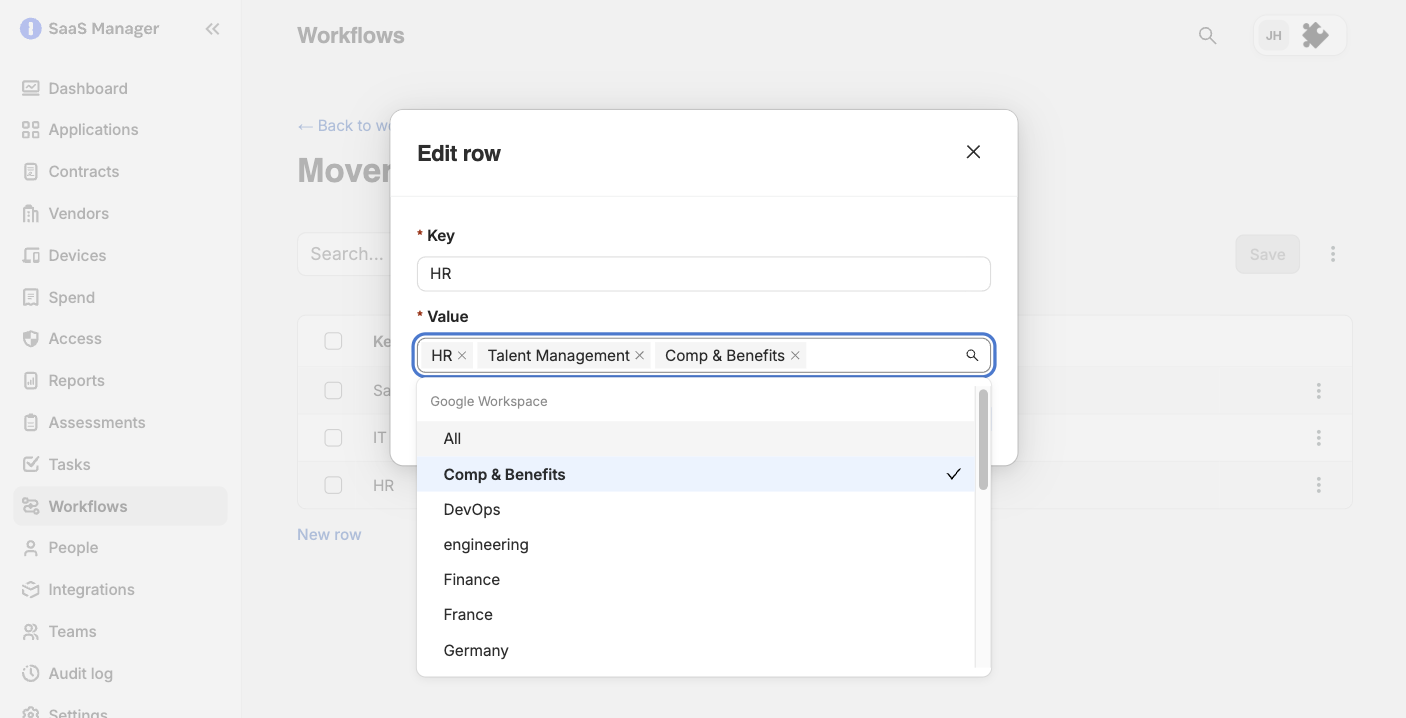
Select New to add rows to the lookup table.
For each row, enter a key that matches an exact string for the attributes you selected in the workflow step, then add values that are relevant to the specific key. In the example below, each key corresponds to a specific team: "Sales", "IT", and "HR". The value entries correspond to the groups related to each key.
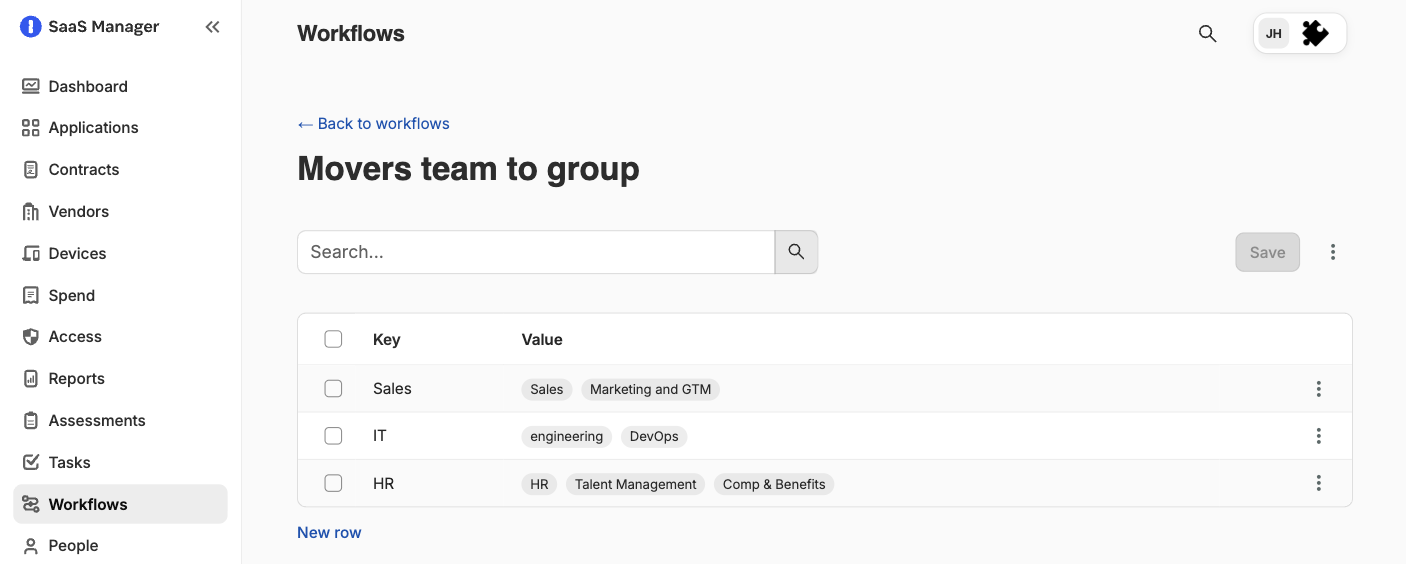
You can add as many rows as you'd like, but each key entry must be unique within a single lookup table.
Select Save before you close the lookup table page.
Importing a lookup table
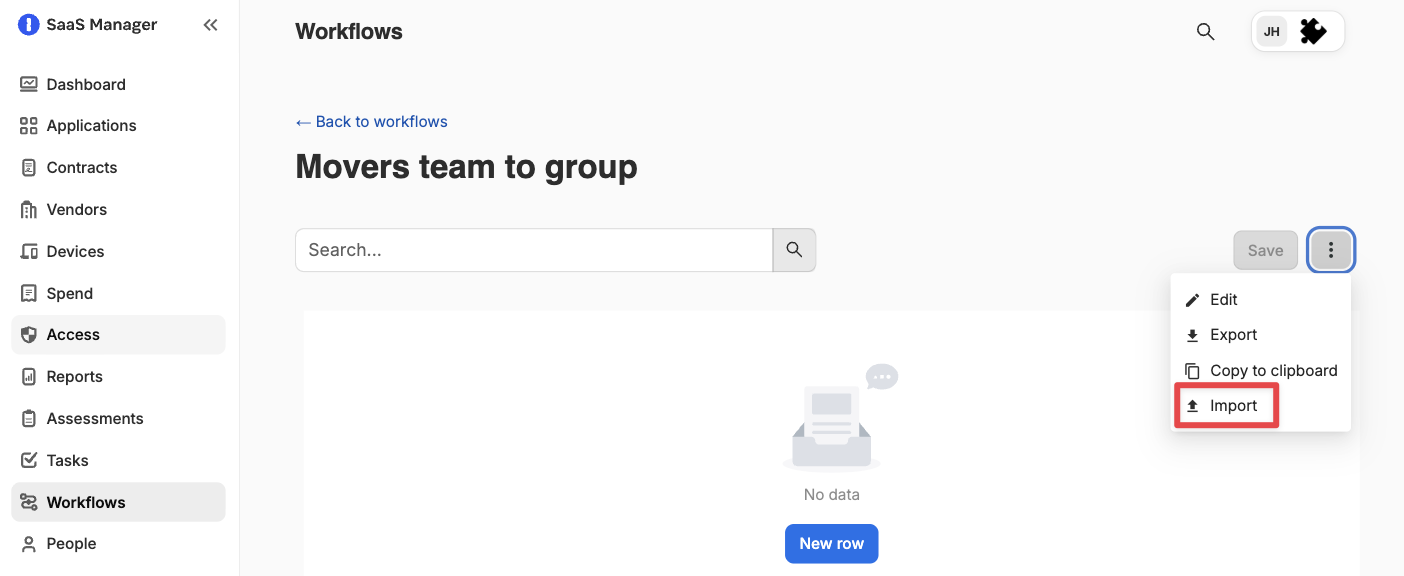
If you already have a table that defines your mappings, you can upload the lookup table data with the import tool.
The importer expects one row per key and value pair. It will consolidate rows where it identifies multiple group values associated with the same key.
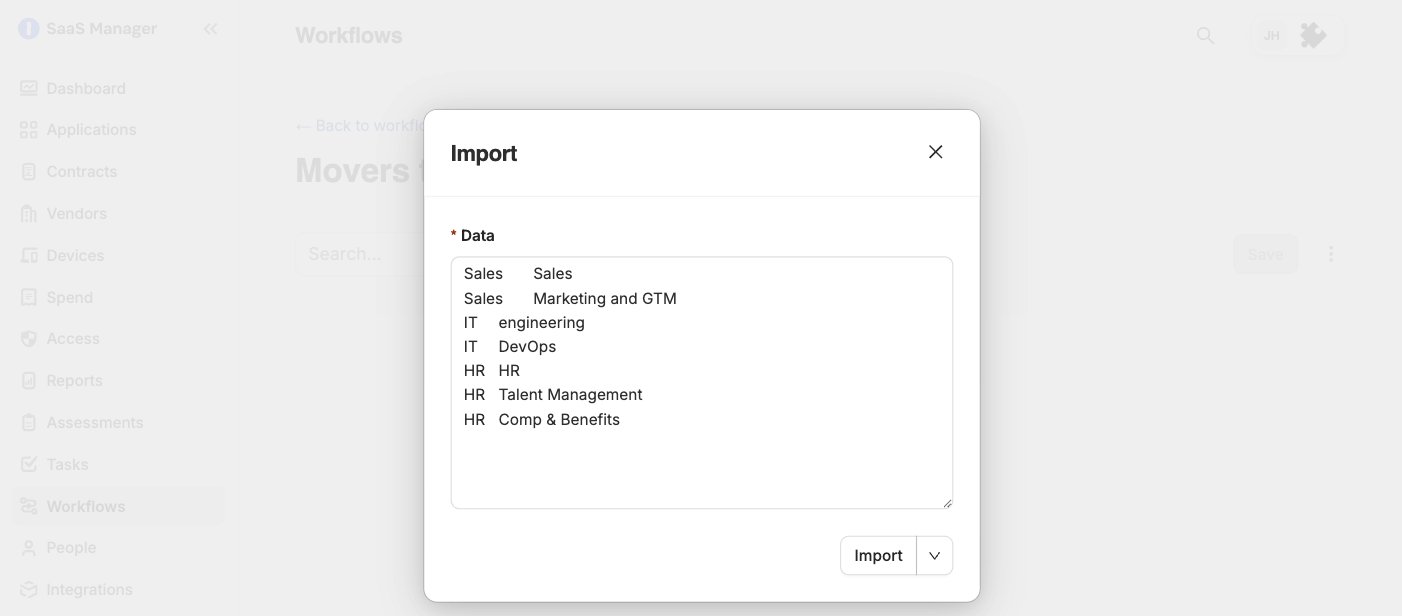
Any invalid group names provided through the importer will be highlighted in red and can manually modified before you save.
Comments
0 comments
Please sign in to leave a comment.