Note: 1Password SaaS Manager was previously named Trelica. Some commands and integrations still use or refer to Trelica. Follow directions as written to avoid errors.
Creating a Web App
In order to connect to CyberArk you must first create a new Web App connection for 1Password SaaS Manager.
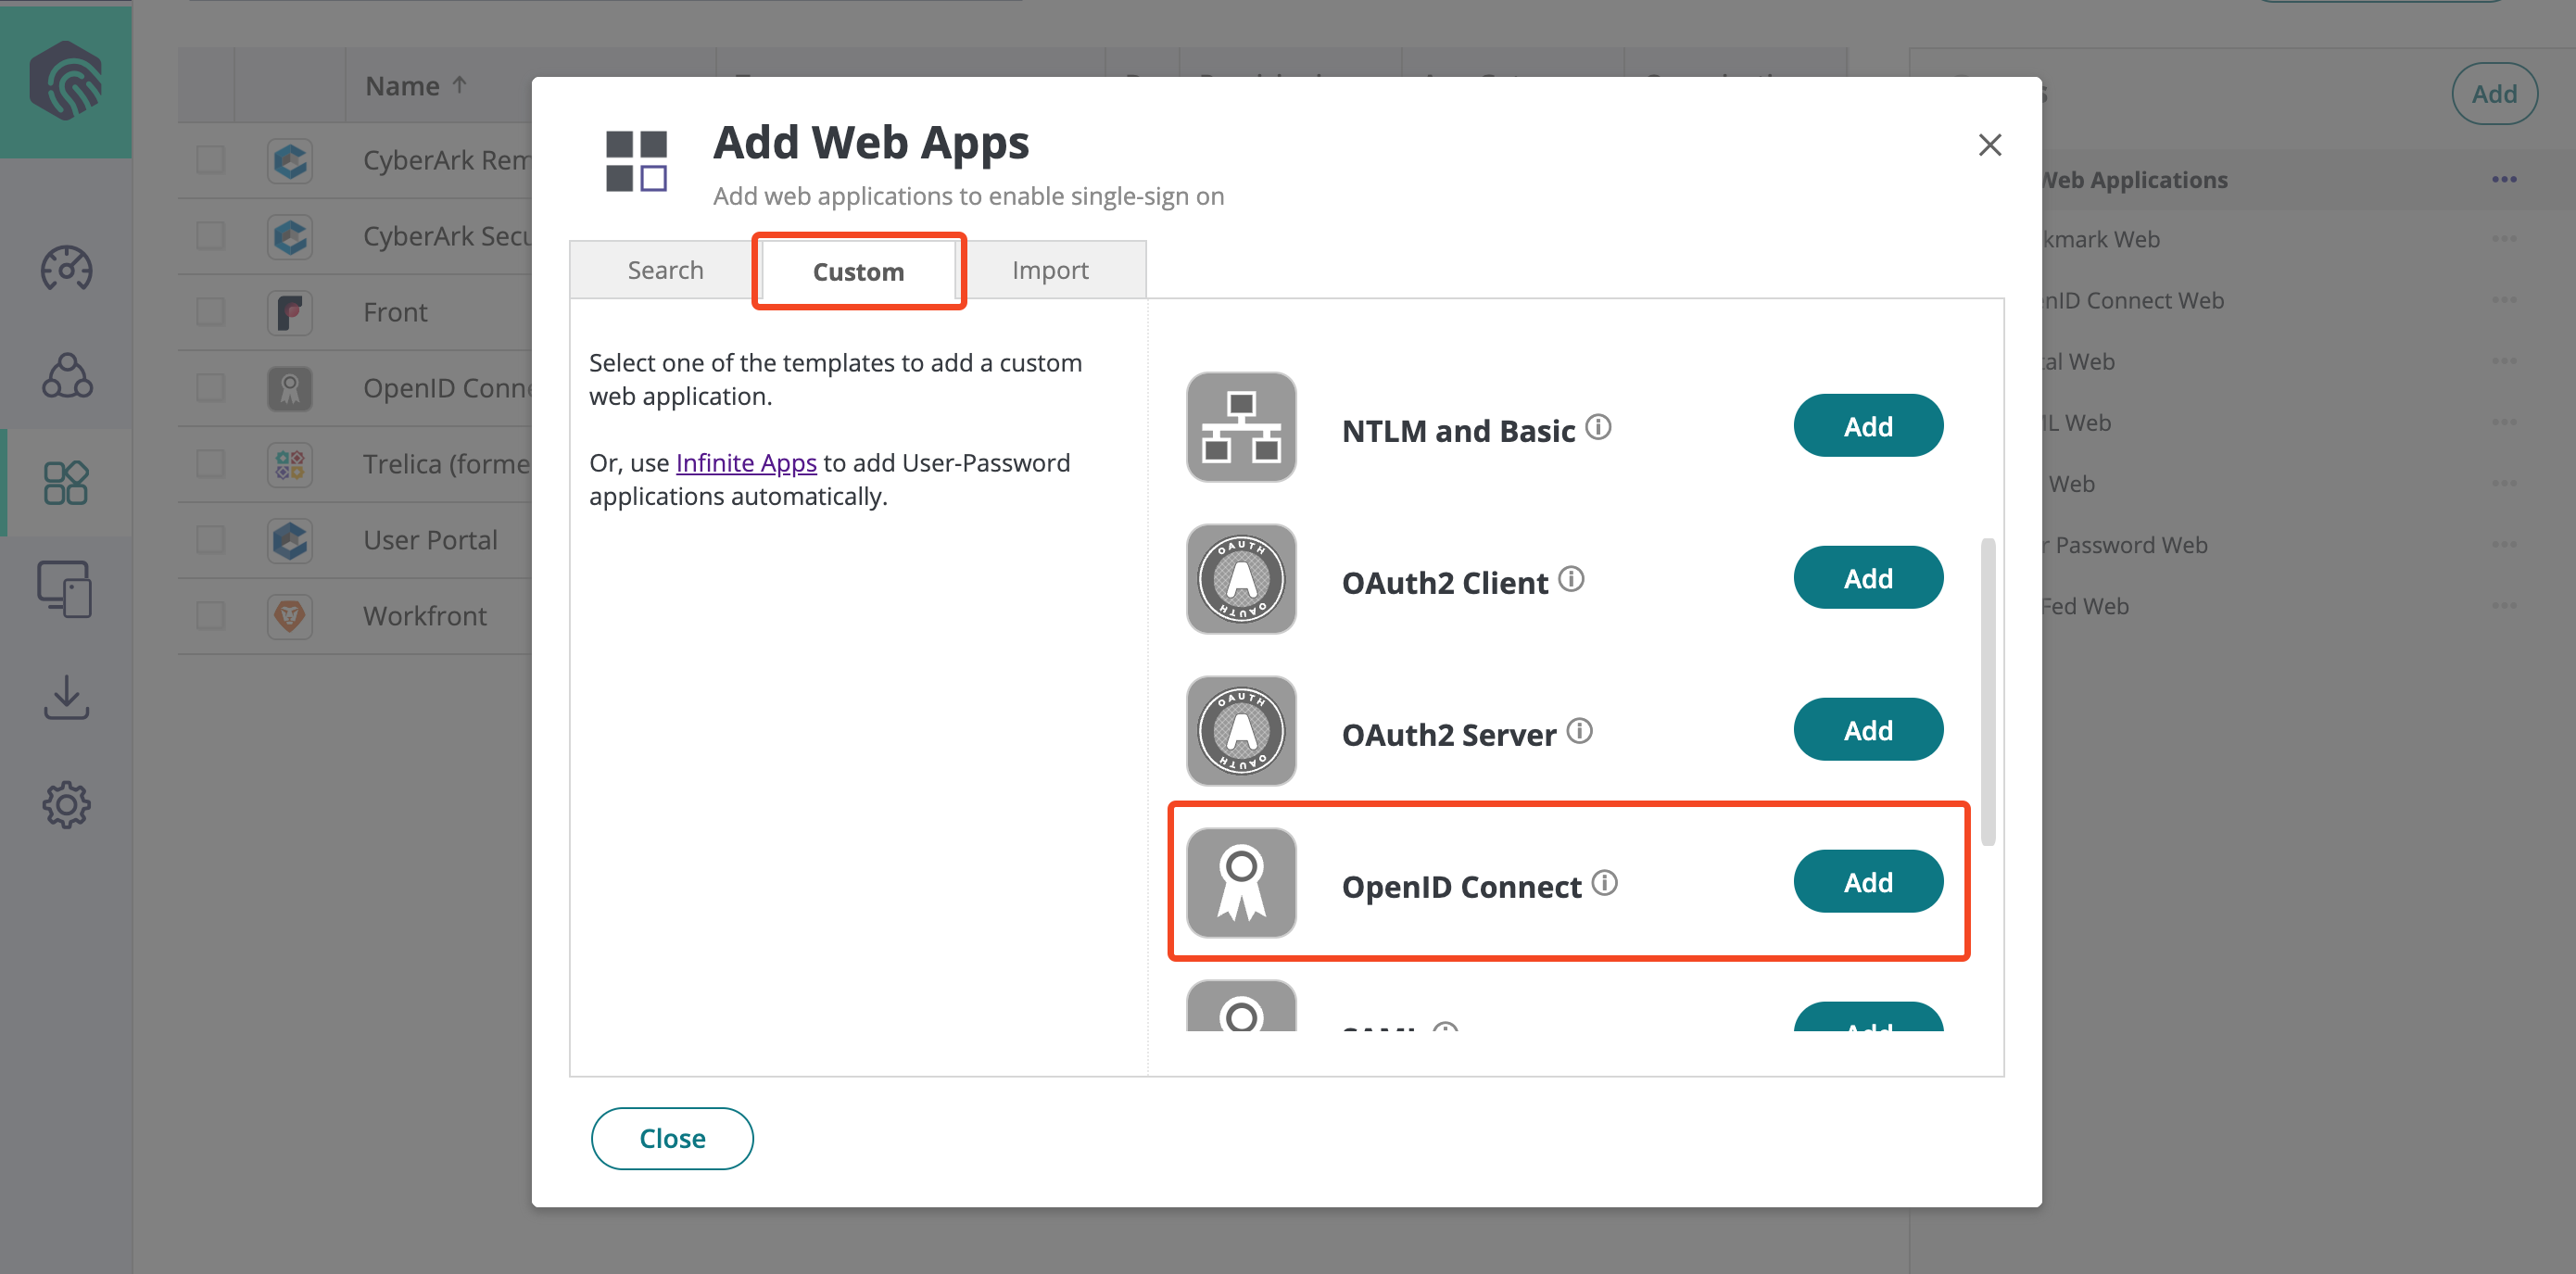
In the Identity Administration section, go to Apps & Widgets > Web Apps and select Add Web Apps:

Select Custom and then OpenID Connect:
Click Yes to confirm you want to add the new Web App.
The application will be added, but you need to close the Add Web Apps dialog to see it.
Settings
On the Settings tab:
- For Application ID, enter
SaaSManager_integration. - For Name, also enter "SaaS Manager Integration".
- You can download a SaaS Manager logo here: https://brand.1password.com/share/zjVY8bk9aEBDwbVtUCSf/folders/104.
Select Save.
Trust
On the Trust tab:
- Generate and enter a strong secret in the OpenID Connect client secret field.
- Select Login initiated by the relying party (RP).
- Select Add to enter a redirect URL. The URL required will vary depending on whether you are using the trelica.app or trelica.eu environments:
-
https://app.trelica.com/IntegrationsApi/Integrations/CyberArk/AuthCallbackhttps://eu.trelica.com/IntegrationsApi/Integrations/CyberArk/AuthCallback - Make sure Enable full url match is selected.

You will need the OpenID Connect client ID and OpenID Connect client secret when connecting to SaaS Manager. You can copy these to the clipboard from the Trust tab.
Select Save and move to the Tokens tab.
Tokens
On the Tokens tab:
- Select Generate access and ID tokens with new structure.
- Set the Access and ID token lifetime to 1 hour.
- Select Issue refresh tokens.
- Set the Refresh token lifetime to 365 days.

Select Save.
Scope
On the Scope tab:
- Leave Prompt the user for consent to authorization request unselected.
- Select Add.
- Enter
SaaS Manageras the scope Name. - Make sure Define the scopes to access APIs is selected, then select Add to add the following REST Regex entries:
- Redrock/Query
- Org/ListAll
- Roles/GetRoleMembers
- UPRest/GetResultantAppsForUser
- If you want to use onboarding features (creating users, assigning users to roles, or temporarily exempting users from MFA), then create a scope called
onboardingand assign the following REST Regex entries:- CDirectoryService/CreateUser
- CDirectoryService/GetUser
- SaasManage/AddUsersAndGroupsToRole
- CDirectoryService/ExemptUserFromMfa
- If you want to use offboarding features (suspending and deleting users, removing users from roles, or unassigning or removing mobile devices) then create a scope called
offboardingand assign the following REST Regex entries:- CDirectoryService/SetUserState
- UserMgmt/RemoveUsers
- SaasManage/RemoveUsersAndGroupsFromRole
- Mobile/DeleteDevice
- Mobile/RemoveDeviceProfile
Select Save on the dialog, and then Save again on the page.
Permissions
On the Permissions tab:
Select Add to open the Select User, Group, or Role dialog.
- Search for an administrator.
- Select the box next to the user.
- Select Add.
Against the user you added, Select View, Run, and Automatically Deployed.
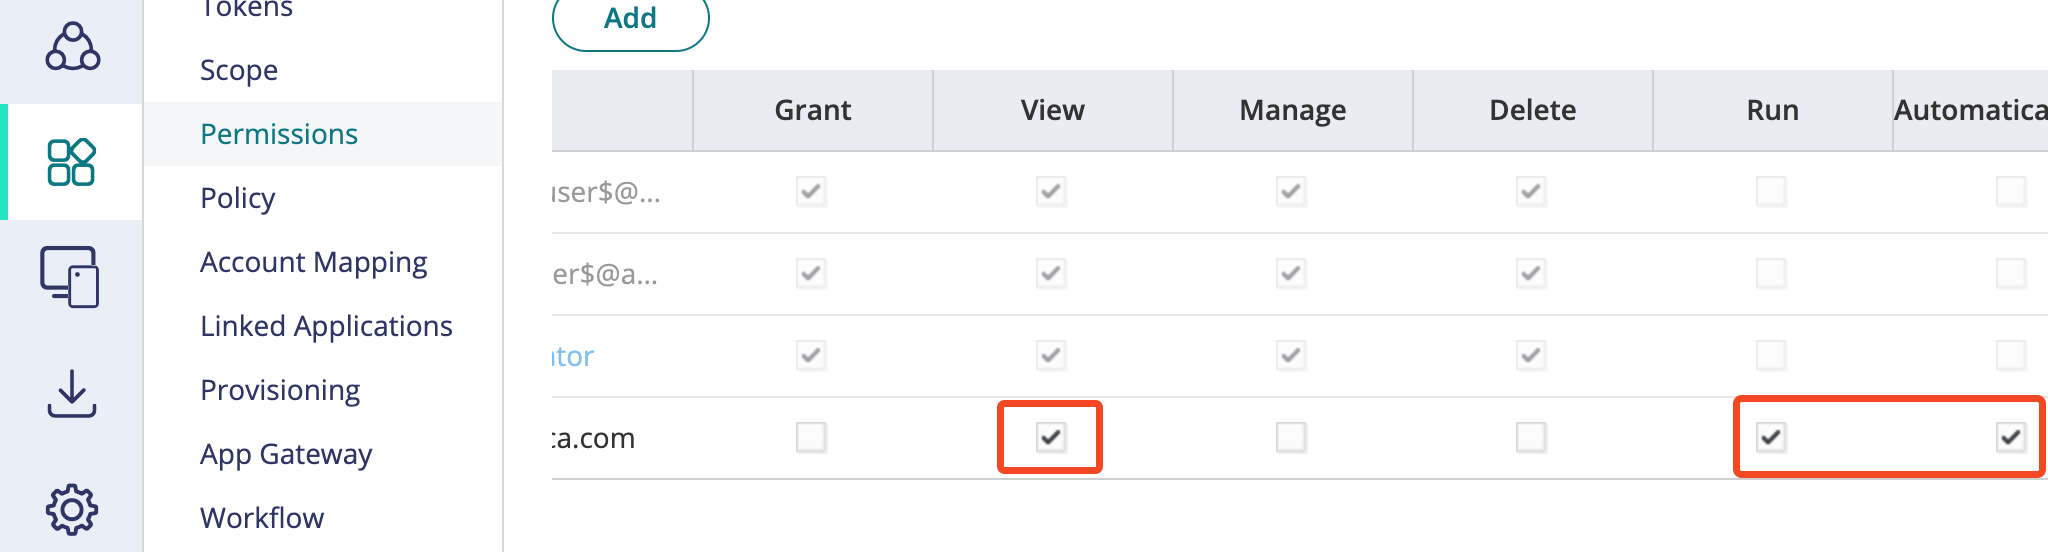
Select Save. The Status of the application should change to Deployed.
You are now ready to connect to CyberArk from SaaS Manager.
Connecting from SaaS Manager
Within SaaS Manager, navigate to to Integrations > CyberArk and select Connect.
Enter your CyberArk URL. This is the URL you will have been using when logged in to CyberArk configuring the Web app.
Enter the Client ID and Client Secret from the Trust tab.
Select Connect.
Comments
0 comments
Please sign in to leave a comment.