Managing email accounts of other users cannot be done using the standard 1Password SaaS Manager Microsoft 365 integration. Instead it requires an 'App registration' configuring in your Entra ID tenant (formerly Azure AD).
There are two parts to configuring the connection - you may need help from an IT admin to complete the first step.
- Create credentials in Entra ID (an 'app')
- Connect SaaS Manager to Microsoft 365 using these credentials.
What can you do with the Microsoft 365 Email integration?
The integration lets you build workflows that set out of office messages for users, as well as configuring email forwarding.
Create a new app in Entra ID
This also involves multiple steps:
- Register the basic app details
- Assign API permissions
- Create credentials
Register the app
- Login to Entra ID and find App registrations:

- Click New registration.
- Enter a name (e.g.
SaaS Manager (Mailbox management)) - Choose Accounts in this organizational directory only (Single tenant).
- You do not need to enter a Redirect URI - just click Register to continue.
Configuring API permissions
-
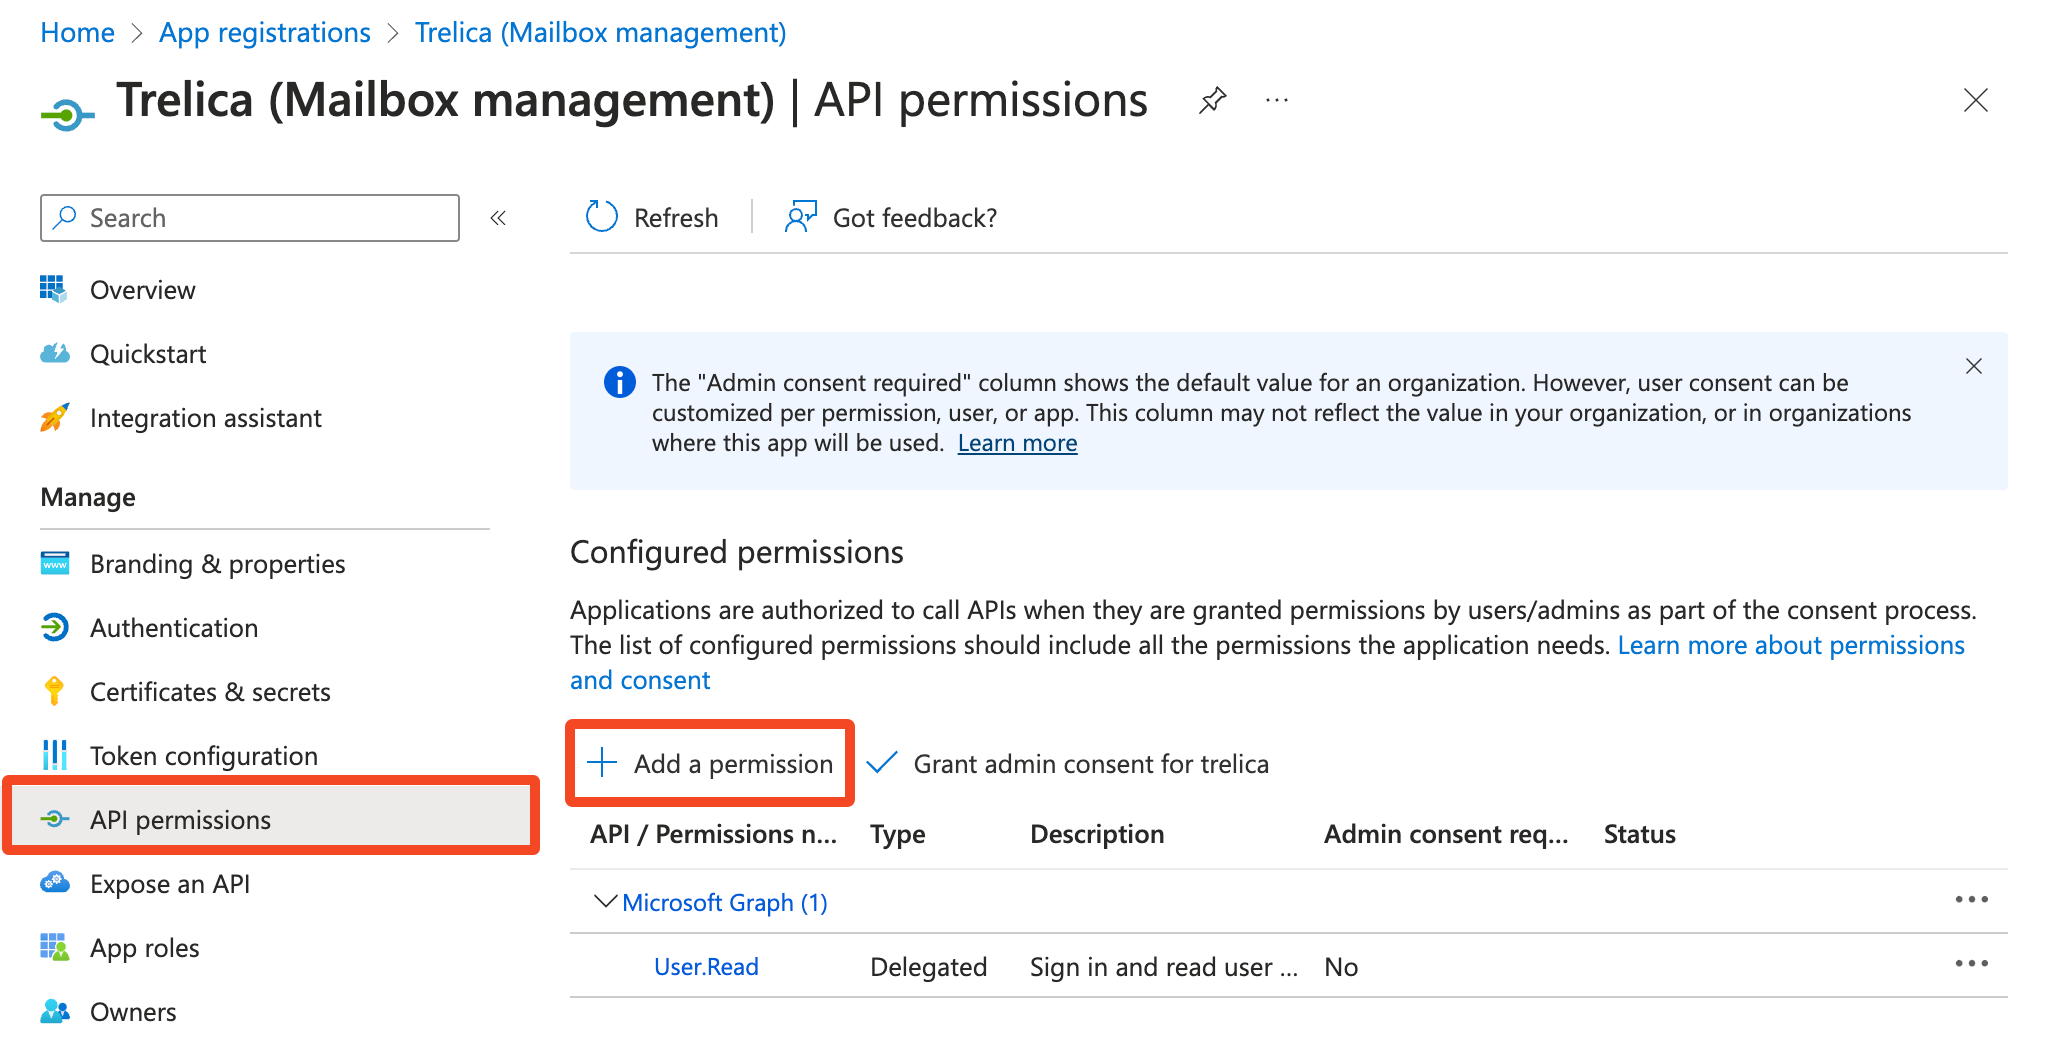
- On the API permissions tab, click Add a permission

-
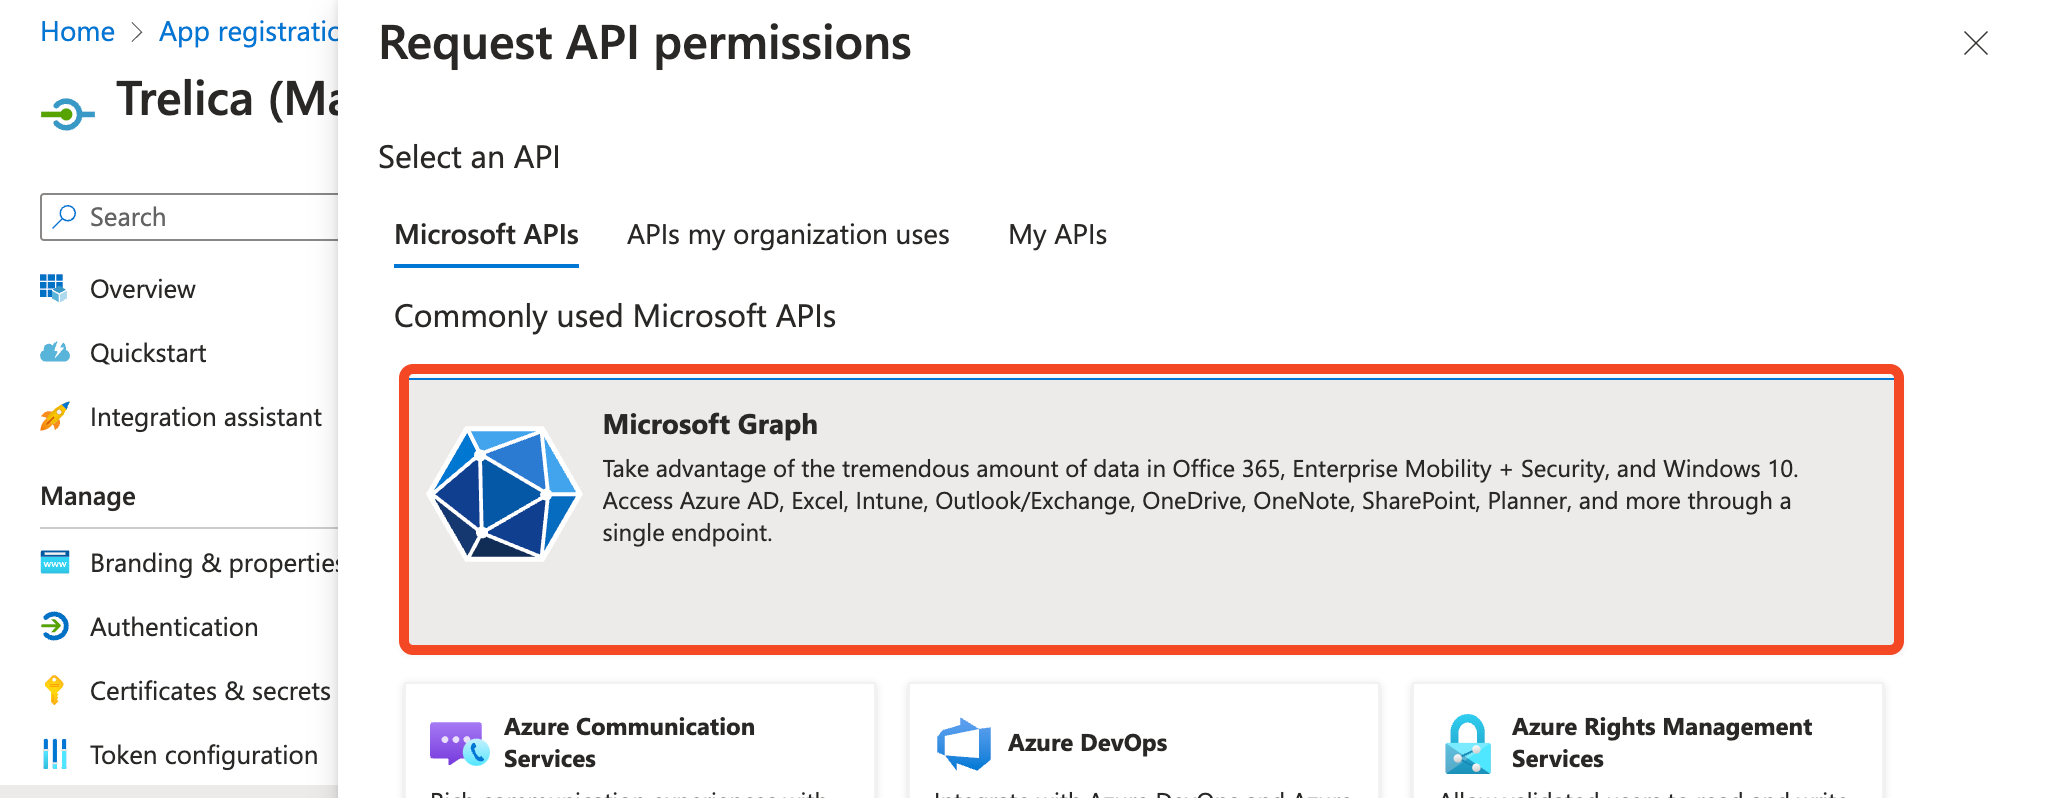
Under the Microsoft APIs tab choose Microsoft Graph:

-
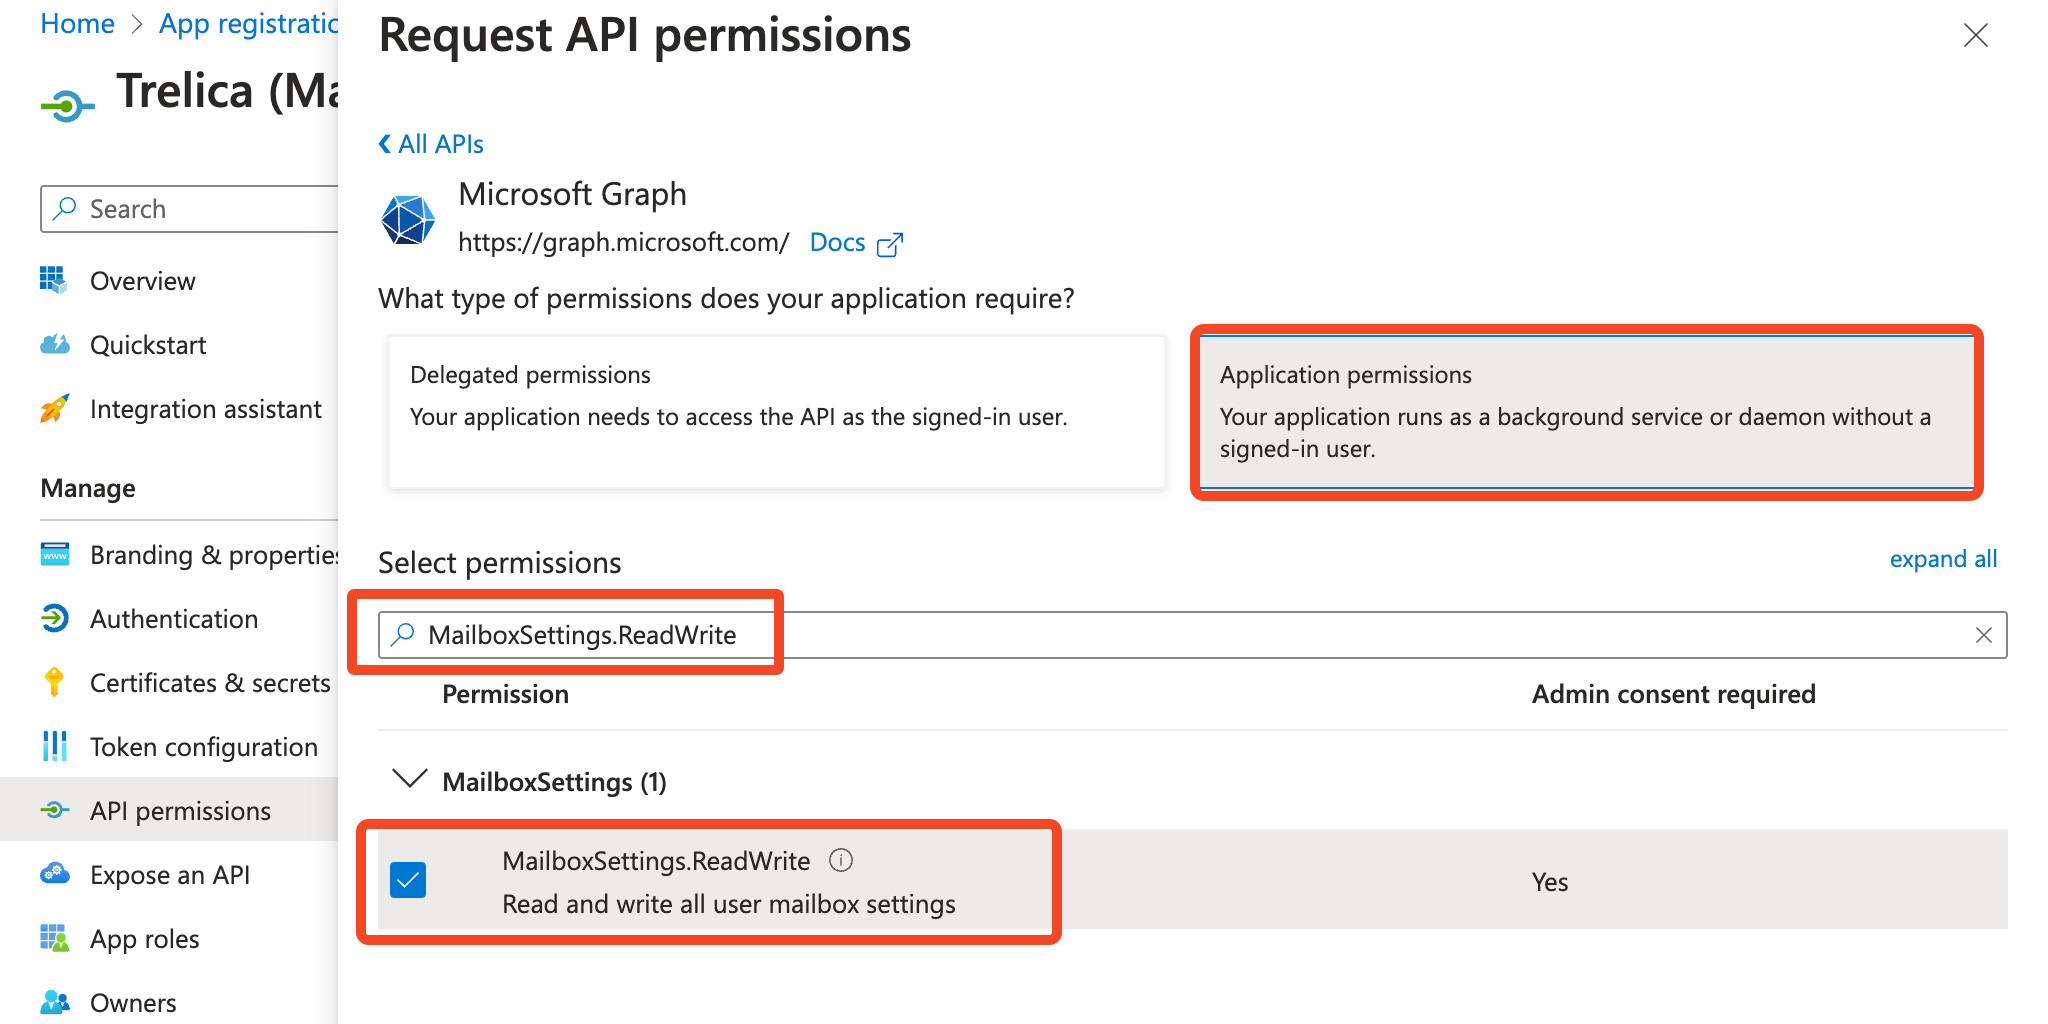
Choose Application permissions search for
MailboxSettings.ReadWriteand then tick this:
- In a similar way, add
User.Read.All - Click Add permissions
- Finally, click Grant admin consent:

- On the API permissions tab, click Add a permission
Create a new secret
- Go to Certificates & secrets
- Click New client secret
- Give the secret a name (e.g.
SaaS Manager) and chose the Expiry duration that you are comfortable with (we recommend 12 or 24 months). - Click Add
Collecting the IDs you need
You need three IDs which you can copy from Entra ID:
-
From the Certificates & secrets tab copy the Client Secret Value (not the Secret ID)
The Client Secret Value will only be available for you to copy for a short period of time. If you are unable to view or copy it, then just create new one.
- From the Overview tab copy the Application (client ID) and the Directory (tenant) ID
Connect from SaaS Manager
- In SaaS Manager, go to Integrations > Microsoft 365 Email
- Click Connect and enter the IDs that you gathered earlier.
- Click Connect again.
- The integration will run in the background. It may take a while with a large number of users. You can come back to it later to check on progress.
Comments
0 comments
Please sign in to leave a comment.