These instructions apply to the Cloud version of ServiceDesk Plus.
User management
ServiceDesk Plus splits users into Requesters and Technicians. Technicians have specific roles within ServiceDesk Plus, whereas Requesters are typically employees who can raise and view their own Requests.
1Password SaaS Manager lets you create both types of user.
Users are paid for if a login method is assigned. Deactivating a user will leave the user in ServiceDesk Plus but they will no longer be able to log in and will not be counted as a licensed user.
Setting up an automation to update SaaS Manager when Requests are closed
SaaS Manager can create Requests in ServiceDesk Plus using the ServiceDesk Plus API. ServiceDesk Plus however does not support notifying SaaS Manager when Requests are updated.
You can however use the Automations feature of ServiceDesk Plus to create a webhook to notify SaaS Manager.
Callback URL
Before starting you will need to take a copy of the Callback URL that SaaS Manager providers when you connect ServiceDesk Plus.
Creating the Trigger
Go to Setup > Automation > Triggers and create a new Request Trigger:
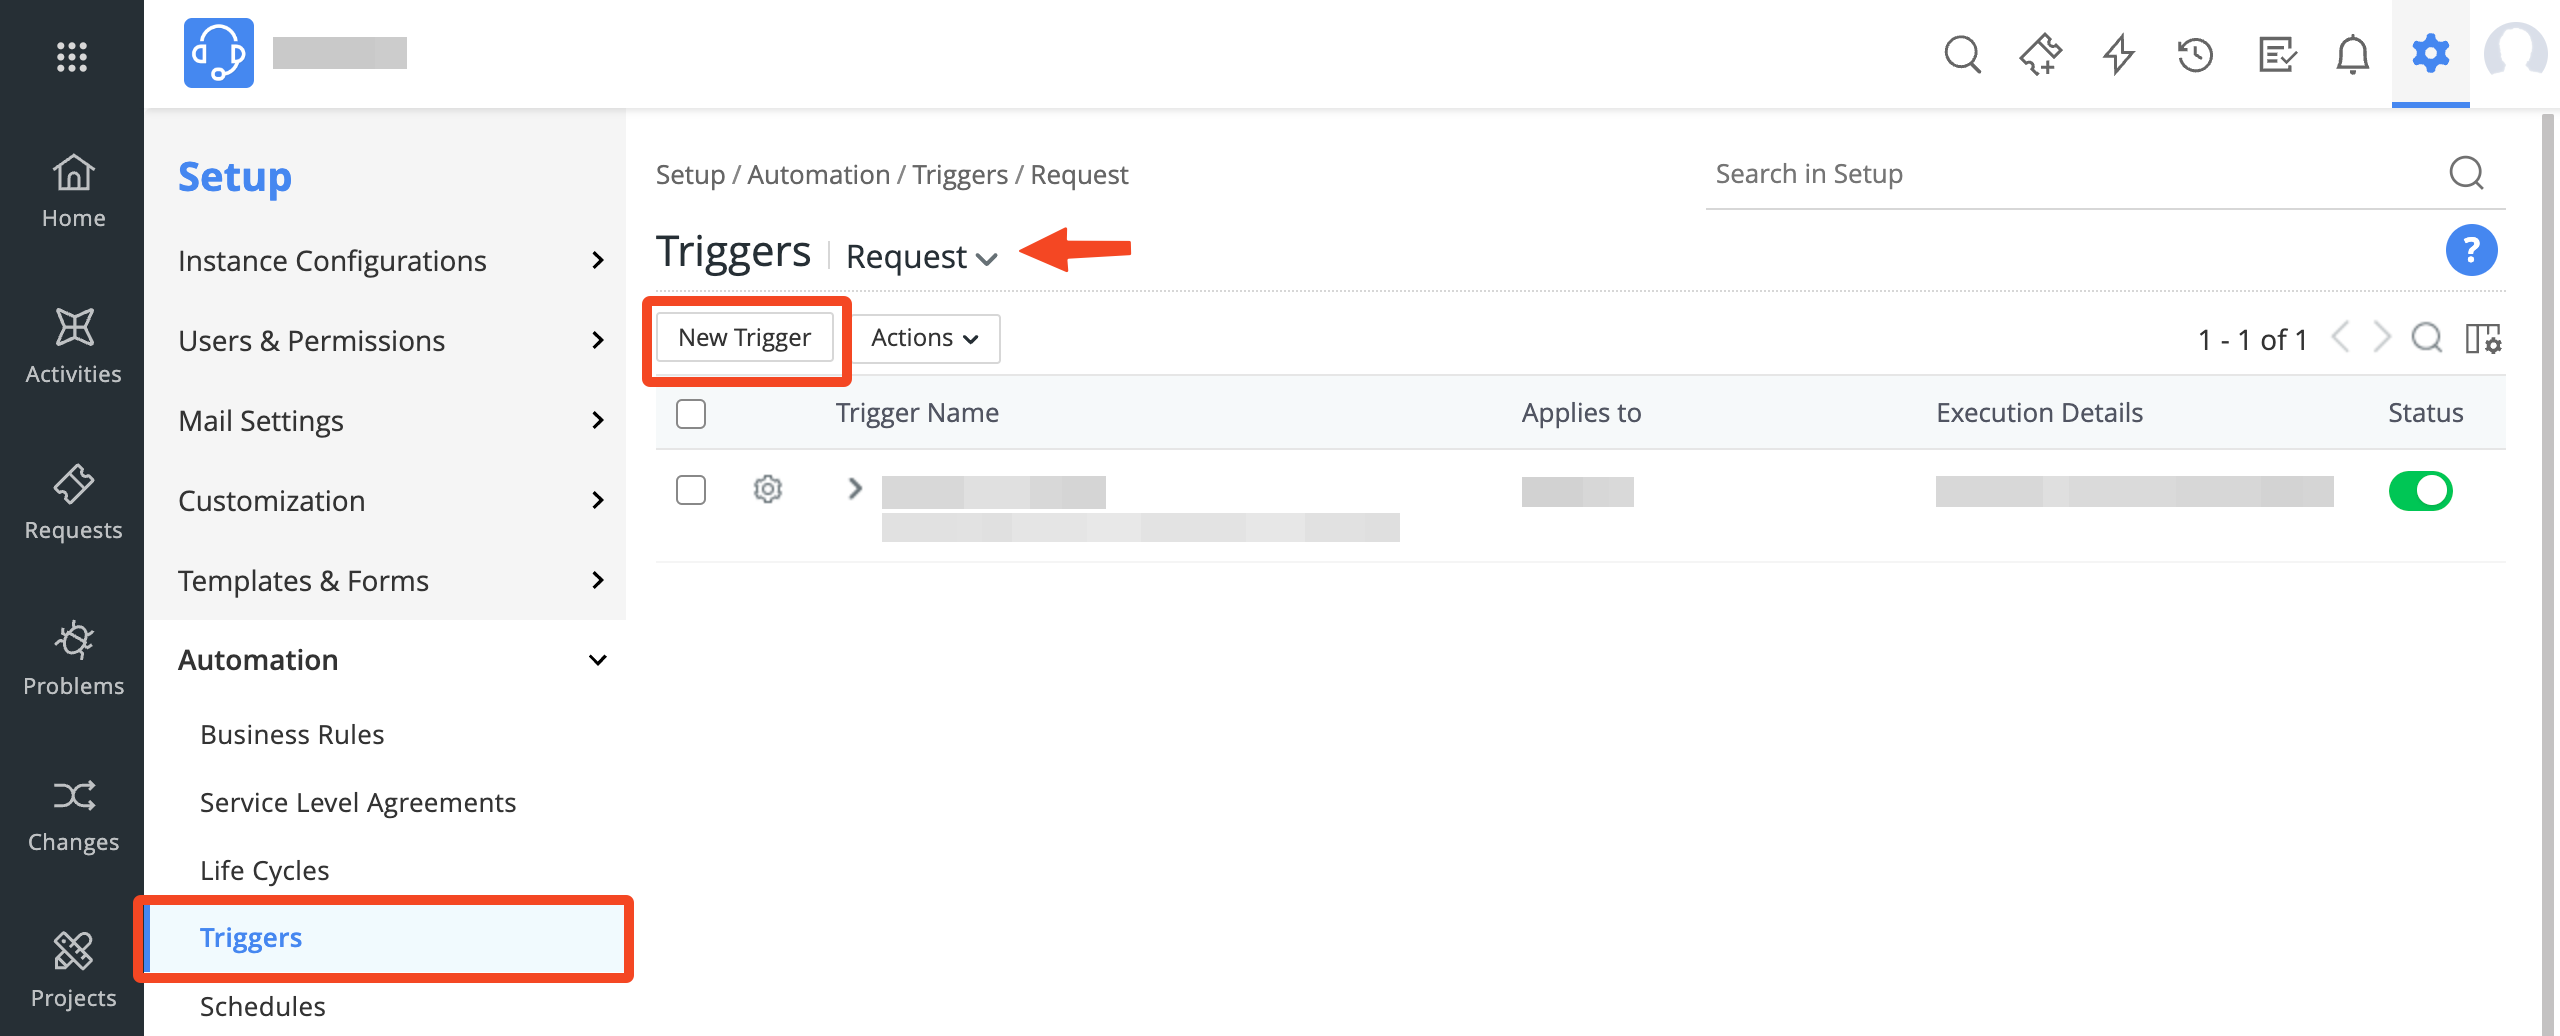
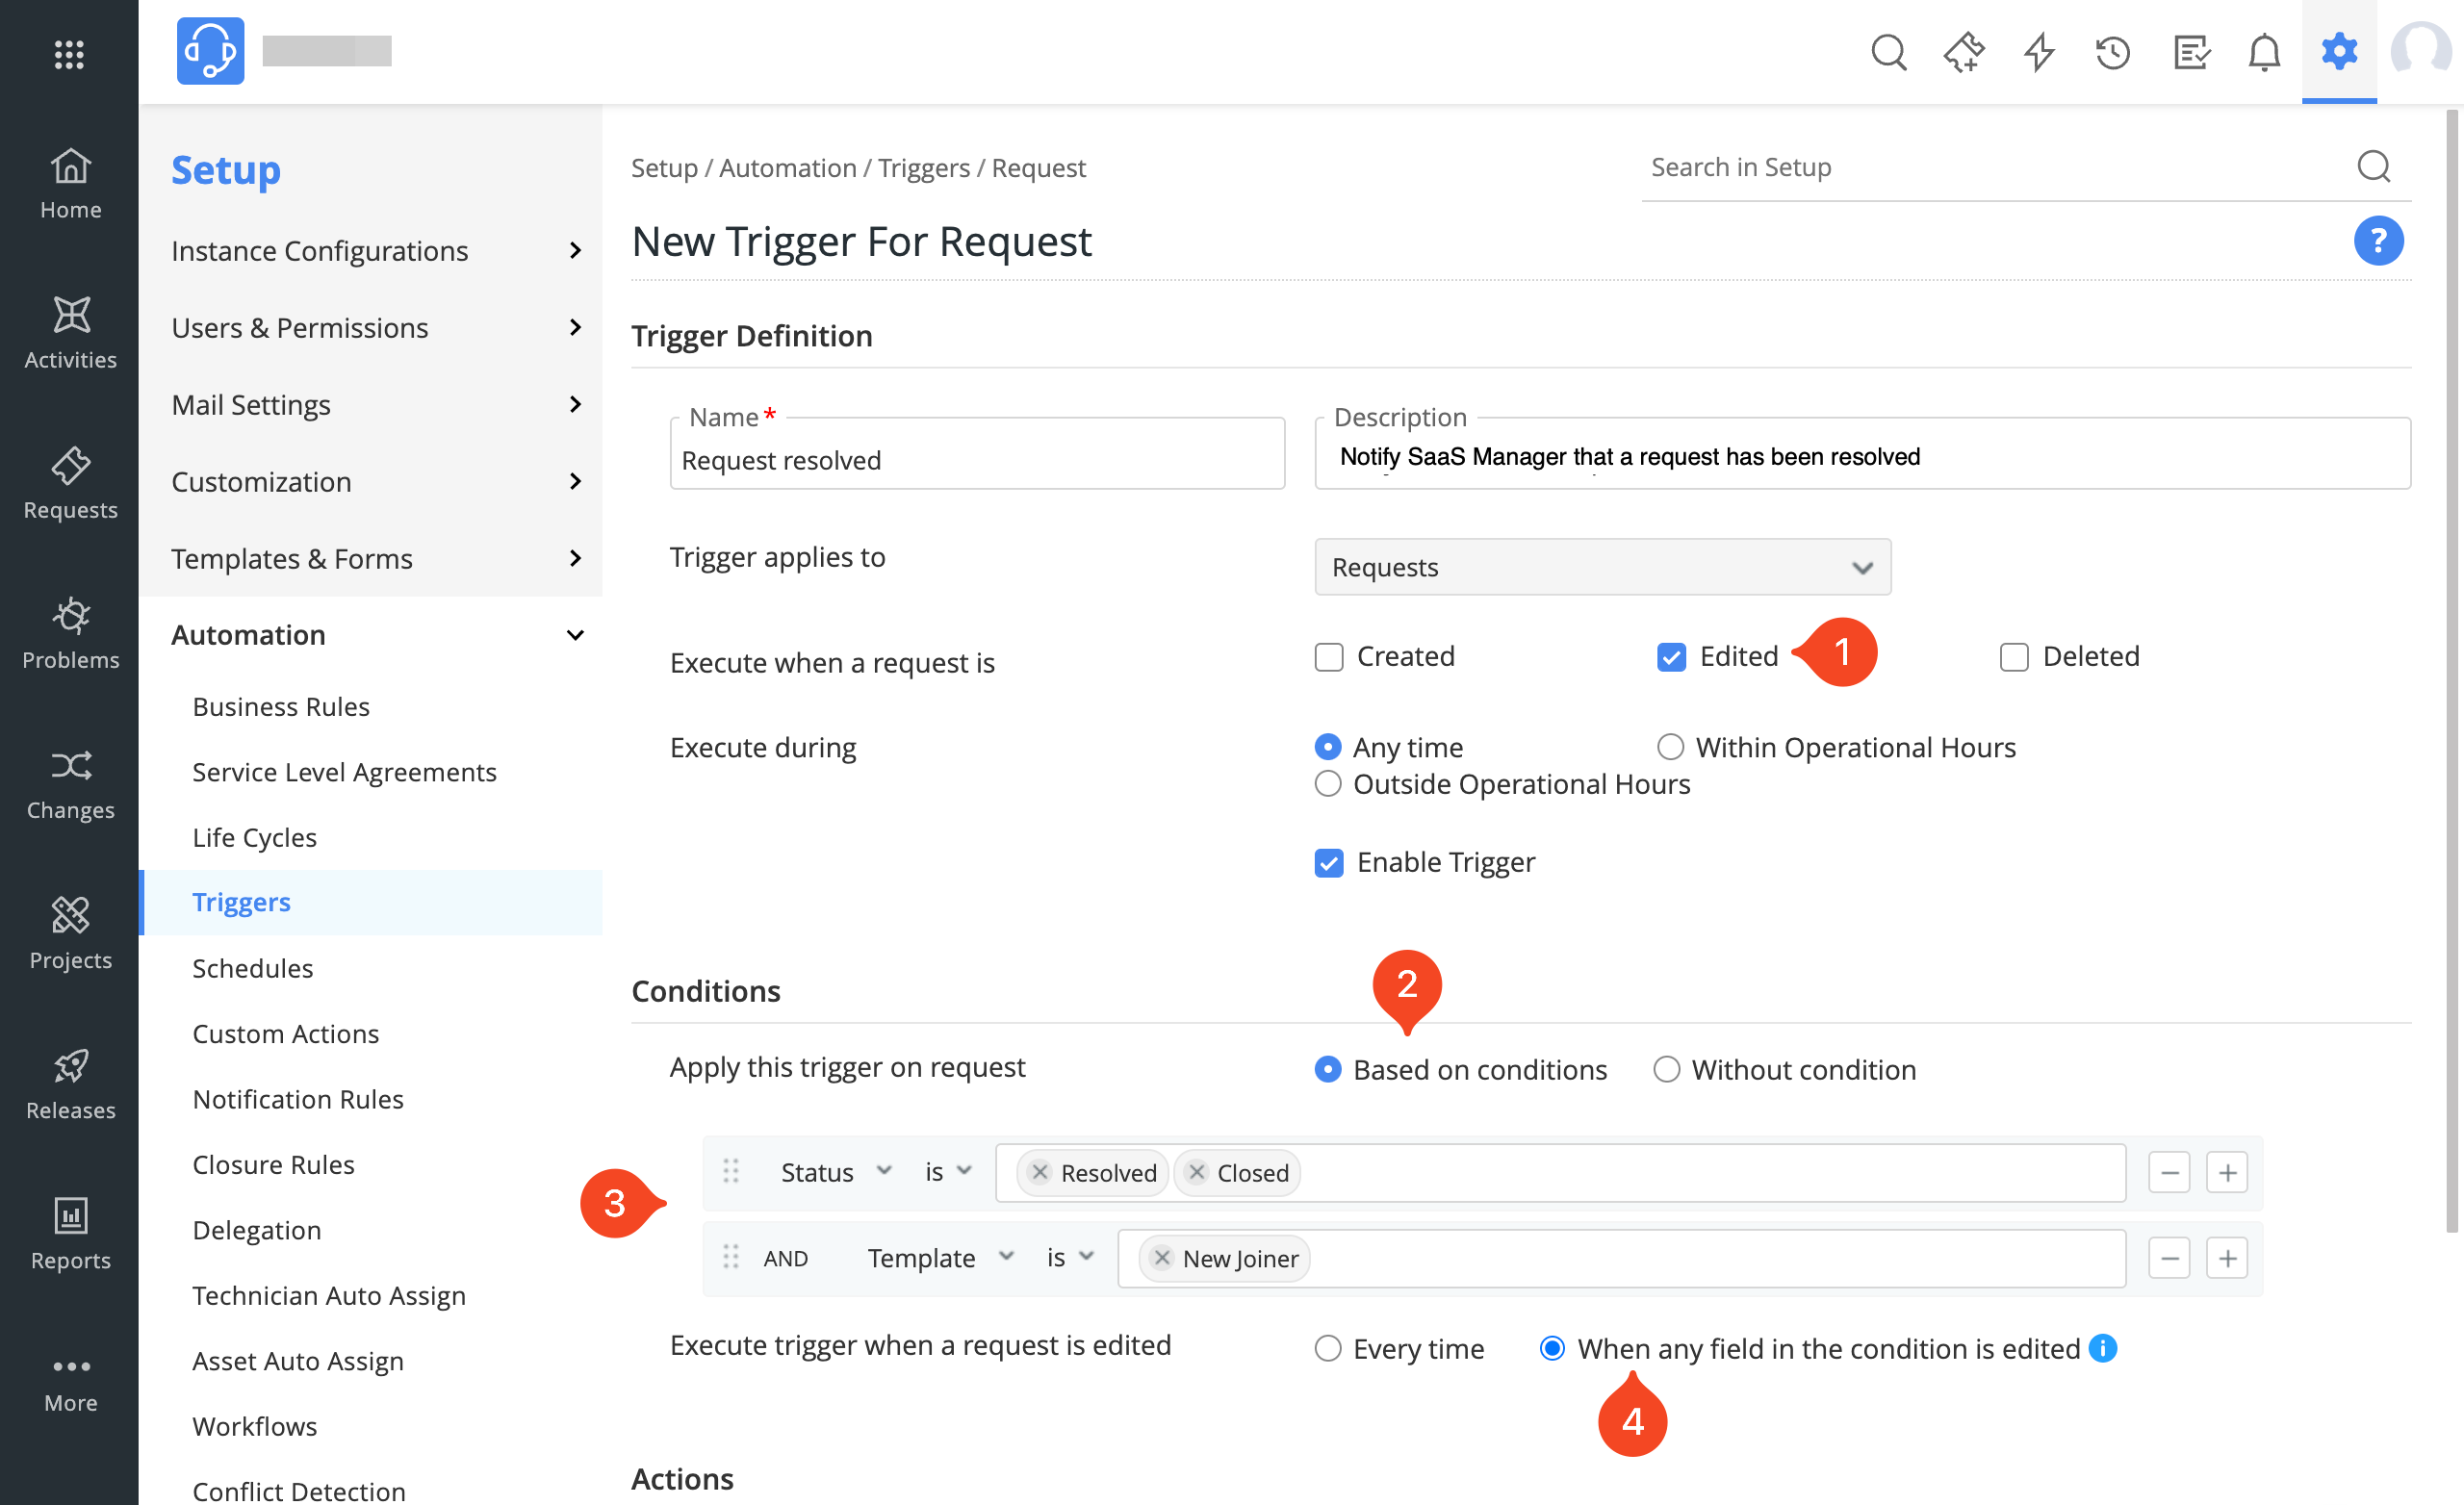
Give the Trigger a name and description e.g. 'Request resolved' and 'Notify SaaS Manager that a request has been resolved'.
The trigger should:
- Execute when a request is Edited.
- Be applied Based on conditions.
- The condition should include Status is Resolved or Closed and preferably some other differentiator. SaaS Manager sets a
SaaS Managertag on all requests it creates but unfortunately the Automation Triggers don't offer this option. - The trigger should be executed When any field in the condition is edited.
Finally, you will need to add a Webhook action:
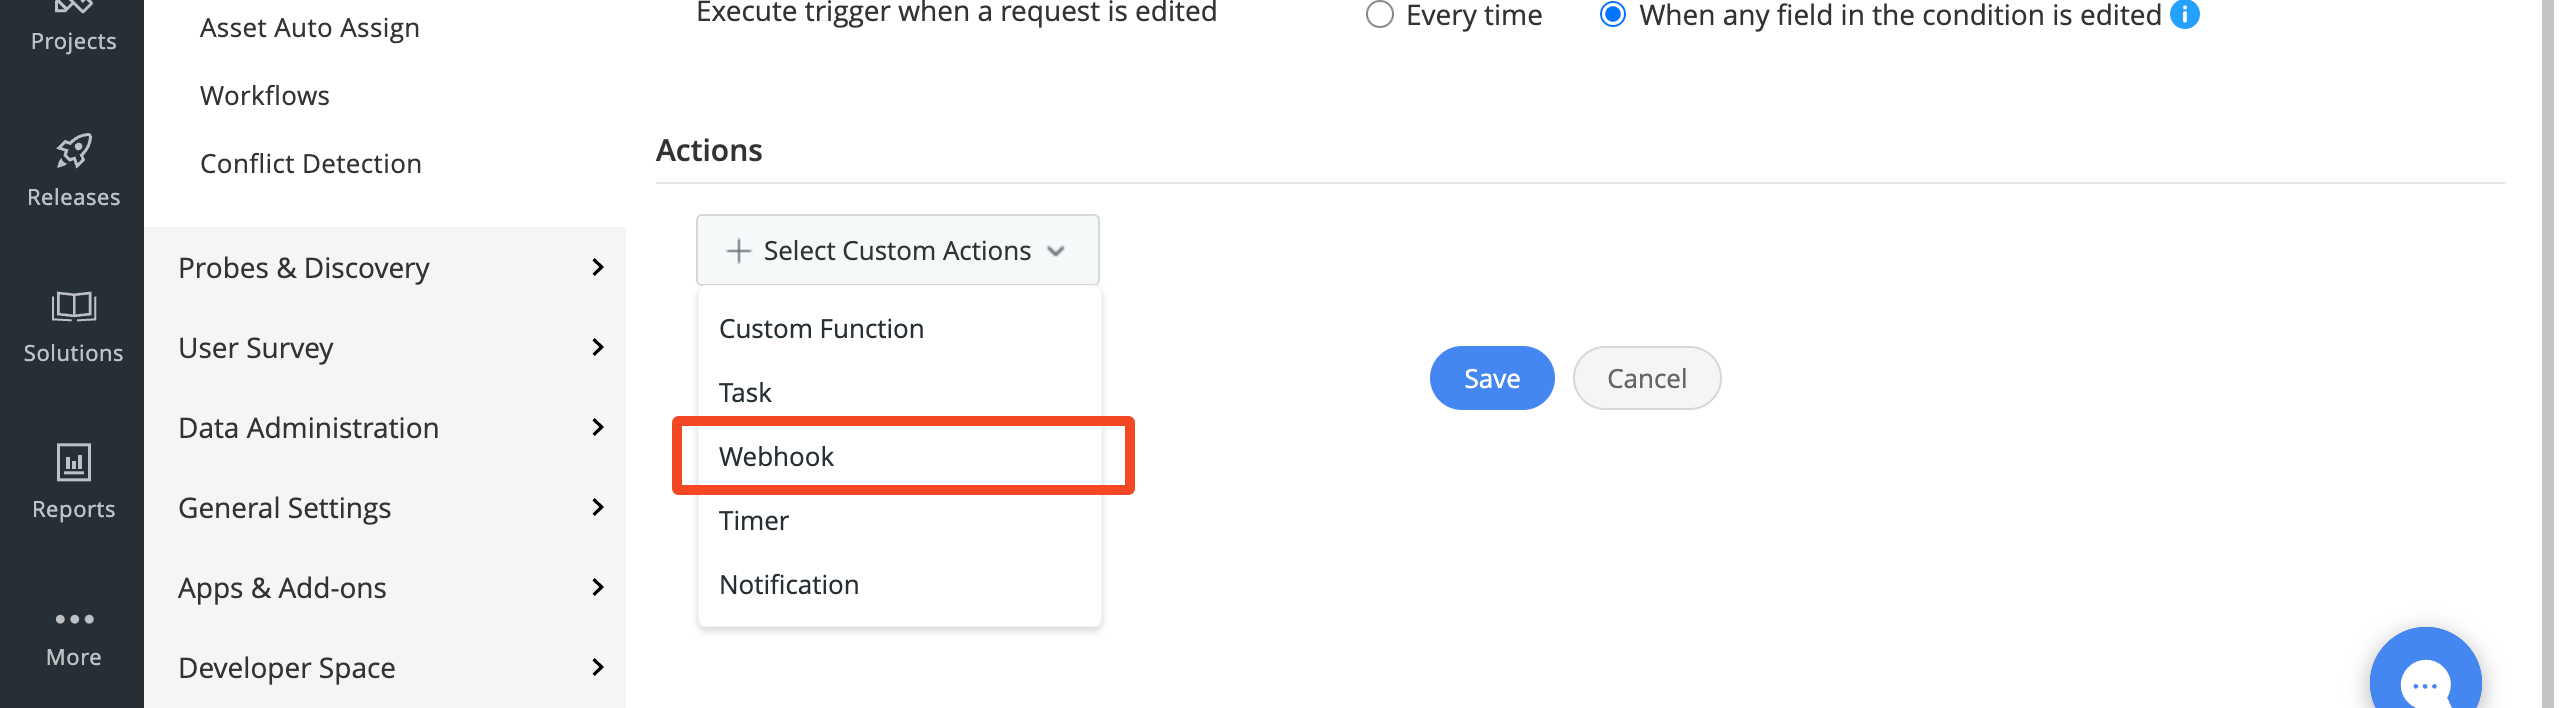
Choose New webhook
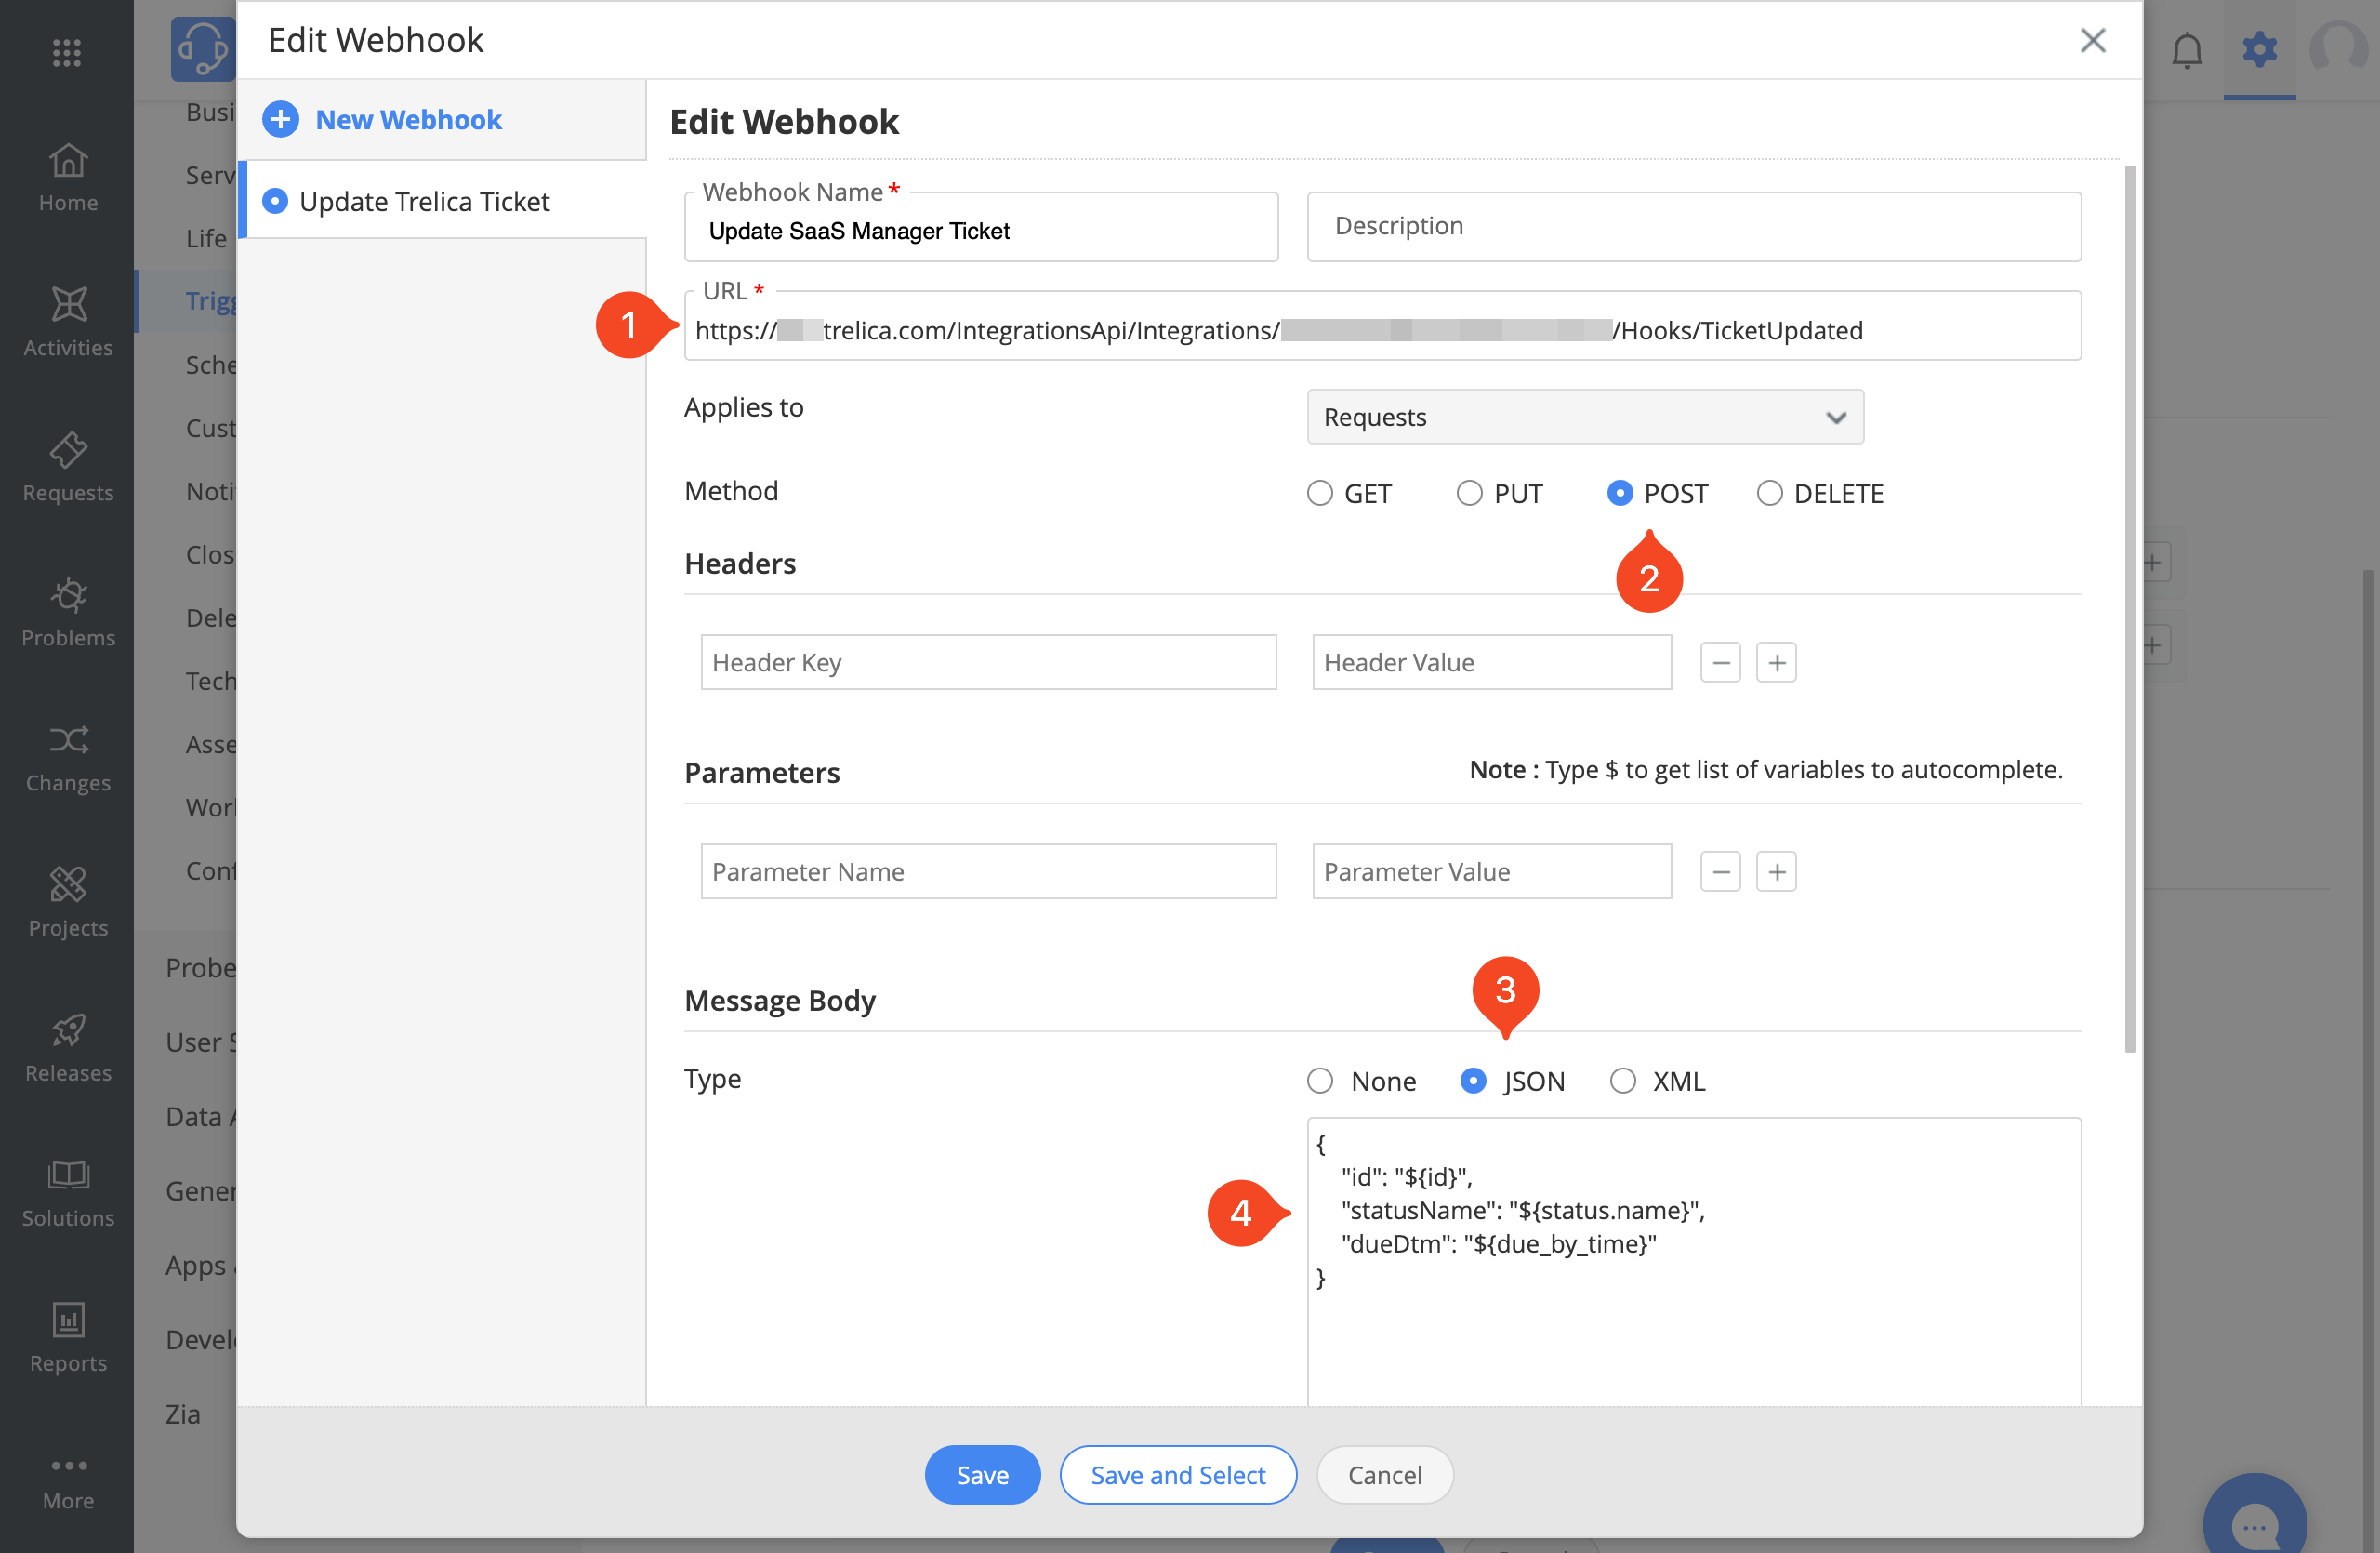
Give the Webhook a name e.g. 'Update SaaS Manager Task'.
- Paste in the Callback URL that you took from SaaS Manager earlier in these instructions.
- Set the Method to POST.
- The Message Body must be JSON.
-
Paste in the following block:
{
    "id": "${id}",
    "statusName": "${status.name}",
    "dueDtm": "${due_by_time}"
}
Save and Select the Trigger.
Comments
0 comments
Please sign in to leave a comment.